Motion · Intro
Magician card flourish
On pure black, a blue starburst flashes for 0.3s, then a card ejects from the flash point — spinning fast along an arc toward the camera, spin decaying as it nears, hard-freezing near full-frame, followed by a sheen sweep.
Source: video-shotcraft (Vincent Wei) ↗ · Apache-2.0 · Remotion composition (React/TSX) — preview video, no in-browser player
When to use
A magic-trick entrance for a single card/poster/cover (a main-visual opener, a product-card reveal); pure dark scenes; a peak moment that needs "conjured out of nowhere" ritual.
Intention
A magician's card flourish: a blue starburst flashes, and the card seems conjured out of the light — ejecting from an extremely distant point at frame center, spinning at high speed along an arc toward the camera, and hard-freezing into a near-full-frame display the instant it arrives. Three crux points for the magic feel: flash comes first (light is the ritual of "conjuring", a brisk 0.3s), launch rhythm (a slow wind-up takeoff → a hard-accelerating kick → a decelerating arc on approach), and freeze means still (no deceleration tail, no rebound; a full 13 spins guarantee the freeze lands exactly face-on).
Duration & energy
- Duration: Flash 0.3s + flight ~1.7s + freeze display and sheen ~2s; whole segment 4.2s
- Energy: High (a one-time peak, still once it freezes)
Shot recipe (original Chinese — timing, easing, parameter table, known pitfalls)
意图
魔术师甩牌:一道蓝色星芒闪过,卡片仿佛从光里被变出来——从画面 中心极远处(视觉上一个小点)弹射而出,沿弧线极速自旋飞向镜头, 到达中心瞬间硬定格成近满幅展示。三个魔术感命门:闪光先行 (光是"变"的仪式,0.3s 短促干脆)、弹射节奏(起飞慢速蓄力→ 急加速踢出→弧线段减速抵达,slow-in→burst→decelerating arc)、 定格即静(无减速尾巴无回弹,13 整圈自旋保证定格恰为正面)。
动效核心
- 开场星芒(用户参考图 IMG_2505 逐轮收敛的最终形态):
- X 形对角针状光束(-38°/52° 起始),闪光期间整体**动态旋转
90°**(easeInOut);长轴 840/短轴 420(比例 2:1)
- 光束纯饱和蓝(#3f9bff→#2277f2 贯穿全长,白段只留根部 5%),
每轴三层:宽糊辉光包层 + 明亮主束 + 过曝细芯
- 中心不是白球:极小亮点(26px)+ 蓝辉光晕(140px)+ 一圈
10 根长短相间放射短刺(随星芒反向缓转)
- 节奏:渐亮 2.5f → 微闪 → 坍缩,9f(0.3s)完
- 弹射飞行:中心极远(scale≈0.06)出发,真透视 scale=F/(F+z)
(z 14000→0);行程曲线 slow-in(前 14% 时间走 6%)→斜率跳变 弹射→easeOut(cubic) 减速;正弦单拱弧线荡出收回中心
- 自旋:沿卡片对角线轴 13 整圈;前 40% 行程近匀速极快,后 60%
角速度 2.4 次幂衰减(越近镜头转越慢),整圈数保证定格正面
- 定格:f=TAKEOFF+50 全量冻结,卡高 ≈94% 画面高(贴上下界)
- 扫光:定格稳 8f 后 sheen 斜带左→右一次扫过(overlay+screen
双层+整卡亮度微抬)
参数表
| 参数 | 典型值 | 调节手感 | |------|--------|----------| | 闪光时长 | 9f(0.3s,用户精确定值;曾 1.5s→0.8s→0.5s 逐轮压短) | 光是仪式不是主角;>15f 抢卡片的戏 | | 星芒旋转 | 闪光期间动态转 90°(判例:静态摆角被裁"没看到旋转") | 旋转要逐帧可见;>120° 读作螺旋桨 | | 光束颜色 | 纯饱和蓝贯穿全长 | 白段过长/衰减过快被裁"不够还原";青蓝偏灰被裁"要蓝色的" | | 中心 | 小亮点+辉光+放射短刺 | 白色圆球被裁——中心是光学辉光不是实体球 | | 弹射曲线 | slow-in 14%→burst→减速弧线 | 直接匀速/纯 easeOut 没有"弹射"的蓄力感 | | 自旋衰减 | 后 60% 行程 2.4 次幂减速 | 匀速到底被裁"靠近镜头时应随距离衰减";整圈数=定格正面的保证 | | 定格尺寸 | 卡高 94% 画面高 | 初版 1.0x 被裁"更近更大基本靠近上下界" | | 硬定格 | 全量冻结零回弹 | 魔术感=瞬间静止;回弹读作物理玩具 |
已知坑
- demo 在灰阶/占位素材上调校通过——参数是调校起点非实战定稿,
首次实战须以真实素材回验
- 光效质感判例链(本卡贡献的全局方法论):几何色块被裁"5毛
特效"→光学实感重做→游戏感+真实→用户给参考图一轮收敛。 质感类意见文字损耗大,主动请用户丢参考图
- 工程坑:细针光束不能放进 CameraMotionBlur——旋转被模糊采样
拆成条纹分身("廉价感"的隐性来源);闪光层独立于运动模糊渲染
- 工程坑:星芒 SVG viewBox 要 ≥ 光束长+旋转扫掠半径,否则端点
被裁出直边
- 与 card-flip-reveal/deck-deal-flyin 分工:那两张是翻牌/发牌的
多卡节奏戏;本卡是单卡"变出来"的魔术仪式,一次只变一张
参考实现
demos/opening/magician-card-flourish/ (MagicianCardFlourish.tsx) 原片出处:无(用户口述定制,多轮迭代收敛)
Reference implementation (Remotion)
- demos/opening/magician-card-flourish/MagicianCardFlourish.tsx — https://raw.githubusercontent.com/Vincentwei1021/video-shotcraft/main/demos/opening/magician-card-flourish/MagicianCardFlourish.tsx
The component imports shared fixtures from demos/_fixtures and helpers from assets/lib in the repo; SKILL.md there documents the render workflow.
Everything on this page is also machine-readable. Point your agent at the JSON, or add the gimgs MCP server and ask it to search motion templates.
- Fetch the JSON — it holds the shot recipe (timing, easing, parameter table, pitfalls) and the full TSX source.
- Clone the video-shotcraft repo; the component imports shared fixtures from demos/_fixtures and helpers from assets/lib.
- Register the component as a <Composition> in a Remotion project and render with `npx remotion render`, or re-implement the recipe in your own engine.
curl -s https://gimgs.net/motion/magician-card-flourish.jsongit clone https://github.com/Vincentwei1021/video-shotcraft
# component: demos/opening/magician-card-flourish/MagicianCardFlourish.tsx
npx remotion render <CompositionId> out.mp4claude mcp add --transport http gimgs https://gimgs.net/mcp
# then: search_motion_templates / get_motion_template("magician-card-flourish")Prompt
Use the video-shotcraft shot recipe "Magician card flourish" (Remotion composition, Apache-2.0) published on gimgs.net.
Recipe JSON (prompt = timing/easing/parameter table/pitfalls, files = TSX source): https://gimgs.net/motion/magician-card-flourish.json
Raw TSX: https://gimgs.net/motion/magician-card-flourish/template.html
Repository: https://github.com/Vincentwei1021/video-shotcraft  (component: demos/opening/magician-card-flourish/MagicianCardFlourish.tsx; imports demos/_fixtures and assets/lib)
Spec: 1920x1080, 30 fps, 4.25s

1. Read the JSON and follow its "prompt" section (when to use, intention, parameter table, known pitfalls).
2. Adapt it for: <describe what you want>.
3. Either clone the repo, register the component as a <Composition> in a Remotion project and run npx remotion render <CompositionId> out.mp4 — or re-implement the recipe in your own engine (HTML/WAAPI works: keep the same timing and easing).
// ===== demos/opening/magician-card-flourish/MagicianCardFlourish.tsx =====
// magician-card-flourish v6 —— 批次 15(无截图,用户意见即全部真相):
// 用户意见(逐字)"这个光需要带点辉光,0.8秒就行;然后十字星应该做成更符合
// 光学实感的,现在太5毛特效了;卡片最开始出来的时候,要做成那种弹射出来的
// 效果,就是刚开始弹射出来速度慢,然后划弧线的过程减速"
// ① 光效段 1.5s→0.8s(24f),辉光加厚(三层柔晕包裹);
// ② 十字星光学实感重做:等宽矩形条改衍射尖峰(径向渐变楔形——越远越细
//    且亮度指数渐隐),三层叠色(白细芯/蓝中层/宽淡外层近似色散),
//    旋转放慢(24f 转 ~40°,真实星芒旋转是镜头效应,快了就假);
// ③ 弹射出场:slow-in → burst → decelerating arc(起飞先慢速蓄力挤出,
//    急加速弹射,弧线段整体减速抵达中心硬定格)。
// v5 其余保留:中心极远飞出+13 圈自旋+94% 定格+sheen 扫光。总长 141 帧。
import React, { useId } from 'react';
import { useCurrentFrame, interpolate, Easing } from 'remotion';
import { CameraMotionBlur } from '@remotion/motion-blur';
import { G } from '../../_fixtures/Fixtures';

const CARD_W = 380;
const CARD_H = 540;
// 对角线轴(卡片自身对角线方向,归一化)
const AX = CARD_W / Math.hypot(CARD_W, CARD_H);
const AY = CARD_H / Math.hypot(CARD_W, CARD_H);

// —— 时间轴(30fps / 126 帧)——
// v9.6(批次 18):光效 0.5s→0.3s(9f)
const TAKEOFF = 9;               // 开场光效 0.3s(9f)后卡片才起飞
const FLASH_END = 12;            // 闪光尾焰完全消失(坍缩略拖 3 帧)
const FLIGHT = 50;               // 飞行帧数
const LAND = TAKEOFF + FLIGHT;   // f=53 硬定格
const SHEEN_START = LAND + 8;    // 定格稳住 8 帧后开始扫光
const SHEEN_DUR = 26;            // 扫光时长(一次性)
const TURNS = 13;                // 飞行总圈数(整数→定格瞬间恰好正面朝镜头)
const FINAL_SCALE = 1.88;        // 终态:卡高 540×1.88≈1015 ≈ 94% 画面高(1080)

// 卡片正面:灰阶海报卡
const CardFace: React.FC = () => (
  <div style={{
    width: CARD_W, height: CARD_H, borderRadius: 22, background: G.card,
    border: `2px solid ${G.border}`, boxSizing: 'border-box', padding: 26,
    display: 'flex', flexDirection: 'column', gap: 16, overflow: 'hidden',
  }}>
    <div style={{ height: 26, width: '62%', background: G.bar, borderRadius: 13 }} />
    <div style={{ height: 12, width: '84%', background: G.line, borderRadius: 6 }} />
    <div style={{
      flex: 1, borderRadius: 14, background: `linear-gradient(145deg, #e6e6e4, ${G.bar})`,
      display: 'flex', alignItems: 'center', justifyContent: 'center',
    }}>
      <div style={{ width: 110, height: 110, borderRadius: 55, background: G.mid, opacity: 0.55 }} />
    </div>
    <div style={{ height: 12, width: '74%', background: G.line, borderRadius: 6 }} />
    <div style={{ height: 12, width: '52%', background: G.line, borderRadius: 6 }} />
    <div style={{ display: 'flex', alignItems: 'center', gap: 10, marginTop: 4 }}>
      <div style={{ width: 34, height: 34, borderRadius: 17, background: G.mid }} />
      <div style={{ height: 11, width: 90, background: G.line, borderRadius: 5 }} />
      <div style={{ marginLeft: 'auto', width: 58, height: 24, borderRadius: 12, background: G.ink, opacity: 0.75 }} />
    </div>
  </div>
);

// 卡背:深灰斜纹
const CardBack: React.FC = () => (
  <div style={{
    position: 'absolute', inset: 0, borderRadius: 22, background: '#3c3c40',
    border: '2px solid #55555a', boxSizing: 'border-box', overflow: 'hidden',
  }}>
    <div style={{
      position: 'absolute', inset: 0,
      background: 'repeating-linear-gradient(45deg, rgba(255,255,255,0.07) 0 14px, transparent 14px 28px)',
    }} />
    <div style={{
      position: 'absolute', inset: 34, borderRadius: 12, border: '2px solid rgba(255,255,255,0.16)',
      display: 'flex', alignItems: 'center', justifyContent: 'center',
    }}>
      <div style={{ width: 72, height: 72, borderRadius: 36, border: '3px solid rgba(255,255,255,0.22)' }} />
    </div>
  </div>
);

// —— 开场闪光(v8,批次 17):以用户参考图 IMG_2505 为基准 ——
// 参考图特征(真实镜头 lens flare 星芒,密看归纳):
// ① X 形对角星芒(4 条 45° 斜向针状光束),不是 +  形正交;
// ② 光束极细(针状),其中一条对角轴显著更长、近乎横贯画面;
// ③ 核心小而极亮(过曝白点),辉光晕很克制(小半径即衰减入黑);
// ④ 青蓝色(参考图上星青色/下星蓝色,取青蓝中间调);
// ⑤ 背景纯黑,光束边缘干净锐利(真实衍射,无宽糊外层)。
// 时长 0.5s:渐亮(f0–4)→ 全芒微闪(f4–10)→ 坍缩(f10–15)。
const SpawnFlash: React.FC<{ f: number }> = ({ f }) => {
  // 渐变 ID 按实例生成,多实例同场不串引(useId 的 «:» 在 url() 里非法,需清洗)
  // hooks 必须在条件 return 之前调用
  const SPIKE_ID = `mcf-needle-${useId().replace(/[^a-zA-Z0-9]/g, '')}`;
  if (f > FLASH_END) return null;
  const grow = interpolate(f, [0, 2.5], [0.2, 1], {
    extrapolateRight: 'clamp', easing: Easing.out(Easing.quad),
  });
  const shrink = interpolate(f, [6, TAKEOFF, FLASH_END], [1, 0.3, 0.05], {
    extrapolateLeft: 'clamp', extrapolateRight: 'clamp', easing: Easing.in(Easing.quad),
  });
  const s = grow * shrink;
  // 亮度微闪(真实光源级细微抖动)
  const flicker = 0.94 + 0.06 * (0.5 + 0.5 * Math.sin(f * 1.9) * Math.sin(f * 0.83 + 1.7));
  const opacity = interpolate(f, [0, 2, 6, FLASH_END], [0, 1, 1, 0], {
    extrapolateRight: 'clamp',
  }) * flicker;
  // v9:用户意见"开场光点的光芒要旋转90度"——闪光期间星芒动态旋转 90°
  const rot = interpolate(f, [0, FLASH_END], [0, 90], { extrapolateRight: 'clamp', easing: Easing.inOut(Easing.quad) });
  // 针状光束:极细楔形(根部窄、尖端归零)+ 亮度指数渐隐——对照参考图
  // v9(批次 18):用户意见"开场光点的光芒要旋转90度"——整体转 90°:长轴 -38°→52°(陡斜近竖贯),短轴 52°→142°
  const needle = (deg: number, len: number, w0: number, op: number) => (
    <g key={`${deg}-${len}`} transform={`rotate(${deg})`} opacity={op}>
      <path d={`M 0 ${-w0 / 2} L ${len} 0 L 0 ${w0 / 2} Z`} fill={`url(#${SPIKE_ID})`} />
      <path d={`M 0 ${-w0 / 2} L ${len} 0 L 0 ${w0 / 2} Z`} fill={`url(#${SPIKE_ID})`} transform="scale(-1,1)" />
    </g>
  );
  return (
    <div style={{
      position: 'absolute', left: 960, top: 540, width: 0, height: 0,
      transform: `scale(${s})`, opacity, pointerEvents: 'none',
    }}>
      {/* v9.6 中心重做(对照用户参考图②):不是白色圆球——
          极小过曝亮点 + 蓝色辉光 + 一圈放射状小光芒(短刺) */}
      <div style={{
        position: 'absolute', left: -13, top: -13, width: 26, height: 26, borderRadius: 13,
        background: 'radial-gradient(circle, #ffffff 0%, rgba(225,245,255,0.95) 45%, rgba(140,215,255,0) 80%)',
        filter: 'blur(0.6px)',
      }} />
      <div style={{
        position: 'absolute', left: -70, top: -70, width: 140, height: 140, borderRadius: 70,
        background: 'radial-gradient(circle, rgba(90,175,255,0.75) 0%, rgba(50,130,245,0.35) 45%, rgba(40,110,235,0) 75%)',
        filter: 'blur(4px)',
      }} />
      {/* 放射状小光芒:核心周围一圈短刺(参考图中心的 starburst 细节) */}
      <svg width={260} height={260} viewBox="-130 -130 260 260" style={{
        position: 'absolute', left: -130, top: -130, transform: `rotate(${-rot * 0.6}deg)`,
      }}>
        {[15, 52, 88, 123, 160, 197, 231, 268, 305, 341].map((deg, i) => {
          const ln = 46 + ((i * 37) % 3) * 16;
          return (
            <g key={deg} transform={`rotate(${deg})`} opacity={0.75}>
              <path d={`M 8 -1.1 L ${ln} 0 L 8 1.1 Z`} fill="rgba(150,210,255,0.85)" filter="blur(0.8px)" />
            </g>
          );
        })}
      </svg>
      {/* X 形对角针状星芒——对照 IMG_2505 复刻要点:光束通体明亮饱和
          (青蓝贯穿全长、只在最末端才灭),束身带同色辉光包裹 */}
      <svg width={3200} height={3200} viewBox="-1600 -1600 3200 3200" style={{
        position: 'absolute', left: -1600, top: -1600, transform: `rotate(${rot}deg)`,
      }}>
        <defs>
          {/* v9.6:更纯蓝(参考图光束是饱和蓝,白段只在根部一瞬) */}
          <linearGradient id={SPIKE_ID} x1="0" y1="0" x2="1" y2="0">
            <stop offset="0" stopColor="#eaf6ff" stopOpacity="1" />
            <stop offset="0.05" stopColor="#8cc8ff" stopOpacity="0.95" />
            <stop offset="0.3" stopColor="#3f9bff" stopOpacity="0.88" />
            <stop offset="0.62" stopColor="#2277f2" stopOpacity="0.6" />
            <stop offset="0.88" stopColor="#1b64e0" stopOpacity="0.25" />
            <stop offset="1" stopColor="#1a5fd8" stopOpacity="0" />
          </linearGradient>
        </defs>
        {/* 长对角轴:辉光包层(宽糊、同色发光)+ 明亮主束 + 过曝细芯 */}
        <g filter="blur(7px)" opacity={0.75}>
          {needle(-38, 826, 26, 1)}
        </g>
        <g filter="blur(1.8px)">
          {needle(-38, 840, 8, 1)}
        </g>
        {needle(-38, 819, 3, 1)}
        {/* 短对角轴:同三层 */}
        <g filter="blur(5px)" opacity={0.75}>
          {needle(52, 413, 20, 1)}
        </g>
        <g filter="blur(1.5px)">
          {needle(52, 420, 6.5, 1)}
        </g>
        {needle(52, 410, 2.6, 1)}
      </svg>
    </div>
  );
};

const Scene: React.FC = () => {
  const f = useCurrentFrame();
  // 硬定格:闪光后 f=TAKEOFF 起飞,到达(f=LAND)后时间冻结——所有量按 tEff 计算
  const tEff = Math.min(1, Math.max(0, (f - TAKEOFF) / FLIGHT));
  const airborne = f >= TAKEOFF;

  // —— 自旋(v7):用户意见"靠近镜头时,卡片自旋速度开始随距离靠近而衰减"
  // 前 40% 行程近匀速极快,之后角速度随 tEff 持续衰减(easeOut 2.4 次幂),
  // spinP(1)=1 保证整圈数——定格瞬间仍恰好正面朝镜头
  const spinP = tEff < 0.4
    ? tEff * 1.55
    : 0.62 + 0.38 * (1 - Math.pow(1 - (tEff - 0.4) / 0.6, 2.4));
  const theta = TURNS * 360 * Math.min(1, spinP);

  // —— 轨迹:画面中心的 3D 纵深远处(极小)→ 弧线飞向镜头 → 近满幅定格于中心 ——
  // v6 弹射曲线(用户意见"刚开始弹射出来速度慢,然后划弧线的过程减速"):
  // slow-in(前 14% 慢速蓄力挤出 6% 行程)→ 斜率跳变=弹射踢出 →
  // 弧线段 easeOut(cubic) 全程减速抵达中心
  const tp = tEff < 0.14
    ? 0.06 * (tEff / 0.14) * (tEff / 0.14)
    : 0.06 + 0.94 * (1 - Math.pow(1 - (tEff - 0.14) / 0.86, 3));
  const arc = Math.sin(tp * Math.PI);
  const cx = 960 + arc * 360;
  const cy = 540 - arc * 250;
  // 纵深:真透视 scale=F/(F+z)×FINAL_SCALE,z 从极远推近到 0——
  // 终态卡高≈94% 画面高(基本贴近上下界)
  const FOCAL = 900;
  const z = interpolate(tp, [0, 1], [14000, 0]);
  const scale = FINAL_SCALE * (FOCAL / (FOCAL + z)); // 0.11 → 1.88,无过冲

  // 背面判定
  const facingBack = Math.cos((theta * Math.PI) / 180) < 0;

  // —— 定格后 sheen 扫光:一道高光斜带从卡面左侧扫到右侧(一次性)——
  const sheenP = interpolate(f, [SHEEN_START, SHEEN_START + SHEEN_DUR], [0, 1], {
    extrapolateLeft: 'clamp', extrapolateRight: 'clamp',
    easing: Easing.inOut(Easing.cubic),
  });
  const sheenVisible = f >= SHEEN_START && f <= SHEEN_START + SHEEN_DUR;
  // 扫光经过时整卡亮度微抬升(正弦单拱),保证"整体光泽"肉眼可感
  const sheenLift = sheenVisible ? 0.07 * Math.sin(sheenP * Math.PI) : 0;

  return (
    <div style={{ width: 1920, height: 1080, background: '#000000', position: 'relative', overflow: 'hidden' }}>
      {/* —— 卡片:闪光过后从中心飞出,纯黑空间中飞行 —— */}
      <div style={{
        position: 'absolute', left: cx - CARD_W / 2, top: cy - CARD_H / 2,
        width: CARD_W, height: CARD_H,
        transform: `scale(${scale})`,
        transformOrigin: '50% 50%',
        opacity: airborne ? 1 : 0,
      }}>
        <div style={{
          width: '100%', height: '100%',
          transform: `perspective(1300px) rotate3d(${AX}, ${AY}, 0, ${theta}deg)`,
          transformOrigin: '50% 50%',
          position: 'relative',
          borderRadius: 22,
          filter: sheenLift > 0 ? `brightness(${1 + sheenLift})` : undefined,
        }}>
          <CardFace />
          <div style={{ opacity: facingBack ? 1 : 0, position: 'absolute', inset: 0 }}>
            <CardBack />
          </div>
          {/* 转动中的动态侧光(贴在卡面上,非环境光);定格后随 theta 冻结 */}
          <div style={{
            position: 'absolute', inset: 0, borderRadius: 22, pointerEvents: 'none',
            background: `linear-gradient(${115 + Math.sin((theta * Math.PI) / 180) * 30}deg, rgba(255,255,255,0) 30%, rgba(255,255,255,${0.14 + 0.14 * Math.abs(Math.sin((theta * Math.PI) / 180))}) 50%, rgba(255,255,255,0) 70%)`,
            mixBlendMode: 'screen',
          }} />
          {/* 定格后的一次性 sheen 扫光:斜高光带左→右扫过整卡 */}
          {sheenVisible && (
            <div style={{
              position: 'absolute', inset: 0, borderRadius: 22, overflow: 'hidden',
              pointerEvents: 'none',
            }}>
              <div style={{
                position: 'absolute', top: '-45%', bottom: '-45%',
                left: `${-70 + sheenP * 215}%`, width: '42%',
                background: 'linear-gradient(100deg, rgba(200,200,205,0) 0%, rgba(225,225,230,0.5) 34%, rgba(255,255,255,0.9) 50%, rgba(225,225,230,0.5) 66%, rgba(200,200,205,0) 100%)',
                transform: 'rotate(16deg)',
                mixBlendMode: 'overlay',
              }} />
              {/* 叠一层 screen 提亮,让灰色区块上的高光带更亮 */}
              <div style={{
                position: 'absolute', top: '-45%', bottom: '-45%',
                left: `${-70 + sheenP * 215}%`, width: '26%',
                background: 'linear-gradient(100deg, rgba(255,255,255,0) 0%, rgba(255,255,255,0.45) 45%, rgba(255,255,255,0.8) 50%, rgba(255,255,255,0.45) 55%, rgba(255,255,255,0) 100%)',
                transform: 'rotate(16deg)',
                mixBlendMode: 'screen',
              }} />
            </div>
          )}
        </div>
      </div>
    </div>
  );
};

// 闪光层独立于 CameraMotionBlur(细针光束旋转会被采样拆成条纹分身)
const FlashLayer: React.FC = () => {
  const f = useCurrentFrame();
  return (
    <div style={{ position: 'absolute', inset: 0, overflow: 'hidden', pointerEvents: 'none' }}>
      <SpawnFlash f={f} />
    </div>
  );
};

export const MagicianCardFlourish: React.FC = () => (
  <>
    <CameraMotionBlur shutterAngle={150} samples={7}>
      <Scene />
    </CameraMotionBlur>
    <FlashLayer />
  </>
);
- Read the recipePrompt = when to use, intention, parameter table with typical values and how each one feels, known pitfalls. Treat values as calibrated starting points.
- Get the codetool: git
git clone https://github.com/Vincentwei1021/video-shotcraft && cd video-shotcraft && npm install - Register + rendertool: remotion
npx remotion render <CompositionId> out.mp4 # component: demos/opening/magician-card-flourish/MagicianCardFlourish.tsx - Or re-implementPort the timing/easing from the recipe to HTML + WAAPI (gimgs motion contract) or any engine; keep the same segment windows and easing.
| param | type | default | description |
|---|---|---|---|
| — | |||
More in this category
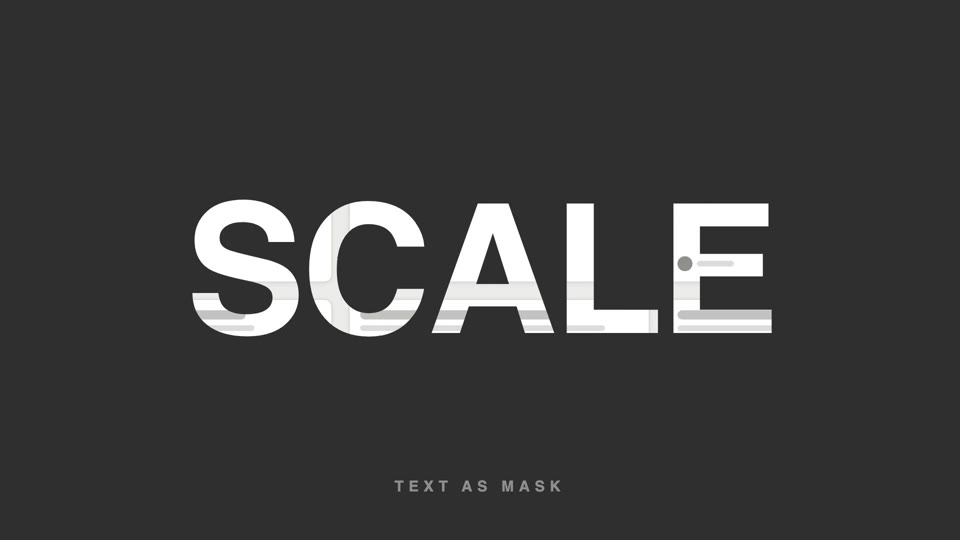
Text-as-video mask
Text as video mask — extra-bold title letters reveal slowly panning product footage through them; at the end the letterforms scale up 26x and overflow, and the inner footage takes over the full screen.
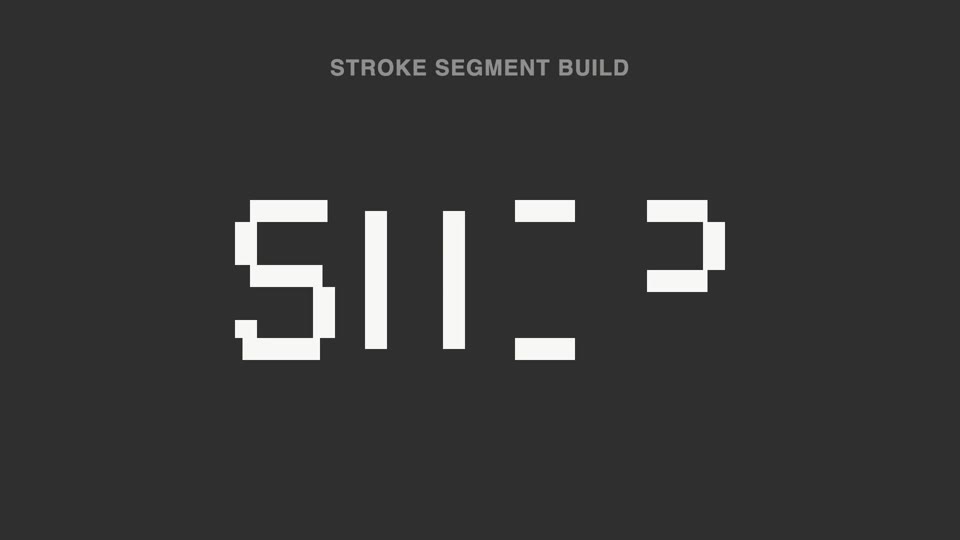
Broken-stroke title reveal
Broken strokes into letters — a title breaks into a dozen-plus disconnected stroke segments that light up out of order; 70% unreadable, then the last segment lands and the meaning snaps into place.
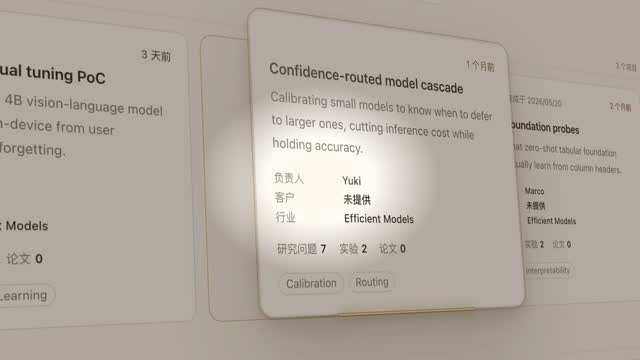
Spotlight hero card reveal
A spotlight sweeps the page and locks onto one card; it pushes in at 45°, the card lifts and hovers, a light beam circles its outline twice, then it settles back in place.
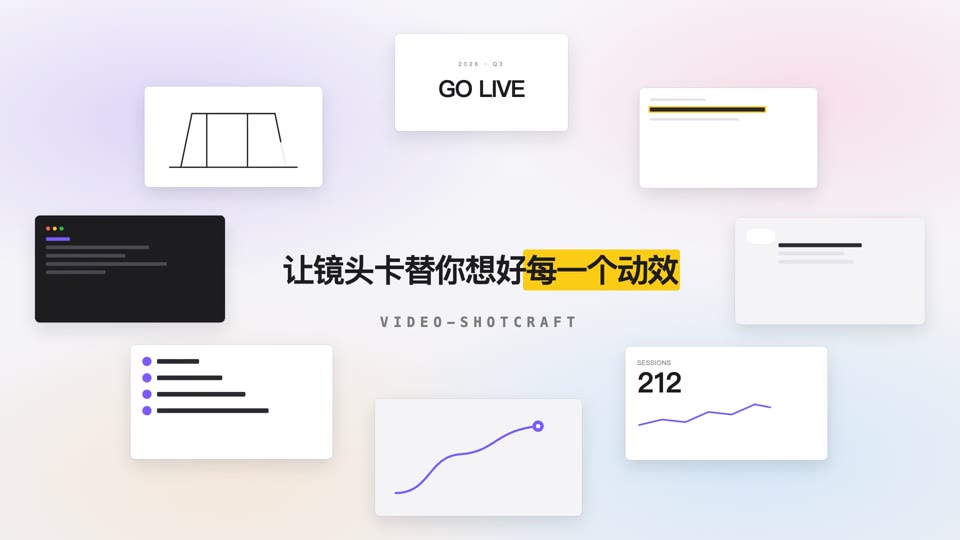
Orbit ring title opening
Eight content cards orbit a 700×375 ellipse at constant speed while a centered title resolves into focus and settles.