Motion · Luz & ênfase
Dark-stage spotlight reveals
Three dark-stage spotlight reveals — A wake-sleep sweep (light in = bright, light out = dark), B edge-hugging glow pan (violet light seeps along UI edges + steady rightward sweep), C corner reveal (radial light expands steadily from a corner to light the whole screen); light itself narrates in the dark.
Fonte: video-shotcraft (Vincent Wei) ↗ · Apache-2.0 · Composição Remotion (React/TSX) — vídeo de prévia, sem player no navegador
Variantes
醒睡扫过:radial 显影罩跟随光头从左向右匀速移动,贴顶边紫色光线三层辉光同行,经过 logo 描光、到右缘点亮竖直残光,尾段面板沉回黑暗
暗色调品牌片里介绍单个 UI 面板——有醒有睡的登场与谢幕
贴边泛光横摇:光线先绕左上角竖缘、转角后沿顶边横走,紫光晕染渗入 UI 顶部内侧;聚光头匀速右移显影 + 面板匀速左滑=相机右摇感
横向巡礼宽面板/多列看板,逐段点亮功能区
角落匀速显影:左上角径向聚光半径严格 linear 扩张,照到显影照不到沉黑,最终全屏亮起——光即转场
黑场开场点亮界面登场;段落间光转场
When to use
Introducing UI panels/feature areas one by one in dark-toned brand films; a black-stage opener that "lights up" the interface; a light transition between passages
Intention
In the dark, viewers only see what the light lets them see — the spotlight is lighting, camera move, and edit all at once: wherever the light lands, that's the entrance; when the light leaves, that's the exit. All three share an identity element — an "edge-hugging violet glow" (light tracing the UI border/logo/top edge, the glow bright and soft, the light "caressing" the interface rather than an outline animation). The linchpin is constant speed: the spotlight's movement/expansion must be strictly linear — easing would give the light "intent," only constant speed reads as a searchlight's mechanical sweep (case in point for style C: linear but with too large a final radius means it saturates in the first quarter, and the feel is no longer even).
Duration & energy
- Duration: Single style: 3.5–4.5s; A/B can be chained into a tour passage
- Energy: Medium-low (restrained, mysterious, the payoff is the moment of lighting up)
Shot recipe (original Chinese — timing, easing, parameter table, known pitfalls)
意图
黑场里观众只能看见光给看的东西——聚光既是照明也是运镜和剪辑: 光到哪里哪里登场,光走即谢幕。三式共用"贴边紫色辉光光线"这个 身份元素(光线贴着 UI 边框/logo/顶边走,辉光要亮要糊,是光在 "抚摸"界面而不是描边动画)。命门是匀速:聚光的移动/扩张 严格 linear——缓动会让光有"意图",匀速才读作探照灯的机械扫掠 (C 式判例:linear 但半径终值过大=前 1/4 就饱和,观感照样不匀速)。
动效核心
A 醒睡扫过(glow-wake-sleep-panel):radial 显影罩跟随光头从左 向右匀速移动,范围外全黑;贴顶边紫色光线三层辉光(blur26 宽糊+ blur9 中层+亮芯+粉色偏移层)随扫光同步走,经过 logo 时 boxShadow 描光、到右缘点亮竖直残光;尾段光走面板沉回黑暗——有醒有睡。 B 贴边泛光横摇(slide-spotlight-pan):光线锚定面板边缘(先绕 左上角竖缘、转角后沿顶边横走),紫光晕染渗入 UI 顶部内侧(光从 边缘渗进界面);聚光头匀速右移显影、面板同时匀速左滑=相机右摇感。 C 角落匀速显影(corner-spotlight-reveal):左上角径向聚光半径 严格 linear 扩张,照到显影照不到沉黑,最终全亮(光即转场)。
参数表
| 参数 | 典型值 | 调节手感 | |------|--------|----------| | 聚光移动/扩张 | 全程 linear、零缓动 | 匀速是命门——全程零缓动;加 ease 读作光有主观意图 | | C 式半径终值 | 恰好在片尾覆盖全屏(1300@1080p/100f) | 终值过大=提前饱和假匀速:亮度采样须全程平滑爬升(实测 8/46/101/…/238) | | 贴边光线辉光 | 3–4 层(blur26+blur9+亮芯+粉偏移) | 层少读作细线描边;辉光要够亮够糊才是"光" | | 光线锚定 | 严格贴 UI 边缘/顶边/logo | 光线脱离边缘漂浮=失去"抚摸界面"语义(A 式返工判例:定位丢失紫光跑到底边) | | 显影罩 | radial 渐变硬边略糊(feather ~15%) | 边太硬像圆形遮罩;太糊没有"照到/照不到"的界线 |
已知坑
- demo 在灰阶/占位素材上调校通过——参数是调校起点非实战定稿,
首次实战须以真实素材回验
- 与 light-play-moves 分工:那张是元素/文字上的
光泽戏(sheen/辉光呼吸);本卡光是运镜和剪辑(显影/谢幕/转场), 光决定观众看什么
- 三式重做判例:聚光扫过必须带贴边光线同行(v1 只有显影罩被裁
"改改再看"——裸聚光没有身份,贴边紫光才是这个手法的签名)
- 原片(clickup-30)光线转角有一瞬彩虹色散,demo 未做;实战可
在转角帧加 1–2f 色散层提质感
参考实现
demos/effects/spotlight-sweep-moves/ (CornerSpotlightReveal.tsx / GlowWakeSleepPanel.tsx / SlideSpotlightPan.tsx) 原片出处:clickup-30.mp4
Reference implementation (Remotion)
- demos/effects/spotlight-sweep-moves/CornerSpotlightReveal.tsx — https://raw.githubusercontent.com/Vincentwei1021/video-shotcraft/main/demos/effects/spotlight-sweep-moves/CornerSpotlightReveal.tsx
- demos/effects/spotlight-sweep-moves/GlowWakeSleepPanel.tsx — https://raw.githubusercontent.com/Vincentwei1021/video-shotcraft/main/demos/effects/spotlight-sweep-moves/GlowWakeSleepPanel.tsx
- demos/effects/spotlight-sweep-moves/SlideSpotlightPan.tsx — https://raw.githubusercontent.com/Vincentwei1021/video-shotcraft/main/demos/effects/spotlight-sweep-moves/SlideSpotlightPan.tsx
The component imports shared fixtures from demos/_fixtures and helpers from assets/lib in the repo; SKILL.md there documents the render workflow.
Tudo nesta página também é legível por máquina. Aponte seu agente para o JSON ou adicione o servidor MCP do gimgs e peça para buscar templates de motion.
- Baixe o JSON — contém a receita do plano (timing, easing, tabela de parâmetros, armadilhas) e o código TSX completo.
- Clone o repositório video-shotcraft; o componente importa fixtures de demos/_fixtures e helpers de assets/lib.
- Registre o componente como <Composition> em um projeto Remotion e renderize com `npx remotion render`, ou reimplemente a receita no seu próprio engine.
curl -s https://gimgs.net/motion/spotlight-sweep-moves.jsongit clone https://github.com/Vincentwei1021/video-shotcraft
# component: demos/effects/spotlight-sweep-moves/CornerSpotlightReveal.tsx, demos/effects/spotlight-sweep-moves/GlowWakeSleepPanel.tsx, demos/effects/spotlight-sweep-moves/SlideSpotlightPan.tsx
npx remotion render <CompositionId> out.mp4claude mcp add --transport http gimgs https://gimgs.net/mcp
# then: search_motion_templates / get_motion_template("spotlight-sweep-moves")Prompt
Use the video-shotcraft shot recipe "Dark-stage spotlight reveals" (Remotion composition, Apache-2.0) published on gimgs.net.
Recipe JSON (prompt = timing/easing/parameter table/pitfalls, files = TSX source): https://gimgs.net/motion/spotlight-sweep-moves.json
Raw TSX: https://gimgs.net/motion/spotlight-sweep-moves/template.html
Repository: https://github.com/Vincentwei1021/video-shotcraft  (component: demos/effects/spotlight-sweep-moves/CornerSpotlightReveal.tsx, demos/effects/spotlight-sweep-moves/GlowWakeSleepPanel.tsx, demos/effects/spotlight-sweep-moves/SlideSpotlightPan.tsx; imports demos/_fixtures and assets/lib)
Spec: 1920x1080, 30 fps, 4.54s

1. Read the JSON and follow its "prompt" section (when to use, intention, parameter table, known pitfalls).
2. Adapt it for: <describe what you want>.
3. Either clone the repo, register the component as a <Composition> in a Remotion project and run npx remotion render <CompositionId> out.mp4 — or re-implement the recipe in your own engine (HTML/WAAPI works: keep the same timing and easing).
// ===== demos/effects/spotlight-sweep-moves/CornerSpotlightReveal.tsx =====
// corner-spotlight-reveal —— 对标 clickup-30.mp4 41.5–44.6s:
// 黑场上,左上角径向聚光从小到大扩张,把白色 Inbox 界面逐步"点亮",
// 照到的区域显影、照不到的沉黑,最终全屏亮起。光即转场。
import React from 'react';
import { AbsoluteFill, useCurrentFrame, interpolate, Easing } from 'remotion';

const FONT = '"Avenir Next", "Helvetica Neue", Helvetica, sans-serif';

// 灰阶 Inbox 界面(自绘,替代真 UI)
const InboxPanel: React.FC = () => (
  <div
    style={{
      width: 1920,
      height: 1080,
      background: '#f6f6f5',
      fontFamily: FONT,
      padding: '90px 120px',
      boxSizing: 'border-box',
      color: '#2c2c2c',
    }}
  >
    <div style={{ display: 'flex', alignItems: 'center', gap: 26 }}>
      <div style={{ fontSize: 118, fontWeight: 700, letterSpacing: -2 }}>Inbox</div>
      <div
        style={{
          width: 0, height: 0, marginTop: 26,
          borderLeft: '16px solid transparent',
          borderRight: '16px solid transparent',
          borderTop: '20px solid #3a3a3a',
        }}
      />
    </div>
    <div style={{ display: 'flex', gap: 64, marginTop: 90, fontSize: 44, color: '#555' }}>
      <div style={{ background: '#e9e8f6', color: '#5b55c8', padding: '10px 34px', borderRadius: 14, fontWeight: 600 }}>All</div>
      <div style={{ padding: '10px 0' }}>Tasks</div>
      <div style={{ padding: '10px 0' }}>Docs</div>
      <div style={{ padding: '10px 0' }}>People</div>
      <div style={{ padding: '10px 0' }}>Chat</div>
    </div>
    {[0, 1, 2].map((row) => (
      <div key={row} style={{ display: 'flex', alignItems: 'center', gap: 30, marginTop: row === 0 ? 96 : 64 }}>
        <div style={{ width: 42, height: 42, border: '3px solid #c9c9c7', borderRadius: 10 }} />
        <div style={{ width: 14, height: 14, borderRadius: 7, background: '#5b55c8' }} />
        <div style={{ width: 56, height: 56, borderRadius: 28, background: '#efe4e2' }} />
        <div>
          <div style={{ display: 'flex', gap: 22, alignItems: 'center' }}>
            <div style={{ height: 22, width: 220 + ((row * 67) % 90), background: '#3f3f3f', borderRadius: 11 }} />
            <div style={{ width: 8, height: 8, borderRadius: 4, background: '#bbb' }} />
            <div style={{ height: 18, width: 260, background: '#c9c9c7', borderRadius: 9 }} />
          </div>
          <div style={{ display: 'flex', gap: 14, marginTop: 16 }}>
            <div style={{ height: 18, width: 300, background: '#8f8bd8', borderRadius: 9, opacity: 0.75 }} />
            <div style={{ height: 18, width: 340 - ((row * 91) % 120), background: '#d8d8d6', borderRadius: 9 }} />
          </div>
        </div>
      </div>
    ))}
  </div>
);

export const CornerSpotlightReveal: React.FC = () => {
  const frame = useCurrentFrame();

  // 聚光半径扩张:全程匀速(用户裁决"整个过程要匀速"——严格 linear,无缓动)
  // r+feather=1.85r 是光前沿;1.85*1300≈2400 恰在片尾盖满全屏对角,
  // 保证扩张动作占满全片时长而不是前 1/3 就饱和
  const r = interpolate(frame, [0, 100], [160, 1300], {
    extrapolateLeft: 'clamp',
    extrapolateRight: 'clamp',
  });

  // 光心沿左上角匀速游移(linear)
  const cx = interpolate(frame, [0, 96], [140, 420], { extrapolateRight: 'clamp' });
  const cy = interpolate(frame, [0, 96], [90, 260], { extrapolateRight: 'clamp' });

  // 软边宽度:扩张时边缘更羽化
  const feather = r * 0.85;

  // UI 轻微透视漂移(原片相机贴着界面缓推)
  const drift = interpolate(frame, [0, 100], [0, 1]);
  const scale = 1.75 - 0.28 * drift;
  const tx = -40 + 70 * drift;
  const ty = -30 + 50 * drift;

  const mask = `radial-gradient(circle ${r + feather}px at ${cx}px ${cy}px, rgba(255,255,255,1) ${Math.max(
    0,
    ((r - feather * 0.25) / (r + feather)) * 100,
  )}%, rgba(255,255,255,0) 100%)`;

  return (
    <AbsoluteFill style={{ background: '#000' }}>
      <AbsoluteFill
        style={{
          WebkitMaskImage: mask,
          maskImage: mask,
          transform: `scale(${scale}) translate(${tx}px, ${ty}px) rotate(${-1.2 + 1.2 * drift}deg)`,
          transformOrigin: '18% 12%',
        }}
      >
        <InboxPanel />
      </AbsoluteFill>
      {/* 聚光自身的白热光晕(叠在界面上方,光心最亮) */}
      <div
        style={{
          position: 'absolute',
          left: cx - r * 0.7,
          top: cy - r * 0.7,
          width: r * 1.4,
          height: r * 1.4,
          borderRadius: '50%',
          background: 'radial-gradient(closest-side, rgba(255,255,255,0.85), rgba(255,255,255,0.25) 45%, transparent 75%)',
          filter: 'blur(26px)',
          opacity: interpolate(frame, [0, 10, 60, 90], [0, 0.9, 0.55, 0], {
            extrapolateRight: 'clamp',
          }),
          pointerEvents: 'none',
        }}
      />
    </AbsoluteFill>
  );
};


// ===== demos/effects/spotlight-sweep-moves/GlowWakeSleepPanel.tsx =====
// glow-wake-sleep-panel v3 —— 扫光方向改为从左向右(用户裁决):
// 聚光灯从左向右"扫过"斜置面板;一条带辉光的紫色光线贴着 UI 顶边/边框/
// logo 划过,光到即亮、光走即暗,尾段沉回黑暗(右缘残留蓝紫)。
import React from 'react';
import { AbsoluteFill, useCurrentFrame, interpolate } from 'remotion';

const W = 1250;
const H = 860;
const R = 26;

const ink = '#3a3a3a';
const mid = '#9a9a98';
const line = '#e2e2e0';

const Row: React.FC<{ w: number; icon?: boolean }> = ({ w, icon = true }) => (
  <div style={{ display: 'flex', alignItems: 'center', gap: 12, height: 30 }}>
    {icon && <div style={{ width: 18, height: 18, borderRadius: 5, background: mid }} />}
    <div style={{ height: 11, width: w, background: '#c9c9c7', borderRadius: 6 }} />
  </div>
);

const TaskCard: React.FC<{ seed: number }> = ({ seed }) => (
  <div style={{ display: 'flex', flexDirection: 'column', gap: 9, padding: '14px 0' }}>
    <div style={{ height: 9, width: 150 + (seed % 3) * 22, background: line, borderRadius: 5 }} />
    <div style={{ height: 12, width: 190 + ((seed * 7) % 4) * 18, background: '#b9b9b7', borderRadius: 6 }} />
    <div style={{ width: 15, height: 11, background: '#d9d9d7', borderRadius: 2 }} />
  </div>
);

// 灰阶斜置面板(ClickUp 布局形:侧栏 + Review/Shipped 两列)
const Panel: React.FC = () => (
  <div style={{
    width: W, height: H, background: '#f6f6f5', borderRadius: R,
    display: 'flex', overflow: 'hidden', boxSizing: 'border-box',
  }}>
    <div style={{ width: 300, borderRight: `2px solid ${line}`, padding: '30px 28px', boxSizing: 'border-box' }}>
      <div style={{ display: 'flex', alignItems: 'center', gap: 12, marginBottom: 34 }}>
        <div style={{ width: 30, height: 30, borderRadius: 8, background: ink }} />
        <div style={{ height: 16, width: 96, background: ink, borderRadius: 7 }} />
      </div>
      <div style={{ display: 'flex', flexDirection: 'column', gap: 14 }}>
        <Row w={72} /><Row w={128} /><Row w={64} />
      </div>
      <div style={{ height: 13, width: 84, background: '#b3b3b1', borderRadius: 6, margin: '34px 0 16px' }} />
      <div style={{ display: 'flex', flexDirection: 'column', gap: 14 }}>
        <Row w={110} /><Row w={140} /><Row w={104} /><Row w={126} />
      </div>
    </div>
    <div style={{ flex: 1, padding: '30px 36px', boxSizing: 'border-box' }}>
      <div style={{ display: 'flex', alignItems: 'center', gap: 14, marginBottom: 30 }}>
        <div style={{ width: 24, height: 20, background: mid, borderRadius: 4 }} />
        <div style={{ height: 17, width: 250, background: '#6f6f6d', borderRadius: 8 }} />
        <div style={{ height: 12, width: 96, background: line, borderRadius: 6, marginLeft: 40 }} />
        <div style={{ height: 12, width: 76, background: line, borderRadius: 6 }} />
      </div>
      <div style={{ display: 'flex', gap: 44 }}>
        {[0, 1].map((col) => (
          <div key={col} style={{ flex: 1 }}>
            <div style={{ borderTop: `4px solid ${col === 0 ? '#b9a44c' : '#6b5bd6'}`, paddingTop: 16, display: 'flex', alignItems: 'center', gap: 10 }}>
              <div style={{ height: 14, width: 88, background: '#5a5a58', borderRadius: 7 }} />
              <div style={{ width: 22, height: 22, borderRadius: 11, border: `2px solid ${line}` }} />
            </div>
            {[0, 1, 2].map((i) => <TaskCard key={i} seed={col * 3 + i + 1} />)}
          </div>
        ))}
      </div>
    </div>
  </div>
);

// 贴边紫色光线(多层辉光:宽糊层+中层+亮芯),水平段,中心在 cx
const EdgeStreak: React.FC<{ cx: number; y: number; len: number; opacity: number; vertical?: boolean }> =
  ({ cx, y, len, opacity, vertical = false }) => {
    const long = { position: 'absolute' as const, left: 0, top: 0, opacity };
    const grad = (c: string) => vertical
      ? `linear-gradient(180deg, rgba(0,0,0,0) 0%, ${c} 45%, ${c} 55%, rgba(0,0,0,0) 100%)`
      : `linear-gradient(90deg, rgba(0,0,0,0) 0%, ${c} 45%, ${c} 55%, rgba(0,0,0,0) 100%)`;
    if (vertical) {
      return (
        <div style={long}>
          <div style={{ position: 'absolute', left: y - 30, top: cx - len / 2, width: 60, height: len, background: grad('rgba(147,80,235,0.55)'), filter: 'blur(26px)' }} />
          <div style={{ position: 'absolute', left: y - 11, top: cx - len / 2, width: 22, height: len, background: grad('rgba(190,120,255,0.85)'), filter: 'blur(9px)' }} />
          <div style={{ position: 'absolute', left: y - 2.5, top: cx - len * 0.4, width: 5, height: len * 0.8, background: grad('#f0deff'), filter: 'blur(1.4px)' }} />
        </div>
      );
    }
    return (
      <div style={long}>
        <div style={{ position: 'absolute', left: cx - len / 2, top: y - 34, width: len, height: 68, background: grad('rgba(150,82,238,0.60)'), filter: 'blur(26px)' }} />
        <div style={{ position: 'absolute', left: cx - len / 2, top: y - 12, width: len, height: 24, background: grad('rgba(196,126,255,0.9)'), filter: 'blur(9px)' }} />
        <div style={{ position: 'absolute', left: cx - len * 0.4, top: y - 3, width: len * 0.8, height: 6, background: grad('#f4e4ff'), filter: 'blur(1.6px)' }} />
        {/* 粉色偏移层:截图里光带紫中带粉 */}
        <div style={{ position: 'absolute', left: cx - len * 0.3, top: y - 7, width: len * 0.6, height: 12, background: grad('rgba(240,150,230,0.75)'), filter: 'blur(5px)' }} />
      </div>
    );
  };

export const GlowWakeSleepPanel: React.FC = () => {
  const frame = useCurrentFrame();

  // 聚光沿面板顶边从左向右匀速扫过(面板本地座标)
  const sx = interpolate(frame, [4, 120], [-260, W + 260], {
    extrapolateLeft: 'clamp', extrapolateRight: 'clamp',
  });
  const sy = 150; // 聚光照在面板上部

  // 全局明暗包络:醒 → 展示 → 睡
  const env = interpolate(frame, [0, 16, 100, 130], [0, 1, 1, 0], {
    extrapolateLeft: 'clamp', extrapolateRight: 'clamp',
  });
  // 尾段右缘残光:最后只剩右缘一线蓝紫
  const rightNear = Math.max(0, Math.min(1, (sx - (W - 420)) / 420));
  const tailBlue = interpolate(frame, [100, 116, 132], [0, 0.8, 0.25], {
    extrapolateLeft: 'clamp', extrapolateRight: 'clamp',
  });

  // logo 描光:聚光经过 logo(本地 x≈60)时点亮
  const logoGlow = Math.exp(-((sx - 60) ** 2) / (2 * 230 ** 2)) * env;

  // 摄影机慢漂移:面板随扫光从左上往右下走(对应扫光方向)
  const drift = interpolate(frame, [0, 132], [-150, 150]);
  const driftY = interpolate(frame, [0, 132], [-36, 36]);

  return (
    <AbsoluteFill style={{ background: '#040308', overflow: 'hidden' }}>
      <div style={{ position: 'absolute', inset: 0, perspective: 1700, perspectiveOrigin: '46% 40%' }}>
        <div style={{
          position: 'absolute', left: 400, top: 150,
          transform: `translate(${drift}px, ${driftY}px) scale(1.05) rotateY(-13deg) rotateX(9deg) rotateZ(-17deg)`,
          transformStyle: 'preserve-3d',
        }}>
          {/* 聚光环境雾光:跟随光头,泛在面板后黑场 */}
          <div style={{
            position: 'absolute', left: sx - 520, top: -300, width: 1040, height: 700,
            background: 'radial-gradient(ellipse at 50% 55%, rgba(110,62,205,0.42), rgba(110,62,205,0) 65%)',
            filter: 'blur(34px)', opacity: env,
          }} />
          {/* 后层重影面板(截图④⑤双层) */}
          <div style={{ position: 'absolute', left: -46, top: 34 }}>
            <div style={{ position: 'relative', filter: 'brightness(0.92)' }}>
              <Panel />
              {/* 重影面板同样受聚光范围控制 */}
              <div style={{
                position: 'absolute', inset: 0, borderRadius: R,
                background: `radial-gradient(circle 680px at ${sx - 46}px ${sy + 34}px, rgba(4,3,8,${1 - 0.45 * env}) 0%, rgba(4,3,8,${1 - 0.14 * env}) 55%, rgba(4,3,8,0.99) 88%)`,
              }} />
            </div>
          </div>
          {/* 面板本体:聚光范围内显影,范围外沉黑 */}
          <div style={{ position: 'relative' }}>
            <Panel />
            <div style={{
              position: 'absolute', inset: 0, borderRadius: R,
              background: `radial-gradient(circle 640px at ${sx}px ${sy}px, rgba(4,3,8,${0.12 * (1 - env)}) 0%, rgba(4,3,8,${1 - 0.72 * env}) 58%, rgba(4,3,8,0.985) 92%)`,
            }} />
            {/* 尾段右缘蓝紫残光罩 */}
            <div style={{
              position: 'absolute', inset: 0, borderRadius: R,
              background: 'linear-gradient(260deg, rgba(120,130,235,0.30) 0%, rgba(120,130,235,0) 16%)',
              opacity: tailBlue,
            }} />
          </div>
          {/* 贴顶边划过的紫色光线(本体) */}
          <EdgeStreak cx={sx} y={-2} len={980} opacity={env} />
          {/* 右缘竖直光线:聚光接近右侧时点亮,尾段转蓝紫 */}
          <EdgeStreak cx={260} y={W + 2} len={620} opacity={Math.max(rightNear * env, tailBlue * 0.9)} vertical />
          {/* logo 一圈描光(截图⑤:光经过 logo 时) */}
          <div style={{
            position: 'absolute', left: 8, top: 12, width: 150, height: 66, borderRadius: 16,
            boxShadow: '0 0 26px 8px rgba(196,126,255,0.75), 0 0 60px 22px rgba(150,82,238,0.4)',
            opacity: logoGlow,
          }} />
          {/* 光头本体眩光:贴着顶边的亮团 */}
          <div style={{
            position: 'absolute', left: sx - 190, top: -84, width: 380, height: 170,
            background: 'radial-gradient(ellipse, rgba(236,205,255,0.95), rgba(180,110,250,0.35) 45%, rgba(0,0,0,0) 72%)',
            filter: 'blur(12px)', opacity: env * 0.95,
          }} />
        </div>
      </div>
    </AbsoluteFill>
  );
};


// ===== demos/effects/spotlight-sweep-moves/SlideSpotlightPan.tsx =====
// slide-spotlight-pan v2 —— 按用户截图 clickup03 重做:
// 紫色光线贴着 UI 面板边缘泛光(先绕左上角竖缘、再沿顶边横走),
// 聚光头匀速右移,照到处显影、离开处沉暗;面板匀速左滑(相机右摇感)。
// 用户裁决:"紫色的光线是贴着ui界面泛光的,聚光的移动是匀速的"。
import React from 'react';
import { AbsoluteFill, useCurrentFrame, interpolate } from 'remotion';

const ink = '#3c3c3a';
const mid = '#98989a';
const line = '#e4e4e2';

const PW = 3000;
const PH = 1400;
const TOP = 150;   // 面板顶边在屏幕座标的 y
const CR = 60;     // 面板圆角

const SideRow: React.FC<{ w: number }> = ({ w }) => (
  <div style={{ display: 'flex', alignItems: 'center', gap: 16, height: 44 }}>
    <div style={{ width: 26, height: 26, borderRadius: 7, background: mid }} />
    <div style={{ height: 15, width: w, background: '#c6c6c4', borderRadius: 7 }} />
  </div>
);

const Task: React.FC<{ seed: number }> = ({ seed }) => (
  <div style={{ display: 'flex', flexDirection: 'column', gap: 13, padding: '26px 0' }}>
    <div style={{ height: 13, width: 210 + (seed % 3) * 30, background: line, borderRadius: 6 }} />
    <div style={{ height: 17, width: 260 + ((seed * 7) % 4) * 26, background: '#aeaeac', borderRadius: 8 }} />
    <div style={{ width: 22, height: 16, background: '#d6d6d4', borderRadius: 3 }} />
  </div>
);

const Col: React.FC<{ accent: string; seed: number; w: number }> = ({ accent, seed, w }) => (
  <div style={{ width: w, flexShrink: 0 }}>
    <div style={{ borderTop: `6px solid ${accent}`, paddingTop: 24, display: 'flex', alignItems: 'center', gap: 14 }}>
      <div style={{ height: 20, width: 120, background: '#525250', borderRadius: 9 }} />
      <div style={{ width: 32, height: 32, borderRadius: 16, border: `3px solid ${line}` }} />
      <div style={{ marginLeft: 'auto', width: 22, height: 22, background: line, borderRadius: 4 }} />
    </div>
    {[0, 1].map((i) => <Task key={i} seed={seed + i} />)}
  </div>
);

// 超宽面板内容(放大特写级别):侧栏 + 顶栏 + 三列看板
const WidePanel: React.FC = () => (
  <div style={{
    width: PW, height: PH, background: '#f4f4f3',
    display: 'flex', boxSizing: 'border-box',
    borderRadius: `${CR}px ${CR}px 0 0`,
  }}>
    <div style={{ width: 560, borderRight: `3px solid ${line}`, padding: '52px 48px', boxSizing: 'border-box' }}>
      <div style={{ display: 'flex', alignItems: 'center', gap: 18, marginBottom: 56 }}>
        <div style={{ width: 46, height: 46, borderRadius: 12, background: ink }} />
        <div style={{ height: 26, width: 150, background: ink, borderRadius: 10 }} />
      </div>
      <div style={{ display: 'flex', flexDirection: 'column', gap: 20 }}>
        <SideRow w={110} /><SideRow w={200} /><SideRow w={100} />
      </div>
      <div style={{ height: 20, width: 130, background: '#adadab', borderRadius: 9, margin: '58px 0 24px' }} />
      <div style={{ display: 'flex', flexDirection: 'column', gap: 20 }}>
        <SideRow w={180} /><SideRow w={220} /><SideRow w={170} />
      </div>
    </div>
    <div style={{ flex: 1, padding: '52px 64px', boxSizing: 'border-box' }}>
      <div style={{ display: 'flex', alignItems: 'center', gap: 22, marginBottom: 48 }}>
        <div style={{ width: 36, height: 30, background: mid, borderRadius: 6 }} />
        <div style={{ height: 26, width: 400, background: '#606060', borderRadius: 11 }} />
        <div style={{ height: 18, width: 150, background: line, borderRadius: 8, marginLeft: 64 }} />
        <div style={{ height: 18, width: 120, background: line, borderRadius: 8 }} />
        <div style={{ height: 18, width: 90, background: line, borderRadius: 8 }} />
      </div>
      <div style={{ display: 'flex', gap: 84 }}>
        <Col accent="#c4ad45" seed={1} w={620} />
        <Col accent="#6b5bd6" seed={4} w={620} />
        <Col accent="#4f8f6f" seed={7} w={620} />
      </div>
    </div>
  </div>
);

export const SlideSpotlightPan: React.FC = () => {
  const frame = useCurrentFrame();
  // 面板匀速左滑(相机右摇)——严格 linear
  const slide = interpolate(frame, [0, 132], [180, -1100]);
  // 聚光头在面板本地座标沿顶边匀速右移——严格 linear
  // 起点在左上角竖缘(负值=还在左缘竖直段),随后转过角沿顶边走
  const head = interpolate(frame, [0, 132], [-360, 2600]);
  const onTop = Math.max(0, head);            // 顶边段进度
  const cornerT = Math.min(1, Math.max(0, (head + 360) / 360)); // 竖缘段 0→1
  const vertHeadY = TOP + 620 - cornerT * 620; // 左缘光头从下往上爬到角

  // 屏幕座标的光头位置
  const headScreenX = slide + onTop;
  // 光头在竖缘阶段贴着面板左缘
  const leftEdgeX = slide;

  // 竖缘光线强度:角前满、转角后衰减
  const vGlow = head < 0 ? 1 : Math.max(0, 1 - head / 900);
  // 顶边光线强度:转角后满
  const hGlow = Math.min(1, Math.max(0, (head + 120) / 240));

  const grad = (dir: string, c: string) =>
    `linear-gradient(${dir}, rgba(0,0,0,0) 0%, ${c} 42%, ${c} 58%, rgba(0,0,0,0) 100%)`;

  return (
    <AbsoluteFill style={{ background: '#050409', overflow: 'hidden' }}>
      {/* 面板层:聚光范围内显影 */}
      <div style={{ position: 'absolute', left: 0, top: TOP, transform: `translateX(${slide}px)` }}>
        <WidePanel />
        {/* 贴面泛光:光头下方的紫光晕染进 UI 顶部(贴着界面泛光的关键层) */}
        <div style={{
          position: 'absolute', left: onTop - 620, top: -30, width: 1240, height: 380,
          background: 'radial-gradient(ellipse 620px 190px at 50% 0%, rgba(168,95,245,0.5), rgba(140,75,235,0.16) 55%, rgba(0,0,0,0) 78%)',
          filter: 'blur(6px)', opacity: hGlow,
        }} />
        {/* 左缘贴面泛光(竖缘阶段) */}
        <div style={{
          position: 'absolute', left: -30, top: vertHeadY - TOP - 320, width: 340, height: 780,
          background: 'radial-gradient(ellipse 170px 390px at 0% 50%, rgba(168,95,245,0.45), rgba(140,75,235,0.14) 55%, rgba(0,0,0,0) 78%)',
          filter: 'blur(6px)', opacity: vGlow,
        }} />
        {/* 聚光范围外压暗:以光头为中心的显影罩(面板本地座标,跟光头走) */}
        <div style={{
          position: 'absolute', inset: -60,
          background: `radial-gradient(ellipse 1350px 1000px at ${onTop + 60}px ${(head < 0 ? vertHeadY - TOP : 40) + 260}px, rgba(0,0,0,0) 26%, rgba(0,0,0,0.55) 60%, rgba(5,4,9,0.96) 100%)`,
        }} />
      </div>

      {/* ===== 贴边紫色光线本体(屏幕层,贴着面板边缘) ===== */}
      {/* 顶边横向光线:三层辉光 + 亮芯,中心=光头 */}
      <div style={{ opacity: hGlow }}>
        <div style={{
          position: 'absolute', left: headScreenX - 640, top: TOP - 56, width: 1280, height: 112,
          background: grad('90deg', 'rgba(150,82,238,0.55)'), filter: 'blur(30px)',
        }} />
        <div style={{
          position: 'absolute', left: headScreenX - 470, top: TOP - 17, width: 940, height: 34,
          background: grad('90deg', 'rgba(196,126,255,0.9)'), filter: 'blur(10px)',
        }} />
        <div style={{
          position: 'absolute', left: headScreenX - 330, top: TOP - 8, width: 660, height: 16,
          background: grad('90deg', 'rgba(240,155,235,0.85)'), filter: 'blur(5px)',
        }} />
        <div style={{
          position: 'absolute', left: headScreenX - 300, top: TOP - 3, width: 600, height: 6,
          background: grad('90deg', '#f6e8ff'), filter: 'blur(1.5px)',
        }} />
      </div>
      {/* 左上角竖缘光线(起始阶段,贴面板左缘) */}
      <div style={{ opacity: vGlow }}>
        <div style={{
          position: 'absolute', left: leftEdgeX - 52, top: vertHeadY - 420, width: 104, height: 840,
          background: grad('180deg', 'rgba(150,82,238,0.5)'), filter: 'blur(28px)',
        }} />
        <div style={{
          position: 'absolute', left: leftEdgeX - 14, top: vertHeadY - 330, width: 28, height: 660,
          background: grad('180deg', 'rgba(196,126,255,0.9)'), filter: 'blur(9px)',
        }} />
        <div style={{
          position: 'absolute', left: leftEdgeX - 3, top: vertHeadY - 260, width: 6, height: 520,
          background: grad('180deg', '#f6e8ff'), filter: 'blur(1.5px)',
        }} />
      </div>

      {/* 顶上方黑檐:光带以上纯黑(截图里顶边之上是黑场) */}
      <div style={{
        position: 'absolute', left: 0, top: 0, width: 1920, height: TOP - 4,
        background: 'linear-gradient(180deg, #050409 78%, rgba(5,4,9,0) 100%)',
      }} />
    </AbsoluteFill>
  );
};
- Read the recipePrompt = when to use, intention, parameter table with typical values and how each one feels, known pitfalls. Treat values as calibrated starting points.
- Get the codetool: git
git clone https://github.com/Vincentwei1021/video-shotcraft && cd video-shotcraft && npm install - Register + rendertool: remotion
npx remotion render <CompositionId> out.mp4 # component: demos/effects/spotlight-sweep-moves/CornerSpotlightReveal.tsx, demos/effects/spotlight-sweep-moves/GlowWakeSleepPanel.tsx, demos/effects/spotlight-sweep-moves/SlideSpotlightPan.tsx - Or re-implementPort the timing/easing from the recipe to HTML + WAAPI (gimgs motion contract) or any engine; keep the same segment windows and easing.
| param | type | default | description |
|---|---|---|---|
| — | |||
Mais nesta categoria
Slam entrance moves
Three high-energy slam entrances: a whip-in perspective stop, a heavy KPI drop, and a shockwave that hits neighboring cards.
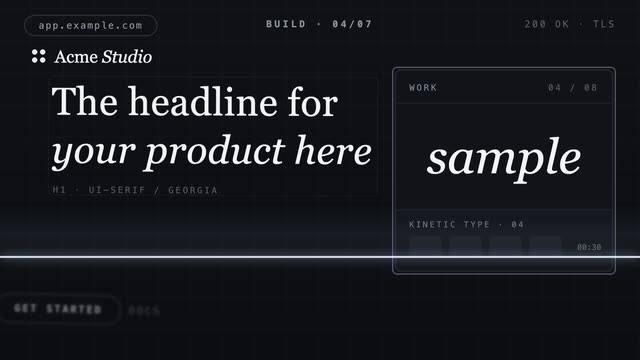
Scanline assemble fly-in
A scan line sweeps down an empty grid, flying each region's component in from off-screen — finishing as the scan ends.
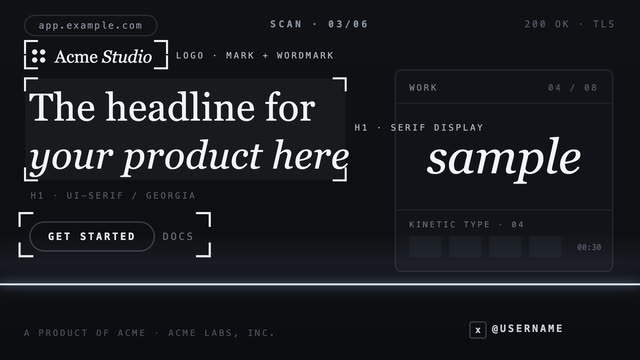
Scanline annotate focus
A bright scan line sweeps down the page, framing each element it passes and labeling it with monospace annotations.
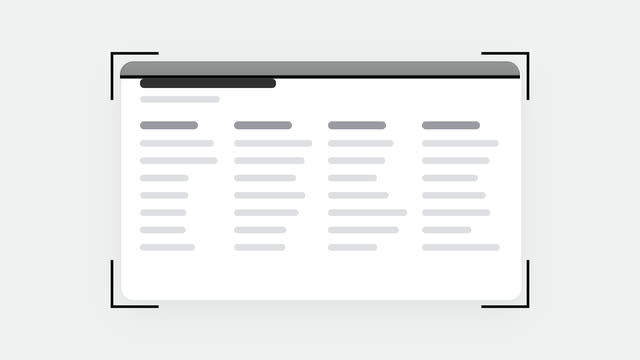
Scan bracket sweep
A skeleton document pops in, viewfinder brackets frame it, and a scan line sweeps it 5 times while it stays completely still.