Motion · Entrada de UI
Value-stagger gradient bars
16 bars enter with delay as a time stagger, while height/hue/offset/blur each lay out as a value gradient from first to last; the second beat moves the stagger origin to center and re-lays the pulse peaking there.
Fonte: video-shotcraft (Vincent Wei) ↗ · Apache-2.0 · Composição Remotion (React/TSX) — vídeo de prévia, sem player no navegador
When to use
A technique-demo/parametric-capability shot; also works directly as a data/spectrum/equalizer-style UI entrance
Intention
Stagger is usually only used to offset time. This card is about it also being able to offset value — the same index decides both "when it moves" and "how much it moves." The two beats form a paired experiment: the first beat's origin is at the start (the gradient spreads monotonically left to right), the second beat's origin moves to center (the gradient spreads symmetrically around the axis). What the viewer sees isn't two animations, it's the same recipe with one parameter swapped. The on-screen code caption changes in sync with the corresponding stagger call, spelling it out.
Duration & energy
- Duration: ~5.0s (150f@30fps)
- Energy: Medium-high (the first beat is a continuous spread, the second beat's center pulse is a clear single peak)
Shot recipe (original Chinese — timing, easing, parameter table, known pitfalls)
意图
stagger 通常只被用来错开时间。这张卡要说的是它还能错开值——同一个索引既决定 "什么时候动",也决定"动到多少"。两拍是一组对照实验:第一拍原点在首位(梯度从左到 右单调铺开),第二拍原点换到中心(梯度以中轴对称铺开)。观众看到的不是两个动画, 而是同一个配方换了一个参数。屏幕上的代码字幕同步换成对应的 stagger 调用,明说这件事。
动效核心
- 核心工具是一个 8 行的
staggerVal(i, n, a, b, ease):把索引归一化成k = i/(n-1)
再 lerp(k, a, b)——等价 anime.js 的 stagger([a, b]) 值模式,可选 ease 让梯度非线性
- 静态梯度(写在 setup 里,一次算完):色相
staggerVal(i,N,200,320)、
最大高度 staggerVal(i,N,92,32)——16 根柱天生是一道从蓝到紫、从高到矮的斜坡
- 动态梯度(每帧用):位移量
staggerVal(i,N,46,14)、模糊量staggerVal(i,N,8,2)
——首位柱要走 46px、糊 8px,末位只走 14px、糊 2px。同一次入场里每根柱的行程都不同
- 第一拍时间错峰:
d = i*0.02,e = seg(t, 0.06+d, 0.28+d, E.outCubic)——从首位起,
16 根摊在 0.3 的窗上;opacity = e、filter = blur((1-e)*b0)、 transform = translateY((1-e)*y0) scaleY(e),三者都被同一个 e 驱动
- 第二拍换原点:
distC = |i - 7.5| / 7.5是到中心的归一化距离,
w = seg(t, 0.56 + distC*0.13, +0.18)——中心柱先动,波向两端扩,这就是 from:'center'
- 第二拍的幅度也是梯度:
amp = lerp(1-distC, 0.06, 0.42),中心柱脉冲 42%、末端只有 6%;
pulse = sin(w*π) 是纯脉冲,同时叠进 scaleY(e*(1+pulse*amp)) 与 brightness(1+pulse*0.55)
- 字幕在 t=0.52 硬切文案,从
scale: stagger([1, 0.35]) hue: stagger([200, 320])
换成 pulse: stagger([.06, .42], { from: 'center' })——正好卡在两拍之间
参数表
| 参数 | 典型值 | 调节手感 | |------|--------|----------| | 柱数 | N=16(left: 8+i*5.4%,宽 3.4%) | 16 根让梯度有足够分档;<8 根梯度读作"每根都不一样"而非一道斜坡,>24 根柱间距要重算 | | 时间错峰 | d = i*0.02(≈3f/根,总 0.3) | 3f 是连绵的铺开;>0.05 会变成逐根点名,梯度的"整体感"丢失 | | 单柱行程 | 窗 0.22(≈33f,outCubic) | 行程是总错峰的 0.73 倍 → 大部分时间十来根同时在动;行程 < 错峰总量时变成一根接一根 | | 高度梯度 | stagger([92, 32])px | 首末 2.9 倍差是明确斜坡;比值 <1.5 读不出梯度,>4 末端柱矮到看不见 | | 色相梯度 | stagger([200, 320]) | 120° 跨度(蓝→紫);跨度 <40° 时色相白给,>200° 会绕回红色让斜坡读作环形 | | 位移/模糊梯度 | stagger([46,14])px / stagger([8,2])px | 这两条是本卡的"值 stagger"主证据——把它们改成常量,动效立刻退化成普通的 stagger 入场 | | 第二拍原点 | from:'center',distC*0.13 | 0.13 是从中心到端点的传播延迟(≈4f);归零则整排同时脉冲,from 参数就没有意义了 | | 脉冲幅度梯度 | lerp(1-distC, 0.06, 0.42) | 中心 42% / 端点 6% 是 7 倍差,波形明显;两端也给大幅度会读作整排一起鼓,中心原点看不出 | | 亮度脉冲 | brightness(1 + pulse*0.55) | 55% 提亮让脉冲在暗底上可读;这一项没做梯度(全柱同幅),是有意的——太多梯度叠一起观众读不清哪个是主角 |
已知坑
- 第一拍与第二拍首尾相接:末柱入场结束于
0.28+15*0.02 = 0.58,而中心柱的脉冲在 0.56
就起。加柱数或加大时间错峰会让入场吃进脉冲段,两拍糊成一件事——加柱必须把 0.56 后推
- 端点柱的第二拍窗口是
0.69→0.87,之后到 t=1 有约 0.13(20f)的完全静止。这是给
观众看清"终态梯度"的时间,不是空白
distC的分母C=(N-1)/2在 N=1 时会除零;staggerVal里已用n<=1 ? 0兜住,
但 distC 没有——柱数改成 1 会 NaN
- 柱位
left: 8+i*5.4%与宽3.4%是为 N=16 手配的(末柱右缘 8+15*5.4+3.4 = 92.4%)。
改柱数必须重算这两个百分比,否则柱会溢出或挤在左半边
- 字幕是 anime.js 的 API 调用字符串,本质是技法说明而不是内容。用在真实成片里
要么换成有语义的标题,要么去掉——否则观众读到的是代码
- 底部的 16 个小圆点(
bottom:17%,opacity .35)是静态装饰,不参与任何动画;它们的
left 偏移 +1.2% 是与柱宽 3.4% 手对的居中量,改柱宽要一起改
- 深底(
#0a0b10)+ 高饱和柱(85%/66%)+ 12px 光晕是一套;浅色主题下光晕与
brightness 脉冲都失效,需要改用 saturate 或阴影表达脉冲
参考实现
demos/ui-entrance/value-stagger-gradient/ (ValueStaggerGradient.tsx)
Reference implementation (Remotion)
- demos/ui-entrance/value-stagger-gradient/ValueStaggerGradient.tsx — https://raw.githubusercontent.com/Vincentwei1021/video-shotcraft/main/demos/ui-entrance/value-stagger-gradient/ValueStaggerGradient.tsx
The component imports shared fixtures from demos/_fixtures and helpers from assets/lib in the repo; SKILL.md there documents the render workflow.
Tudo nesta página também é legível por máquina. Aponte seu agente para o JSON ou adicione o servidor MCP do gimgs e peça para buscar templates de motion.
- Baixe o JSON — contém a receita do plano (timing, easing, tabela de parâmetros, armadilhas) e o código TSX completo.
- Clone o repositório video-shotcraft; o componente importa fixtures de demos/_fixtures e helpers de assets/lib.
- Registre o componente como <Composition> em um projeto Remotion e renderize com `npx remotion render`, ou reimplemente a receita no seu próprio engine.
curl -s https://gimgs.net/motion/value-stagger-gradient.jsongit clone https://github.com/Vincentwei1021/video-shotcraft
# component: demos/ui-entrance/value-stagger-gradient/ValueStaggerGradient.tsx
npx remotion render <CompositionId> out.mp4claude mcp add --transport http gimgs https://gimgs.net/mcp
# then: search_motion_templates / get_motion_template("value-stagger-gradient")Prompt
Use the video-shotcraft shot recipe "Value-stagger gradient bars" (Remotion composition, Apache-2.0) published on gimgs.net.
Recipe JSON (prompt = timing/easing/parameter table/pitfalls, files = TSX source): https://gimgs.net/motion/value-stagger-gradient.json
Raw TSX: https://gimgs.net/motion/value-stagger-gradient/template.html
Repository: https://github.com/Vincentwei1021/video-shotcraft  (component: demos/ui-entrance/value-stagger-gradient/ValueStaggerGradient.tsx; imports demos/_fixtures and assets/lib)
Spec: 1920x1080, 30 fps, 5.5s

1. Read the JSON and follow its "prompt" section (when to use, intention, parameter table, known pitfalls).
2. Adapt it for: <describe what you want>.
3. Either clone the repo, register the component as a <Composition> in a Remotion project and run npx remotion render <CompositionId> out.mp4 — or re-implement the recipe in your own engine (HTML/WAAPI works: keep the same timing and easing).
// ===== demos/ui-entrance/value-stagger-gradient/ValueStaggerGradient.tsx =====
// value-stagger-gradient — Value Stagger 数值梯度(motion-lab 定稿转原生 Remotion)
// stagger 不只错开时间,还把属性值在 N 个元素上铺成梯度:16 根柱入场时
// delay=stagger(时间),同时高度/色相/模糊都是 stagger([from,to]) 的数值梯度;
// 第二拍换 from:'center',脉冲幅度以中心为原点重新铺开。
// 设计坐标 480×270(DesignStage 等比放大),参数表数值以此坐标系标定。
import React from 'react';
import { DesignStage, E, lerp, seg, useT } from '../../_fixtures/Motion';

export const VALUE_STAGGER_GRADIENT_DURATION = 150; // 5000ms @30fps

// 数值梯度 util(等价 stagger([a,b]) 的 value 模式)
const staggerVal = (i: number, n: number, a: number, b: number, ease?: (x: number) => number) => {
  let k = n <= 1 ? 0 : i / (n - 1);
  if (ease) k = ease(k);
  return lerp(k, a, b);
};

const N = 16;
const C = (N - 1) / 2;
const BARS = Array.from({ length: N }, (_, i) => ({
  i,
  hue: staggerVal(i, N, 200, 320), // 数值梯度:色相铺开
  hMax: staggerVal(i, N, 92, 32), // 数值梯度:高度 1→0.35
  distC: Math.abs(i - C) / C,
}));

export const ValueStaggerGradient: React.FC = () => {
  const t = useT();
  return (
    <DesignStage bg="#0a0b10">
      <div
        style={{
          position: 'absolute',
          inset: 0,
          background: '#0a0b10',
          overflow: 'hidden',
          fontFamily: '"SF Mono",Menlo,monospace',
        }}
      >
        {BARS.map(({ i, hue, hMax, distC }) => {
          // 拍一:时间 stagger(linear from first)× 数值梯度(y/blur 同时铺开)
          const d = i * 0.02;
          const e = seg(t, 0.06 + d, 0.28 + d, E.outCubic);
          const y0 = staggerVal(i, N, 46, 14); // 位移量本身也是梯度
          const b0 = staggerVal(i, N, 8, 2); // 模糊量梯度
          // 拍二:from:'center' —— 波与幅度都以中心为原点铺开
          const w = seg(t, 0.56 + distC * 0.13, 0.74 + distC * 0.13);
          const pulse = Math.sin(w * Math.PI);
          const amp = lerp(1 - distC, 0.06, 0.42); // 幅度梯度:中心最大
          return (
            <React.Fragment key={i}>
              <div
                style={{
                  position: 'absolute',
                  bottom: '22%',
                  left: `${8 + i * 5.4}%`,
                  width: '3.4%',
                  height: hMax,
                  borderRadius: 5,
                  transformOrigin: '50% 100%',
                  background: `linear-gradient(180deg,hsl(${hue},85%,66%),hsl(${hue},70%,42%))`,
                  boxShadow: `0 0 12px hsla(${hue},85%,58%,.25)`,
                  opacity: e,
                  filter: `blur(${(1 - e) * b0}px) brightness(${1 + pulse * 0.55})`,
                  transform: `translateY(${(1 - e) * y0}px) scaleY(${e * (1 + pulse * amp)})`,
                }}
              />
              <div
                style={{
                  position: 'absolute',
                  bottom: '17%',
                  left: `${8 + i * 5.4 + 1.2}%`,
                  width: 4,
                  height: 4,
                  borderRadius: '50%',
                  background: `hsl(${hue},70%,55%)`,
                  opacity: 0.35,
                }}
              />
            </React.Fragment>
          );
        })}
        <div
          style={{
            position: 'absolute',
            left: '50%',
            top: '9%',
            transform: 'translateX(-50%)',
            color: '#5b6480',
            fontSize: 10,
            letterSpacing: '1.5px',
            whiteSpace: 'nowrap',
            opacity: 0.5 + 0.5 * seg(t, 0.04, 0.12),
          }}
        >
          {t < 0.52
            ? 'scale: stagger([1, 0.35])  hue: stagger([200, 320])'
            : "pulse: stagger([.06, .42], { from: 'center' })"}
        </div>
      </div>
    </DesignStage>
  );
};
- Read the recipePrompt = when to use, intention, parameter table with typical values and how each one feels, known pitfalls. Treat values as calibrated starting points.
- Get the codetool: git
git clone https://github.com/Vincentwei1021/video-shotcraft && cd video-shotcraft && npm install - Register + rendertool: remotion
npx remotion render <CompositionId> out.mp4 # component: demos/ui-entrance/value-stagger-gradient/ValueStaggerGradient.tsx - Or re-implementPort the timing/easing from the recipe to HTML + WAAPI (gimgs motion contract) or any engine; keep the same segment windows and easing.
| param | type | default | description |
|---|---|---|---|
| — | |||
Mais nesta categoria
Wall reveal: three moves
Three whole-wall batch entrances — bento cell-by-cell light-up, grid wave flip, and blueprint draw-on; all reveal in place with no displacement, complementing the fly-in, displacement-type deck-deal-flyin.
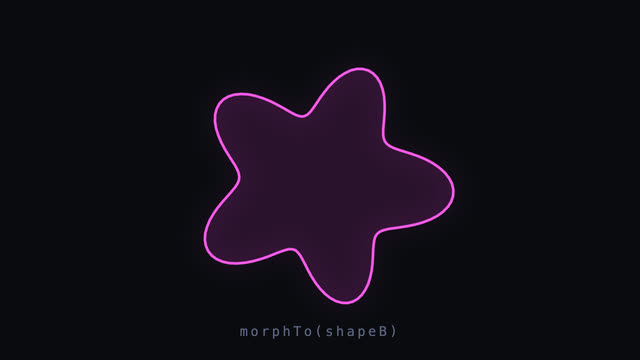
SVG shape morph loop
A 140-point closed outline morphs smoothly into another and back; both shapes are resampled to equal point counts in polar coordinates with per-point radius interpolation and inOutCubic, plus a light scale breathing, slow rotation, and hue drifting 185°→305° mid-morph.
Skeleton reveal
Three-tier reveal from sketch to structure to content — hand-drawn doodles get swapped for skeleton bars, which resolve into real UI.
Runway ground skim entrance
From a low ground-skim angle, UI cards rain down fast and land with zero bounce, then the whole page stands up and squares to camera.