Motion · UI xuất hiện
Khung neon chạy trước dẫn đường
Khung neon phối cảnh sâu tự vẽ ra từ cả hai đầu, trang sáng dần từ tối bên trong khung, thành phần hạ xuống từ trên không kèm bóng mềm cùng hình, các ống neon nền tắt dần ở cuối.
Nguồn: video-shotcraft (Vincent Wei) ↗ · Apache-2.0 · Composition Remotion (React/TSX) — có video preview, không có player trong trình duyệt
Khi nào dùng
Nghi thức "ra mắt" cho bảng UI trong phim thương hiệu nền tối (khung đến trước, nội dung hạ xuống sau); lần xuất hiện đầu tiên của một khu vực tính năng; mở đầu cho đoạn tông neon/cyberpunk.
Ý đồ
Dựng khung trước, lấp nội dung sau: khung dây neon tự vẽ ra từ cả hai đầu như đèn đường băng, tuyên bố "sắp có thứ xuất hiện ở đây"; khi trang sáng dần từ tối bên trong khung, các thành phần hạ xuống từ trên không kèm bóng đổ — khán giả thấy giao diện được "đặt vào" khung. Ba lớp hành động (khung tự vẽ / trang sáng lên / thành phần hạ cánh) phải khớp nhịp đồng bộ: tiến trình hạ cánh song hành với tiến trình sáng lên, hoàn thành trễ hơn một chút, ánh sáng của khung cuối cùng hòa vào quầng sáng của bảng. Các ống neon nền tắt dần ở cuối, nhường độ sáng cho nhân vật chính hoàn tất việc ra mắt.
Thời lượng & năng lượng
- Thời lượng: Khung tự vẽ ~0.6s + sáng lên & hạ cánh ~2s + nền tắt dần thu gọn ~0.8s; cả đoạn 4–4.5s
- Năng lượng: Trung bình cao (ba lớp hành động chồng lên nhau, nhưng đều phục vụ cùng một lần ra mắt)
Công thức cảnh quay (bản gốc tiếng Trung — timing, easing, bảng tham số, lỗi hay gặp)
意图
先立框后填肉:霓虹线框像跑道灯一样两头奔画圈出位置,宣告 "这里要出现东西";页面在框内由暗转亮的同时,组件从空中带影 贴落——观众看见界面被"安放"进框里。三层动作(框奔画/页面点亮/ 组件贴落)必须同步咬合:贴落进程与点亮进程同步推进、稍滞后 收尾,框光最终并入面板辉光。背景霓虹管群终段熄灭,把亮度让给 主角完成收束。
动效核心
- 霓虹框:强透视直角框(梯形),自左缘中点两头同时奔画(描边
动画),带辉光亮头;成型后框光渐并入面板辉光
- 页面点亮:框内面板由暗灰到亮的显影推进(lit 窗口 ~54f)
- 组件贴落:框内全部元素套 FloatWrap(graze-face-tour 同款模式):
初始抬高 100–150px、easeFall 加速贴落、同形软影随高度收敛、 侧栏自上而下/主区自上而下错峰落位;贴落窗口与点亮窗口同步 推进、稍滞后 ~20f 收尾
- 背景:大霓虹管群先亮衬气氛,终段中亮尾熄(先中间后两端熄灭)
参数表
| 参数 | 典型值 | 调节手感 | |------|--------|----------| | 框奔画 | ~18f 两头对奔 | 单头描画读作画图;>30f 观众等不及内容 | | 悬浮高度 | 100–150px、影随高度收敛 | 判例:高度过小+启动过早=影子不可感(v3 第 1 轮返工加大 1.7x 并延后) | | 贴落窗口 | 与点亮窗口同步、滞后 ~20f 收尾 | 贴落先于点亮完=黑屋子里落家具;滞后太多读作两段戏 | | 错峰 | 错开起点、下落重叠并行 | 串行等待被裁(掉落节奏通用判例) | | 背景熄灭 | 终段中亮尾熄 ~22f | 不熄灭主角不突出;同帧全熄读作断电 | | 贴落粒度 | 行/卡级(原片为逐 UI 卡片级,更细) | 粒度越细越贵;行级已验证可读 |
已知坑
- demo 在灰阶/占位素材上调校通过——参数是调校起点非实战定稿,
首次实战须以真实素材回验
- 悬空贴落=clickup 语言核心签名(已验证的口味信号),本卡
与 graze-face-tour 共用 FloatWrap 模式——影子不可感等于没做
- 与 brand-frame-snap 分工:那张是品牌框咔哒定位的
节拍戏;本卡是框先行+内容贴落的登场仪式,框只是序幕
- 衍生方向备忘:视角旋转变体(镜头左→右弧线旋转+同时贴落)
曾被裁"改改再看"(要求所有组件同时贴落),已收敛进 neon-frame-orbit-drop 卡
参考实现
demos/ui-entrance/neon-frame-forerun/ (NeonFrameForerun.tsx) 原片出处:clickup-30.mp4
Mã nguồn tham chiếu (Remotion)
- demos/ui-entrance/neon-frame-forerun/NeonFrameForerun.tsx — https://raw.githubusercontent.com/Vincentwei1021/video-shotcraft/main/demos/ui-entrance/neon-frame-forerun/NeonFrameForerun.tsx
Component import fixture chung từ demos/_fixtures và helper từ assets/lib của repo; xem SKILL.md trong repo để biết quy trình render.
Mọi thứ trên trang này đều có bản máy đọc. Đưa agent link JSON, hoặc thêm MCP server gimgs rồi bảo nó tìm motion template.
- Tải JSON — trong đó có công thức cảnh quay (timing, easing, bảng tham số, lỗi hay gặp) và toàn bộ source TSX.
- Clone repo video-shotcraft; component import fixture chung từ demos/_fixtures và helper từ assets/lib.
- Đăng ký component thành <Composition> trong project Remotion rồi render bằng `npx remotion render`, hoặc dựng lại công thức bằng engine của bạn.
curl -s https://gimgs.net/motion/neon-frame-forerun.jsongit clone https://github.com/Vincentwei1021/video-shotcraft
# component: demos/ui-entrance/neon-frame-forerun/NeonFrameForerun.tsx
npx remotion render <CompositionId> out.mp4claude mcp add --transport http gimgs https://gimgs.net/mcp
# then: search_motion_templates / get_motion_template("neon-frame-forerun")Prompt
Use the video-shotcraft shot recipe "Khung neon chạy trước dẫn đường" (Remotion composition, Apache-2.0) published on gimgs.net.
Recipe JSON (prompt = timing/easing/parameter table/pitfalls, files = TSX source): https://gimgs.net/motion/neon-frame-forerun.json
Raw TSX: https://gimgs.net/motion/neon-frame-forerun/template.html
Repository: https://github.com/Vincentwei1021/video-shotcraft  (component: demos/ui-entrance/neon-frame-forerun/NeonFrameForerun.tsx; imports demos/_fixtures and assets/lib)
Spec: 1920x1080, 30 fps, 4.46s

1. Read the JSON and follow its "prompt" section (when to use, intention, parameter table, known pitfalls).
2. Adapt it for: <describe what you want>.
3. Either clone the repo, register the component as a <Composition> in a Remotion project and run npx remotion render <CompositionId> out.mp4 — or re-implement the recipe in your own engine (HTML/WAAPI works: keep the same timing and easing).
// ===== demos/ui-entrance/neon-frame-forerun/NeonFrameForerun.tsx =====
// neon-frame-forerun v3 —— v2 基础上按用户意见新增(clickup04 五张):
// 框内各组件/文字初始悬空在页面上空(3D 抬起),悬空时在面板上映射
// 同形软影,随页面点亮进程同步先后贴合(FloatWrap 模式,对标截图③:
// tab/组件悬空带错位影 → ④全部贴合)。v2 已有:强透视直角框左缘中点
// 两头奔画、面板原地由暗转亮、背景霓虹管框群中亮尾熄。
import React, { useId } from 'react';
import { AbsoluteFill, useCurrentFrame, interpolate, Easing } from 'remotion';

const easeFall = Easing.bezier(0.5, 0.05, 0.6, 1); // 加速下落、末端软着陆

/* 悬浮 + 同形软影:h=悬浮高度(px)。本体向左上抬起,原位留模糊压暗同形影,
 * h→0 时重合、影子消失(对标批次11 GrazeFaceTour FloatWrap) */
const FloatWrap: React.FC<{ h: number; children: React.ReactNode }> = ({ h, children }) => (
  <div style={{ position: 'relative' }}>
    {h > 1 && (
      <div style={{
        position: 'absolute', inset: 0,
        transform: `translate(${h * 0.26}px, ${h * 0.48}px) scale(${1 + h * 0.0012})`,
        filter: `blur(${2.5 + h * 0.09}px) brightness(0.32) saturate(0.4)`,
        opacity: Math.min(0.4, 0.16 + h * 0.005),
        pointerEvents: 'none',
      }}>{children}</div>
    )}
    <div style={{ transform: `translate(${-h * 0.36}px, ${-h * 0.82}px)` }}>{children}</div>
  </div>
);

/* land=贴合完成时刻(0..1),之前从 H 高度加速贴落 */
const liftOf = (t: number, land: number, H: number) => {
  const FALL = 0.3;
  const p = Math.min(1, Math.max(0, (t - (land - FALL)) / FALL));
  return (1 - easeFall(p)) * H;
};

const mulberry32 = (a: number) => () => {
  let t = (a += 0x6d2b79f5);
  t = Math.imul(t ^ (t >>> 15), t | 1);
  t ^= t + Math.imul(t ^ (t >>> 7), t | 61);
  return ((t ^ (t >>> 14)) >>> 0) / 4294967296;
};

const ink = '#3c3c3a';
const mid = '#9a9a98';
const line = '#e3e3e1';

const PW = 1330;
const PH = 900;
const PL = 1000; // 归一路径长

// 直角矩形路径:从左缘中点出发(对应截图①左缘先亮)
const FRAME_D = `M 0 ${PH / 2} L 0 0 L ${PW} 0 L ${PW} ${PH} L 0 ${PH} Z`;

const Chip: React.FC<{ w: number }> = ({ w }) => (
  <div style={{
    width: w, height: 74, background: '#fdfdfc', border: `2px solid ${line}`,
    borderRadius: 10, padding: '12px 14px', boxSizing: 'border-box',
    display: 'flex', flexDirection: 'column', gap: 9,
  }}>
    <div style={{ height: 11, width: '70%', background: '#b5b5b3', borderRadius: 5 }} />
    <div style={{ height: 9, width: '48%', background: line, borderRadius: 5 }} />
  </div>
);

/* t = 贴落进程(0..1)。各组件按页面展示顺序(侧栏自上而下、主区自上而下)
 * 错峰从空中贴落,悬空时投同形软影(对标截图③虚影→④⑤贴合) */
const GrayHome: React.FC<{ t?: number }> = ({ t = 1 }) => {
  const L = (land: number, H = 72) => liftOf(t, land, H * 1.7);
  return (
  <div style={{ width: PW, height: PH, background: '#f5f5f4', borderRadius: 6, display: 'flex', overflow: 'hidden', boxSizing: 'border-box' }}>
    <div style={{ width: 290, borderRight: `2px solid ${line}`, padding: '26px 24px', boxSizing: 'border-box' }}>
      <FloatWrap h={L(0.24, 84)}>
        <div style={{ display: 'flex', alignItems: 'center', gap: 10, marginBottom: 28 }}>
          <div style={{ width: 28, height: 28, borderRadius: 8, background: ink }} />
          <div style={{ height: 15, width: 88, background: ink, borderRadius: 7 }} />
        </div>
      </FloatWrap>
      {[76, 56, 96, 110, 66, 60].map((w, i) => (
        <FloatWrap key={i} h={L(0.3 + i * 0.045, 66)}>
          <div style={{ display: 'flex', alignItems: 'center', gap: 11, height: 34 }}>
            <div style={{ width: 17, height: 17, borderRadius: 5, background: mid }} />
            <div style={{ height: 10, width: w, background: '#c7c7c5', borderRadius: 5 }} />
          </div>
        </FloatWrap>
      ))}
      <FloatWrap h={L(0.56, 62)}>
        <div style={{ height: 11, width: 70, background: '#b0b0ae', borderRadius: 5, margin: '24px 0 12px' }} />
      </FloatWrap>
      {[104, 126, 96, 118, 88].map((w, i) => (
        <FloatWrap key={i} h={L(0.62 + i * 0.05, 66)}>
          <div style={{ display: 'flex', alignItems: 'center', gap: 11, height: 32 }}>
            <div style={{ width: 16, height: 16, borderRadius: 4, background: '#b8b8b6' }} />
            <div style={{ height: 10, width: w, background: '#cfcfcd', borderRadius: 5 }} />
          </div>
        </FloatWrap>
      ))}
    </div>
    <div style={{ flex: 1, padding: '30px 40px', boxSizing: 'border-box' }}>
      <FloatWrap h={L(0.26, 90)}>
        <div style={{ height: 24, width: 130, background: '#565654', borderRadius: 10, marginBottom: 22 }} />
      </FloatWrap>
      <FloatWrap h={L(0.34, 80)}>
        <div style={{ height: 46, border: `2px solid ${line}`, borderRadius: 12, marginBottom: 26, display: 'flex', alignItems: 'center', padding: '0 16px', background: '#f5f5f4' }}>
          <div style={{ width: 17, height: 17, borderRadius: 9, border: `2px solid ${mid}` }} />
          <div style={{ height: 10, width: 250, background: line, borderRadius: 5, marginLeft: 12 }} />
        </div>
      </FloatWrap>
      <div style={{ display: 'flex', gap: 16, flexWrap: 'wrap', marginBottom: 30 }}>
        {[0, 1, 2, 3, 4, 5, 6].map((i) => (
          <FloatWrap key={i} h={L(0.42 + i * 0.04, 76)}>
            <Chip w={222} />
          </FloatWrap>
        ))}
      </div>
      <FloatWrap h={L(0.72, 60)}>
        <div style={{ display: 'flex', gap: 18, marginBottom: 18 }}>
          {[54, 84, 50, 82].map((w, i) => (
            <div key={i} style={{ height: 11, width: w, background: i === 0 ? '#8a8a88' : line, borderRadius: 5 }} />
          ))}
        </div>
      </FloatWrap>
      {[0, 1, 2, 3].map((i) => (
        <FloatWrap key={i} h={L(0.78 + i * 0.055, 64)}>
          <div style={{ display: 'flex', alignItems: 'center', gap: 14, height: 46, borderBottom: `2px solid ${line}` }}>
            <div style={{ width: 13, height: 13, borderRadius: 7, background: '#c26a6a' }} />
            <div style={{ height: 11, width: 160 + ((i * 37) % 70), background: '#b6b6b4', borderRadius: 5 }} />
            <div style={{ marginLeft: 'auto', display: 'flex', gap: 7 }}>
              {[0, 1, 2].map((k) => <div key={k} style={{ width: 20, height: 20, borderRadius: 10, background: '#d2d2d0' }} />)}
            </div>
          </div>
        </FloatWrap>
      ))}
    </div>
  </div>
  );
};

// 背景霓虹管框:大、亮、带透视错落(截图③④)
type BgFrame = { x: number; y: number; w: number; h: number; hue: string; phase: number; period: number; skew: number };
const rng = mulberry32(20260718);
const HUES = ['#b06af0', '#e879c9', '#f0a35c', '#6a7df0', '#e0679a', '#8a5cf0', '#c06af0'];
const BG_FRAMES: BgFrame[] = Array.from({ length: 18 }).map(() => ({
  x: rng() * 2000 - 120, y: rng() * 1100 - 60,
  w: 160 + rng() * 480, h: 70 + rng() * 220,
  hue: HUES[Math.floor(rng() * HUES.length)],
  phase: rng() * 90, period: 55 + rng() * 70,
  skew: -14 + rng() * 10,
}));

export const NeonFrameForerun: React.FC = () => {
  const frame = useCurrentFrame();
  // 滤镜/渐变 ID 按实例生成,多实例同场不串引(useId 的 «:» 在 url() 里非法,需清洗)
  const uid = useId().replace(/[^a-zA-Z0-9]/g, '');
  // 主框描画:左缘中点向两头奔跑,26 帧成型(截图①→②)
  const trace = interpolate(frame, [2, 28], [0, 1], {
    extrapolateLeft: 'clamp', extrapolateRight: 'clamp',
    easing: Easing.bezier(0.3, 0.1, 0.3, 1),
  });
  // 面板原地显影:框成型后内容从近黑到暗灰(截图②),再全亮(截图③)
  const lit = interpolate(frame, [24, 46, 78], [0.0, 0.3, 1], {
    extrapolateLeft: 'clamp', extrapolateRight: 'clamp',
    easing: Easing.bezier(0.35, 0, 0.3, 1),
  });
  // 主框独立描边可见度:面板亮起后并入面板 rim 辉光(截图③以后细线淡出,糊辉光留下)
  const frameLine = interpolate(frame, [50, 90], [1, 0], {
    extrapolateLeft: 'clamp', extrapolateRight: 'clamp',
  });
  const rimGlow = interpolate(frame, [28, 60, 108, 132], [0.9, 1, 0.75, 0.5], {
    extrapolateLeft: 'clamp', extrapolateRight: 'clamp',
  });
  // 背景:中段全亮(截图③④)→ 尾段熄灭(截图⑤)
  const bgLit = interpolate(frame, [8, 44, 96, 128], [0.15, 1, 0.85, 0.06], {
    extrapolateLeft: 'clamp', extrapolateRight: 'clamp',
  });
  // 强透视 → 缓和:框飞入时角度大,面板亮起后落定(截图①梯形→③④缓斜)
  const settle = interpolate(frame, [0, 70], [0, 1], {
    extrapolateLeft: 'clamp', extrapolateRight: 'clamp',
    easing: Easing.out(Easing.cubic),
  });
  const rotY = -26 + 15 * settle;
  const rotX = 7 - 3 * settle;
  const rotZ = -9 + 4.5 * settle;
  const scale = 0.94 + 0.1 * settle;
  const headP = trace * (PL / 2);
  // 组件贴落进程:与页面点亮(lit 24→78)同步推进,稍滞后收尾——
  // "和页面的展示同步完成贴合"
  const drop = interpolate(frame, [34, 98], [0, 1], {
    extrapolateLeft: 'clamp', extrapolateRight: 'clamp',
  });

  return (
    <AbsoluteFill style={{ background: '#060509', overflow: 'hidden' }}>
      {/* 背景霓虹管框群 */}
      <svg width={1920} height={1080} style={{ position: 'absolute' }}>
        <defs>
          <filter id={`bgblur-${uid}`} x="-60%" y="-60%" width="220%" height="220%">
            <feGaussianBlur stdDeviation={7} />
          </filter>
        </defs>
        {BG_FRAMES.map((b, i) => {
          const breath = 0.5 + 0.5 * Math.sin(((frame + b.phase) / b.period) * Math.PI * 2);
          const op = bgLit * (0.18 + 0.4 * breath);
          return (
            <g key={i} transform={`translate(${b.x} ${b.y}) skewY(${b.skew * 0.4}) skewX(${b.skew})`}>
              <rect width={b.w} height={b.h} rx={4} fill="none"
                stroke={b.hue} strokeWidth={7} filter={`url(#bgblur-${uid})`} opacity={op * 0.8} />
              <rect width={b.w} height={b.h} rx={4} fill="none"
                stroke={b.hue} strokeWidth={2} opacity={op} />
            </g>
          );
        })}
      </svg>
      {/* 主体:强透视斜置的框 + 面板 */}
      <div style={{ position: 'absolute', inset: 0, perspective: 1600, perspectiveOrigin: '42% 40%' }}>
        <div style={{
          position: 'absolute', left: (1920 - PW) / 2, top: (1080 - PH) / 2 - 10,
          transform: `scale(${scale}) rotateY(${rotY}deg) rotateX(${rotX}deg) rotateZ(${rotZ}deg)`,
          transformStyle: 'preserve-3d',
        }}>
          {/* 面板:原地由暗转亮(无位移缩放) */}
          <div style={{ opacity: trace > 0.55 ? 1 : 0, filter: `brightness(${Math.max(0.05, lit)})` }}>
            <GrayHome t={drop} />
            {/* 未点亮时的冷色压暗罩 */}
            <div style={{
              position: 'absolute', inset: 0, borderRadius: 6,
              background: 'linear-gradient(150deg, rgba(30,20,60,0.5), rgba(0,0,0,0.78))',
              opacity: 1 - lit,
            }} />
          </div>
          {/* 面板 rim 辉光(框光并入后由它承担,底缘最强——对应截图③④底/右缘粉光) */}
          <div style={{
            position: 'absolute', left: -10, top: -10, width: PW + 20, height: PH + 20,
            borderRadius: 12, opacity: rimGlow * Math.min(1, trace * 1.6),
            boxShadow: '-18px -8px 42px 6px rgba(185,95,240,0.42), 22px 24px 56px 12px rgba(240,150,90,0.30), 0 14px 80px 22px rgba(200,100,220,0.20)',
          }} />
          {/* 霓虹描边框:左缘中点出发两头奔画,直角转角 */}
          <svg width={PW + 80} height={PH + 80} viewBox={`-40 -40 ${PW + 80} ${PH + 80}`}
            style={{ position: 'absolute', left: -40, top: -40 }}>
            <defs>
              <linearGradient id={`mainfg-${uid}`} gradientUnits="userSpaceOnUse" x1={0} y1={0} x2={PW} y2={PH}>
                <stop offset="0%" stopColor="#c07af5" />
                <stop offset="38%" stopColor="#e58bd8" />
                <stop offset="72%" stopColor="#f0b06a" />
                <stop offset="100%" stopColor="#e8925c" />
              </linearGradient>
              <filter id={`fblur-${uid}`} x="-40%" y="-40%" width="180%" height="180%">
                <feGaussianBlur stdDeviation={10} />
              </filter>
              <filter id={`fblur2-${uid}`} x="-40%" y="-40%" width="180%" height="180%">
                <feGaussianBlur stdDeviation={3} />
              </filter>
            </defs>
            {[1, -1].map((dir) => (
              <g key={dir}>
                {/* 糊辉光层:一直保留 */}
                <path d={FRAME_D} pathLength={PL} fill="none" stroke={`url(#mainfg-${uid})`}
                  strokeWidth={14} strokeLinecap="butt" filter={`url(#fblur-${uid})`}
                  strokeDasharray={`${headP} ${PL}`}
                  strokeDashoffset={dir === 1 ? 0 : -(PL - headP)}
                  opacity={0.6 * rimGlow} />
                {/* 亮芯细线:面板亮起后淡出并入 rim */}
                <path d={FRAME_D} pathLength={PL} fill="none" stroke={`url(#mainfg-${uid})`}
                  strokeWidth={3.5} strokeLinecap="butt"
                  strokeDasharray={`${headP} ${PL}`}
                  strokeDashoffset={dir === 1 ? 0 : -(PL - headP)}
                  opacity={0.95 * Math.max(frameLine, 0.25)} />
                {/* 奔跑亮头 */}
                {trace < 1 && (
                  <path d={FRAME_D} pathLength={PL} fill="none" stroke="#ffffff"
                    strokeWidth={6} strokeLinecap="round" filter={`url(#fblur2-${uid})`}
                    strokeDasharray={`8 ${PL}`}
                    strokeDashoffset={dir === 1 ? -(Math.max(0, headP - 8)) : -(PL - headP)}
                    opacity={0.95} />
                )}
              </g>
            ))}
          </svg>
        </div>
      </div>
    </AbsoluteFill>
  );
};
- Read the recipePrompt = when to use, intention, parameter table with typical values and how each one feels, known pitfalls. Treat values as calibrated starting points.
- Get the codetool: git
git clone https://github.com/Vincentwei1021/video-shotcraft && cd video-shotcraft && npm install - Register + rendertool: remotion
npx remotion render <CompositionId> out.mp4 # component: demos/ui-entrance/neon-frame-forerun/NeonFrameForerun.tsx - Or re-implementPort the timing/easing from the recipe to HTML + WAAPI (gimgs motion contract) or any engine; keep the same segment windows and easing.
| param | type | default | description |
|---|---|---|---|
| — | |||
Cùng danh mục
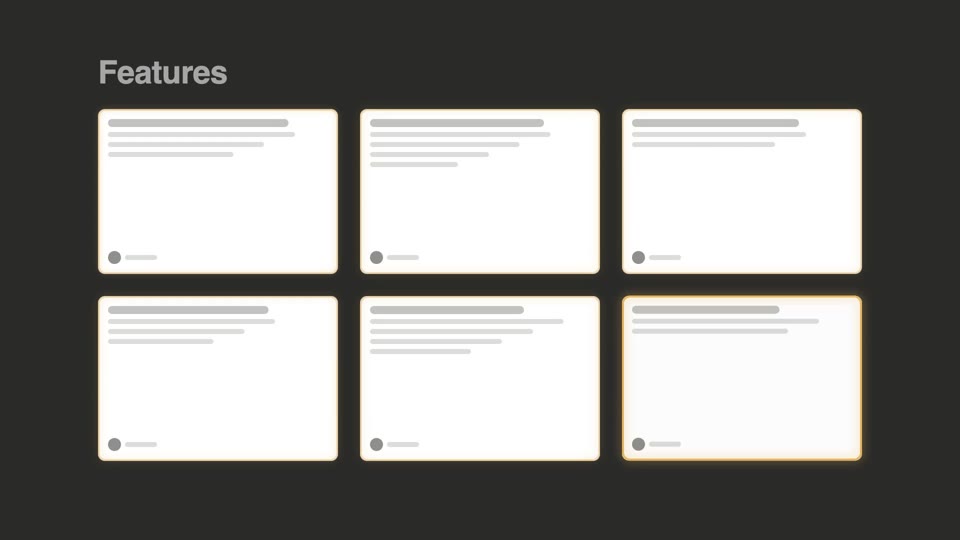
Hiện hình cả bức tường: ba kiểu
Ba kiểu vào hình hàng loạt cả bức tường — bento thắp sáng từng ô, lưới lật sóng, và bản vẽ blueprint hiện nét; tất cả hiện hình tại chỗ không dịch chuyển, bổ trợ cho deck-deal-flyin kiểu bay vào dịch chuyển.
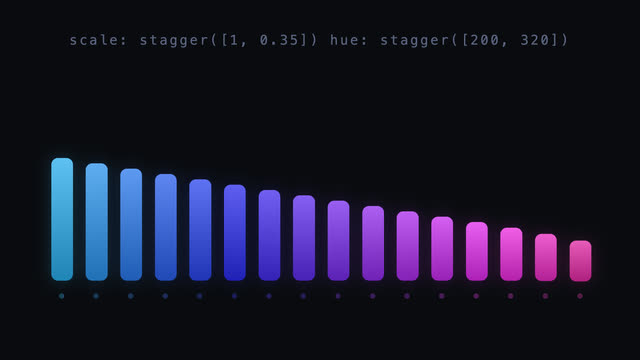
Cột nhập theo bậc thang giá trị
16 cột vào hình với delay là bậc thang thời gian, đồng thời chiều cao/sắc màu/dịch chuyển/độ mờ mỗi thuộc tính tự trải thành bậc thang giá trị từ đầu đến cuối; nhịp hai đổi gốc lệch nhịp về tâm, biên độ xung lấy tâm làm đỉnh trải lại.
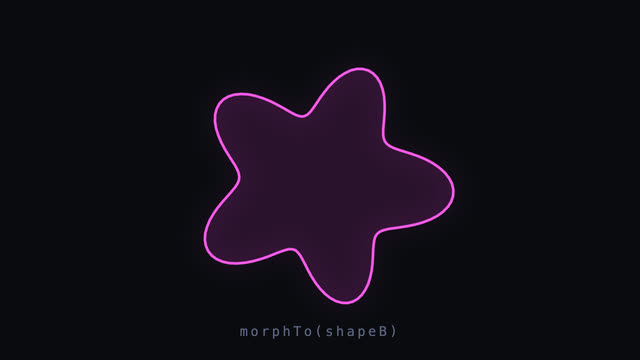
Biến hình SVG lặp vòng
Một viền khép kín 140 điểm biến hình mượt sang viền khác rồi biến lại, hai hình trước hết được lấy mẫu lại cùng số điểm trong tọa độ cực, nội suy bán kính từng điểm + inOutCubic, giữa chừng chèn hơi thở scale nhẹ, tự xoay chậm và sắc màu trôi 185°→305°.
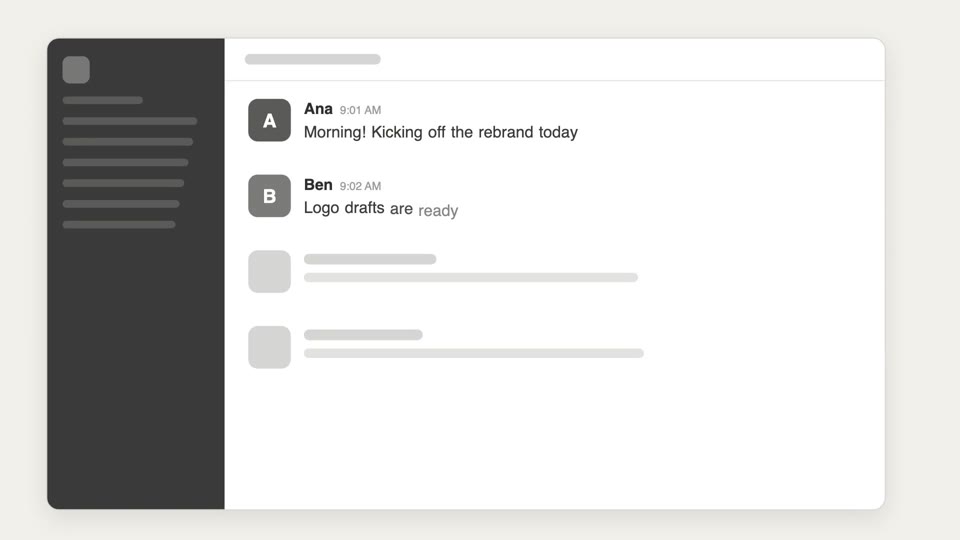
Hiện hình từ khung xương
Hiện hình ba tầng từ phác thảo đến khung xương đến nội dung — nét vẽ tay được thay bằng thanh xám khung xương rồi rõ nét thành UI thật.