Motion · Light & emphasis
Scanline assemble fly-in
A scan line sweeps down an empty grid, flying each region's component in from off-screen — finishing as the scan ends.
Source: video-shotcraft (Vincent Wei) ↗ · Apache-2.0 · Remotion composition (React/TSX) — preview video, no in-browser player
When to use
An opening for "the page builds itself"; the core demo for AI website-builder/auto-layout products; a blank-to-finished capability narrative
Intention
Give "the page being generated" a believable construction order: the scan line is the progress bar, the components flying in from off-screen are the construction actions. The critical thing is that the last piece finishes assembling exactly as the scan finishes — if the scan line finishes early or a component trails behind, the causal link of "scan drives assembly" falls apart.
Duration & energy
- Duration: About 4.6s (138f@30fps)
- Energy: Medium-high (the scan line is steady, but every component fly-in is a burst, with rising density)
Shot recipe (original Chinese — timing, easing, parameter table, known pitfalls)
意图
让"页面被生成"这件事有一个可信的施工顺序:扫描线是施工进度条, 组件从画外飞进来贴合是施工动作。关键是扫完那一刻恰好装完最后一块 ——扫描线提前收工或组件拖尾都会让"扫描驱动装配"的因果关系散掉。
动效核心
- 空页底只有暗网格(24px 双向
repeating-linear-gradient,
rgba(255,255,255,.025)、整层 opacity .5)——组件飞入前唯一可见的东西
- 扫描线
t 0.05→0.72匀速走 y −30→300,
0.03→0.08 淡入、0.72→0.77 淡出
- 触发时刻由组件落点 y 反算:
ft = 0.05 + ((y+30)/330)*0.67 − 0.02,
再钳制最小间隔 0.045;提前 0.02 起飞让组件与扫描线同时到位
- 7 个组件各有独立飞入方案
from:[dx,dy]+rot:顶栏自上(0,−70),
logo 自左(−160,−30, −6°),模块卡自右(230,40, 5°),H1 自左下 (−260,60, −4°),CTA 自下(−60,130, 3°),页脚/社交自下方两侧
- 飞入
seg(ft, ft+0.15, outBack)过冲贴合;运动中按1−a加
blur(≤2.2px) 残影,a>0.97 即清零
- 落位瞬间闪一道细亮边:
inset:-3px的 1px 强调色描边,
ft+0.11→+0.15 亮起、+0.15→+0.26 收掉
- 状态行统计
a≥0.99的组件数显示BUILD · 0n/07,
0.80→0.86 后切 ASSEMBLY · COMPLETE
参数表
| 参数 | 典型值 | 调节手感 | |------|--------|----------| | 扫描线 | t 0.05→0.72 匀速,y −30→300 | 收工时刻要略晚于最后一块落位,才读作"扫完即装完" | | 触发换算 | ft = 0.05 + ((y+30)/330)·0.67 − 0.02 | 那个 −0.02 是提前起飞量:去掉就变成"扫过之后才动",慢半拍 | | 最小间隔 | prev + 0.045 | y 接近的页脚/社交会同时飞;钳制后才有"一块一块"的密度 | | 飞入位移 | 画外 60–260px,按组件所在方位定 | 位移小于 60px 读作"抖一下就位",不是从画外来 | | 飞入旋转 | ±3–8° | 超过 12° 就读作"翻滚",贴合时不服帖 | | 飞入缓动 | outBack,0.15 时长 | outBack 的过冲是"吸附贴合"的手感;outCubic 就成了滑入 | | 残影模糊 | blur ≤2.2px,随 1−a 衰减,a>0.97 清零 | 不清零会留一层永久糊;阈值必须留裕量 | | 落位闪边 | inset −3px、1px 强调色,0.04 亮 / 0.11 落 | 闪边是"咬合"的听觉替代品,去掉后落位没有实感 |
已知坑
- 触发时刻与 plan 里的落点 y 绑定:换页面模板后每个组件的 y 要重测,
否则组件在扫描线到达前就飞入
filter与transform同时作用于组件节点,落位后必须把 filter 设回
none(不是 blur(0))——留着合成层会持续吃 GPU
- 闪边层是 append 到组件内部的子节点,组件本身若有
overflow:hidden
会把 inset:-3px 裁掉,需改成外层兄弟节点
- 与
scanline-annotate-focus共用同一套页面模板与扫描线;两张卡可以
串联(先装配、后分析),但扫描线要换向或留空档,否则读作重复
- 页面内容为中性占位模板,ACCENT(
#9fb6e8)可按项目替换
参考实现
demos/effects/scanline-assemble-flyin/ (ScanlineAssembleFlyin.tsx)
Reference implementation (Remotion)
- demos/effects/scanline-assemble-flyin/ScanlineAssembleFlyin.tsx — https://raw.githubusercontent.com/Vincentwei1021/video-shotcraft/main/demos/effects/scanline-assemble-flyin/ScanlineAssembleFlyin.tsx
The component imports shared fixtures from demos/_fixtures and helpers from assets/lib in the repo; SKILL.md there documents the render workflow.
Everything on this page is also machine-readable. Point your agent at the JSON, or add the gimgs MCP server and ask it to search motion templates.
- Fetch the JSON — it holds the shot recipe (timing, easing, parameter table, pitfalls) and the full TSX source.
- Clone the video-shotcraft repo; the component imports shared fixtures from demos/_fixtures and helpers from assets/lib.
- Register the component as a <Composition> in a Remotion project and render with `npx remotion render`, or re-implement the recipe in your own engine.
curl -s https://gimgs.net/motion/scanline-assemble-flyin.jsongit clone https://github.com/Vincentwei1021/video-shotcraft
# component: demos/effects/scanline-assemble-flyin/ScanlineAssembleFlyin.tsx
npx remotion render <CompositionId> out.mp4claude mcp add --transport http gimgs https://gimgs.net/mcp
# then: search_motion_templates / get_motion_template("scanline-assemble-flyin")Prompt
Use the video-shotcraft shot recipe "Scanline assemble fly-in" (Remotion composition, Apache-2.0) published on gimgs.net.
Recipe JSON (prompt = timing/easing/parameter table/pitfalls, files = TSX source): https://gimgs.net/motion/scanline-assemble-flyin.json
Raw TSX: https://gimgs.net/motion/scanline-assemble-flyin/template.html
Repository: https://github.com/Vincentwei1021/video-shotcraft  (component: demos/effects/scanline-assemble-flyin/ScanlineAssembleFlyin.tsx; imports demos/_fixtures and assets/lib)
Spec: 1920x1080, 30 fps, 5.1s

1. Read the JSON and follow its "prompt" section (when to use, intention, parameter table, known pitfalls).
2. Adapt it for: <describe what you want>.
3. Either clone the repo, register the component as a <Composition> in a Remotion project and run npx remotion render <CompositionId> out.mp4 — or re-implement the recipe in your own engine (HTML/WAAPI works: keep the same timing and easing).
// ===== demos/effects/scanline-assemble-flyin/ScanlineAssembleFlyin.tsx =====
// scanline-assemble-flyin — Scanline Assemble 扫描装配组件飞入(motion-lab 定稿转原生 Remotion)
// 页面开场为空的暗底网格,一条亮扫描线自上而下掠过;扫过每个区块的落点后,该处组件从画外
// 四面八方飞入(左上 logo 自左、右侧模块卡自右、H1 自左下、CTA 自下、页脚社交自下方两侧),
// 带轻微过冲和残影模糊,贴合落位瞬间闪一道细亮边。扫完整页恰好装配完成。
// 页面内容为中性占位模板,强调色可按项目替换。设计坐标 480×270(DesignStage 等比放大)。
import React from 'react';
import { DesignStage, E, lerp, seg, useT } from '../../_fixtures/Motion';

export const SCANLINE_ASSEMBLE_FLYIN_DURATION = 138; // 4600ms @30fps

const MONO = "'SF Mono',Menlo,Consolas,monospace";
const SERIF = "Georgia,'Times New Roman',serif";
const ACCENT = '#9fb6e8'; // 模板强调色,可按项目替换
const A_RGB = '159,182,232';

/* ---- 每个组件的飞入方案:y=扫描落点(触发用),from=画外起点位移,rot=起始旋转 ---- */
type Plan = { key: string; y: number; from: [number, number]; rot: number; ft: number };
const PLAN: Plan[] = (() => {
  const ps: Plan[] = [
    { key: 'topbar', y: 30, from: [0, -70], rot: 0, ft: 0 },
    { key: 'logo', y: 53, from: [-160, -30], rot: -6, ft: 0 },
    { key: 'module', y: 100, from: [230, 40], rot: 5, ft: 0 },
    { key: 'h1', y: 148, from: [-260, 60], rot: -4, ft: 0 },
    { key: 'cta', y: 192, from: [-60, 130], rot: 3, ft: 0 },
    { key: 'footer', y: 257, from: [-140, 70], rot: 2, ft: 0 },
    { key: 'social', y: 262, from: [150, 70], rot: -3, ft: 0 },
  ];
  // 触发时刻:扫描线(0.05→0.72 纵扫 -30→300)到达组件落点 y,依序钳制最小间隔
  let prev = -1;
  for (const pl of ps) {
    pl.ft = Math.max(0.05 + ((pl.y + 30) / 330) * 0.67 - 0.02, prev + 0.045);
    prev = pl.ft;
  }
  return ps;
})();
const FT: Record<string, number> = Object.fromEntries(PLAN.map((pl) => [pl.key, pl.ft]));

export const ScanlineAssembleFlyin: React.FC = () => {
  const t = useT();

  // 扫描线纵扫 + 首尾淡入淡出
  const ly = lerp(seg(t, 0.05, 0.72), -30, 300);
  const lineOpacity = seg(t, 0.03, 0.08) * (1 - seg(t, 0.72, 0.77));

  // 组件飞入样式:outBack 过冲贴合 + 运动残影 blur(落位即清晰)
  const fly = ({ from, rot, ft }: Plan): React.CSSProperties => {
    const a = seg(t, ft, ft + 0.15, E.outBack);
    const vis = t >= ft ? 1 : 0;
    const speed = a > 0 && a < 0.97 ? 1 - a : 0;
    return {
      position: 'absolute',
      opacity: vis * Math.min(1, seg(t, ft, ft + 0.06) * 1.4),
      transform: `translate(${lerp(a, from[0], 0)}px,${lerp(a, from[1], 0)}px) rotate(${lerp(a, rot, 0)}deg)`,
      filter: speed > 0.03 ? `blur(${speed * 2.2}px)` : 'none',
    };
  };
  // 贴合瞬间闪一道细亮边(组件内层 inset:-3px 描边)
  const flash = (ft: number): React.CSSProperties => ({
    position: 'absolute',
    inset: -3,
    border: `1px solid rgba(${A_RGB},.9)`,
    borderRadius: 4,
    opacity: seg(t, ft + 0.11, ft + 0.15) * (1 - seg(t, ft + 0.15, ft + 0.26)),
    pointerEvents: 'none',
  });

  // 已落位组件计数(a≥0.99 视为贴合完成)
  const placed = PLAN.reduce((acc, pl) => acc + (seg(t, pl.ft, pl.ft + 0.15, E.outBack) >= 0.99 ? 1 : 0), 0);
  const done = seg(t, 0.8, 0.86);

  return (
    <DesignStage bg="#0a0b0e">
      {/* 页面底渐变:原 CSS 为 #101116→#0c0d11,样片 x264 近黑量化后实测为
          rgb(15,17,20)→rgb(10,12,16),按对照帧校准取 #0f1114→#0a0c10 */}
      <div style={{ position: 'absolute', inset: 0, background: 'linear-gradient(180deg,#0f1114,#0a0c10)' }}>
        {/* 空页底:暗网格(组件飞入前唯一可见的东西) */}
        <div
          style={{
            position: 'absolute',
            inset: 0,
            opacity: 0.5,
            background:
              'repeating-linear-gradient(0deg,transparent 0 23px,rgba(255,255,255,.025) 23px 24px),' +
              'repeating-linear-gradient(90deg,transparent 0 23px,rgba(255,255,255,.025) 23px 24px)',
          }}
        />
        {/* 顶栏(url pill + 状态)——整组自上方落下 */}
        <div style={{ ...fly(PLAN[0]), left: 0, top: 0, width: 480, height: 30 }}>
          <div style={{ position: 'absolute', left: 18, top: 11, padding: '3px 10px', border: '1px solid #2a2c33', borderRadius: 9, font: `500 7px ${MONO}`, color: '#8d93a0', letterSpacing: 1 }}>app.example.com</div>
          <div style={{ position: 'absolute', right: 18, top: 14, font: `500 7px ${MONO}`, color: '#565b66', letterSpacing: 1.5 }}>200 OK · TLS</div>
          <div style={flash(FT.topbar)} />
        </div>
        {/* logo:点阵 mark + 衬线字标——自左飞入 */}
        <div style={{ ...fly(PLAN[1]), left: 24, top: 35, width: 100, height: 18 }}>
          {[0, 1, 2, 3].map((i) => (
            <div key={i} style={{ position: 'absolute', width: 4, height: 4, borderRadius: '50%', background: '#e8e9ee', left: (i % 2) * 6, top: 2 + (i >> 1) * 6 }} />
          ))}
          <div style={{ position: 'absolute', left: 17, top: 0, font: `400 13px ${SERIF}`, color: '#eceef2' }}>
            Acme <i>Studio</i>
          </div>
          <div style={flash(FT.logo)} />
        </div>
        {/* H1 两行 + 注脚——自左下飞入 */}
        <div style={{ ...fly(PLAN[3]), left: 22, top: 64, width: 242, height: 84 }}>
          <div style={{ position: 'absolute', left: 0, top: 0, font: `400 29px ${SERIF}`, color: '#f2f3f6', letterSpacing: 0.3 }}>The headline for</div>
          <div style={{ position: 'absolute', left: 0, top: 36, font: `italic 400 29px ${SERIF}`, color: '#f2f3f6', letterSpacing: 0.3 }}>your product here</div>
          <div style={{ position: 'absolute', left: 1, top: 79, font: `500 6.5px ${MONO}`, color: '#565b66', letterSpacing: 1.5 }}>H1 · UI-SERIF / GEORGIA</div>
          <div style={flash(FT.h1)} />
        </div>
        {/* CTA 行——自下飞入 */}
        <div style={{ ...fly(PLAN[4]), left: 22, top: 166, width: 136, height: 26 }}>
          <div style={{ position: 'absolute', left: 0, top: 0, padding: '6px 13px', border: '1px solid #3a3d46', borderRadius: 12, font: `600 7.5px ${MONO}`, color: '#e8e9ee', letterSpacing: 1.5 }}>GET STARTED</div>
          <div style={{ position: 'absolute', left: 100, top: 7, font: `500 7.5px ${MONO}`, color: '#6a707c', letterSpacing: 1.5 }}>DOCS</div>
          <div style={flash(FT.cta)} />
        </div>
        {/* 右侧模块卡——自右飞入 */}
        {/* 原采集页为 content-box:162×150 外加 1px 边框(总 164×152),补 boxSizing 对齐几何 */}
        <div style={{ ...fly(PLAN[2]), left: 296, top: 52, width: 162, height: 150, boxSizing: 'content-box', background: '#121319', border: '1px solid #23252d', borderRadius: 5 }}>
          <div style={{ position: 'absolute', left: 10, top: 9, font: `500 6.5px ${MONO}`, color: '#7c828e', letterSpacing: 1.5 }}>WORK</div>
          <div style={{ position: 'absolute', right: 10, top: 9, font: `500 6.5px ${MONO}`, color: '#565b66', letterSpacing: 1.5 }}>04 / 08</div>
          <div style={{ position: 'absolute', left: 0, top: 24, width: '100%', height: 1, background: '#1e2028' }} />
          <div style={{ position: 'absolute', left: 0, top: 44, width: '100%', textAlign: 'center', font: `italic 400 36px ${SERIF}`, color: '#f4f5f8' }}>sample</div>
          <div style={{ position: 'absolute', left: 0, top: 104, width: '100%', height: 1, background: '#1e2028' }} />
          <div style={{ position: 'absolute', left: 10, top: 112, font: `500 6px ${MONO}`, color: '#6a707c', letterSpacing: 1.5 }}>KINETIC TYPE · 04</div>
          {[0, 1, 2, 3].map((i) => (
            <div key={i} style={{ position: 'absolute', left: 10 + i * 30, top: 124, width: 24, height: 16, background: '#1a1c23', borderRadius: 2 }} />
          ))}
          <div style={{ position: 'absolute', right: 8, top: 129, font: `500 6px ${MONO}`, color: '#565b66' }}>00:30</div>
          <div style={flash(FT.module)} />
        </div>
        {/* 页脚——自左下飞入 */}
        <div style={{ ...fly(PLAN[5]), left: 18, top: 243, width: 220, height: 14 }}>
          <div style={{ position: 'absolute', left: 0, top: 3, font: `500 6.5px ${MONO}`, color: '#4c515c', letterSpacing: 1.5 }}>A PRODUCT OF ACME · ACME LABS, INC.</div>
          <div style={flash(FT.footer)} />
        </div>
        {/* 社交 chip——自右下飞入 */}
        <div style={{ ...fly(PLAN[6]), left: 352, top: 239, width: 108, height: 16 }}>
          {/* 同为 content-box:11×11 外加 1px 边框(总 13×13) */}
          <div style={{ position: 'absolute', left: 0, top: 2, width: 11, height: 11, boxSizing: 'content-box', border: '1px solid #3a3d46', borderRadius: 2, font: `600 7px ${MONO}`, color: '#c9cdd6', textAlign: 'center', lineHeight: '11px' }}>x</div>
          <div style={{ position: 'absolute', left: 17, top: 3, font: `600 7.5px ${MONO}`, color: '#c9cdd6', letterSpacing: 1.5 }}>@USERNAME</div>
          <div style={flash(FT.social)} />
        </div>
      </div>

      {/* ---- 扫描线(渐变拖尾 + 亮芯) ---- */}
      <div
        style={{
          position: 'absolute',
          left: 0,
          top: 0,
          width: '100%',
          height: 40,
          background: `linear-gradient(180deg,transparent,rgba(${A_RGB},.07) 55%,rgba(${A_RGB},.02) 96%,transparent)`,
          transform: `translateY(${ly - 40}px)`,
          opacity: lineOpacity,
        }}
      >
        <div
          style={{
            position: 'absolute',
            bottom: 0,
            left: 0,
            width: '100%',
            height: 1.5,
            background: 'rgba(238,244,255,.9)',
            boxShadow: `0 0 7px ${ACCENT},0 0 18px rgba(${A_RGB},.35)`,
          }}
        />
      </div>

      {/* ---- 顶部状态行:BUILD 计数 → ASSEMBLY · COMPLETE ---- */}
      <div
        style={{
          position: 'absolute',
          left: '50%',
          top: 14,
          transform: 'translateX(-50%)',
          font: `600 7px ${MONO}`,
          letterSpacing: 2,
          color: done >= 1 ? ACCENT : '#8d93a0',
          opacity: seg(t, 0.02, 0.07),
          zIndex: 60,
        }}
      >
        {done >= 1 ? 'ASSEMBLY · COMPLETE' : `BUILD · 0${placed}/0${PLAN.length}`}
      </div>
    </DesignStage>
  );
};
- Read the recipePrompt = when to use, intention, parameter table with typical values and how each one feels, known pitfalls. Treat values as calibrated starting points.
- Get the codetool: git
git clone https://github.com/Vincentwei1021/video-shotcraft && cd video-shotcraft && npm install - Register + rendertool: remotion
npx remotion render <CompositionId> out.mp4 # component: demos/effects/scanline-assemble-flyin/ScanlineAssembleFlyin.tsx - Or re-implementPort the timing/easing from the recipe to HTML + WAAPI (gimgs motion contract) or any engine; keep the same segment windows and easing.
| param | type | default | description |
|---|---|---|---|
| — | |||
More in this category
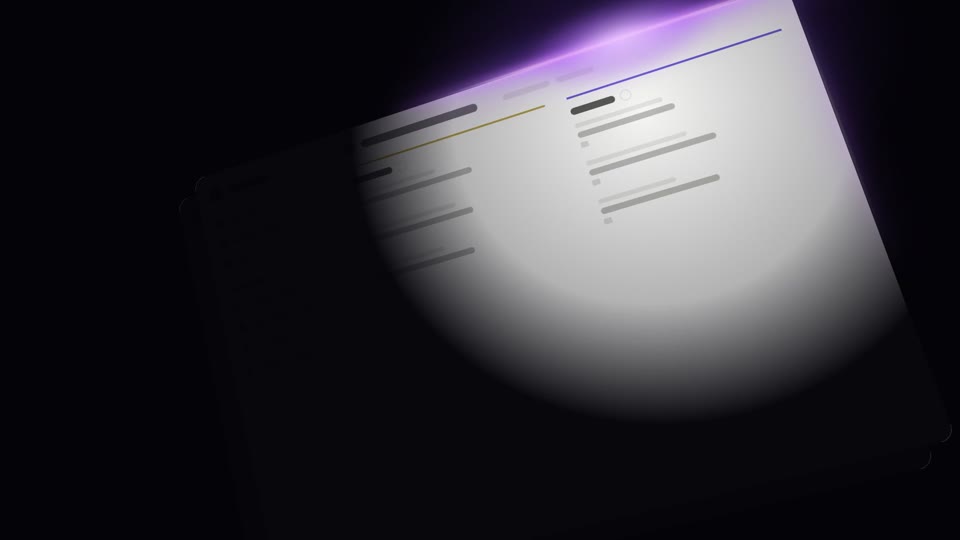
Dark-stage spotlight reveals
Three dark-stage spotlight reveals — A wake-sleep sweep (light in = bright, light out = dark), B edge-hugging glow pan (violet light seeps along UI edges + steady rightward sweep), C corner reveal (radial light expands steadily from a corner to light the whole screen); light itself narrates in the dark.
Slam entrance moves
Three high-energy slam entrances: a whip-in perspective stop, a heavy KPI drop, and a shockwave that hits neighboring cards.
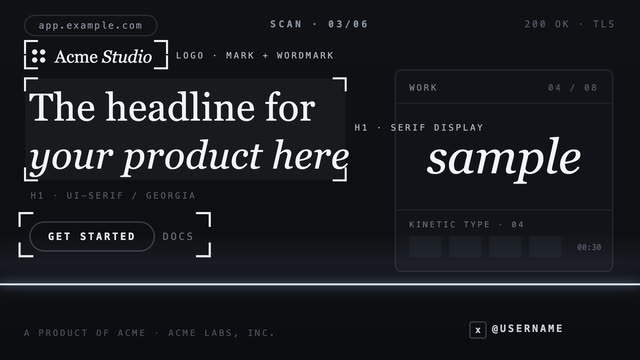
Scanline annotate focus
A bright scan line sweeps down the page, framing each element it passes and labeling it with monospace annotations.
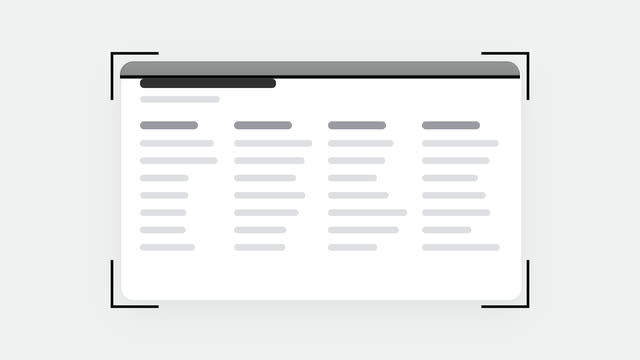
Scan bracket sweep
A skeleton document pops in, viewfinder brackets frame it, and a scan line sweeps it 5 times while it stays completely still.