Motion · UI entrance
Wall reveal: three moves
Three whole-wall batch entrances — bento cell-by-cell light-up, grid wave flip, and blueprint draw-on; all reveal in place with no displacement, complementing the fly-in, displacement-type deck-deal-flyin.
Source: video-shotcraft (Vincent Wei) ↗ · Apache-2.0 · Remotion composition (React/TSX) — preview video, no in-browser player
Variants
A dark 3×2 bento wall sits dimmed and waiting, an amber flowing light traces each cell's outline in turn as its content brightens and lifts; once all are lit the camera pushes in slowly to settle
A gravitas/dark-toned brand passage; a steady-paced feature overview
A 3×3 gray-backed card wall flips 180° in place along a diagonal wavefront on rotateX, revealing its front content; the last card overshoots and bounces back
A brisk feature wall; a fast passage that sweeps the whole screen in one second
The interface is first drawn in groups as a fine SVG-line blueprint, then a glowing amber vertical line sweeps left to right, and wherever it passes the wireframe solidifies into the real interface
A "from design to product / from idea to product" narrative; the product's first full reveal
When to use
The overall reveal of a feature wall/card wall/whole-page UI; passages where content is already in place and needs to "appear" rather than "pour in"
Intention
Until now, the library's only answer for "how does a whole wall of content enter" was deck-deal-flyin — high-energy, displacement-type, "things pouring in." But not every wall should pour: a brand passage wants gravitas, a feature wall wants briskness, a "from design to product" passage wants to show process. These three moves share a common trait — non-displacement batch entrance — elements reveal in place, the layout is already correct from frame one, and what the viewer watches is "a wavefront of state-change sweeping across a wall," not "objects flying." Ask first when choosing: should this wall "pour in" or "light up"? The former goes to deck-deal-flyin, the latter to this card.
Duration & energy
- Duration: Single style ~4.3–5s (A 150f / B 130f / C 150f @30fps, including an establishing hold and a still close)
- Energy: Medium
Shot recipe (original Chinese — timing, easing, parameter table, known pitfalls)
意图
"一墙内容怎么出场"库内此前只有 deck-deal-flyin 一个答案——高能量、位移型、 "东西涌进来"。但不是每面墙都该涌:品牌段要庄重、功能墙要轻快、 "从设计到实物"要讲工序。这三式共同点是非位移批量入场——元素原地显形, 版式从第一帧就成立,观众看的是"状态变化的波前扫过一面墙"而不是"物体飞行"。 选型先问一句:这面墙该"涌进来"还是"亮起来"?前者去 deck-deal-flyin,后者进本卡。
三式选型
| 式 | 做法 | 适用 | |----|------|------| | A bento-light-up 逐格点亮 | 暗场 3×2 bento 墙压暗待命,强调色流光逐格描边一圈、内容随即提亮上浮,全亮后镜头缓推收住 | 内容庄重/暗场品牌段;节奏沉稳的功能总览 | | B grid-wave-flip 波浪翻面 | 3×3 灰背卡墙沿对角线波前依次 rotateX 原位翻转 180°,翻出正面内容,尾张过冲回弹 | 轻快功能墙;一秒扫完全屏的快节奏段 | | C wireframe-draw-on 蓝图描线成形 | 界面先以 SVG 细线蓝图分组描画,再一条强调色发光竖线左→右扫过,扫过处线框实体化成真实界面 | "从设计到实物/从想法到产品"叙事;产品首次整体亮相 |
参数表
| 参数 | 典型值 | 调节手感 | |------|--------|----------| | A 节拍 | hold 20f → 每格间隔 12f 依次激活(六格 ~96f 全亮)→ scale 1→1.04 缓推 25f(bezier 0.33,0,0.2,1)→ 静止收尾 | 12f 级联是"逐格可辨"与"整墙拖沓"的平衡点;格数增多可压到 8–10f,但间隔均匀本身就是这一式的庄重感来源,别学发牌加速 | | A 单格 | 暗态 opacity 0.18 + translateY 20px;SVG rect pathLength=100 + dashoffset 描边 8f(强调色 #e8b45e 4px + drop-shadow 辉光);描边过半(+6f)内容 back-out(0.3,1.4,0.5,1) 弹出 8f 提亮归位;描完 +12f 流光退火到 0.4 常亮细边 | 描边与内容弹出要接力不同步——同帧起读作整格闪现;点亮中段辉光脉冲用 lit·(1−lit)·4 抛物线,峰值幅度按格 seed 微差(正弦哈希,禁真随机) | | B 波前 | hold 20f → delay=(row+col)*6f 对角线步进,每张 rotateX 0→180° 翻 14f bezier(0.35,0,0.25,1);尾张冲到 190° 再 8f 弹回 180° | (row+col) 是对角波的灵魂,换 row 或 col 单向扫立刻平庸;只给尾张过冲——张张过冲读作整墙果冻 | | B 翻面结构 | 共享 perspective 1200px 容器(整墙一个消失点),每张双面卡 preserve-3d:灰背朝外 + 正面预转 rotateX(180°),两面都 backfaceVisibility hidden | perspective 加在墙容器不是单卡上,否则九个消失点各翻各的;翻到 90° 最薄处叠一道 4px 白色高光线(不随卡旋转、贴格位随角度 45°→135° 从上缘扫到下缘,opacity=1−|angle−90|/45),阴影随 sin(angle) 抬起再收回 | | C 描线 | hold 20f → 分组错峰各 30f 描完:侧栏 20f 起/顶栏 30f 起/6 卡 40+i*3f 起/折线图 52f 起;SVG pathLength=1 + dashoffset 1→0,描边 #8f8f8d 2.5px round | 分组错峰是"手在画"的感觉来源,全部同帧起笔读作打印机;卡内占位线再按 +3f 细错峰,长短用 seed 哈希微差 | | C 实体化 | 88–118f 实体层 clip-path inset(0 right% 0 0) 从左向右展开 30f,bezier(0.55,0,0.25,1);前沿跟 4px 强调色竖线(#ffc46b + 双层辉光 boxShadow),86–92f 淡入、112–120f 淡出 | 竖线位置与 clip 前沿必须同一个 scan 值驱动,异步读作穿帮;描线段与扫描段之间留 ~6f 喘息(82→88f),线框画完立刻扫读作赶工 | | 静止收尾 | 三式动作全部落定后真静止 ≥15f(A 在缓推结束后、B 在尾张回弹后、C 在扫描线淡出后起算) | R1 呼吸判例:静止期一切属性锁死,包括辉光/阴影/高光残留 |
已知坑
- **demo 在灰阶/占位素材上调校通过——参数是调校起点非实战定稿,
首次实战须以真实素材回验**
- A/C 的强调色描边/扫描线属"单点高质量光效"范畴(Q4 三约束内合规),但一支片
整墙点亮 ≤1 次(P4 手法去重)——A 和 C 同片共用即算两次整墙光效,选一
- B 式翻面后的正面实战要接真实截图:backface 侧预留高清纹理(Q2),翻转中
正面会以斜角被看,低倍截图先按审美准则 Q2 的高分辨率栅格化技法处理再上
- C 式线框几何必须与实体层布局逐像素对位(demo 里按 FakeDashboard A 手排),
换素材要重排线框——对不齐则扫描线扫过瞬间元素跳位,一眼穿帮
- 三式都是"原位显形",别混入位移入场(如 B 翻面时再加 translateY 飞入)——
位移需求去 deck-deal-flyin,杂交会两头不像
- A 式暗态 opacity 0.18 依赖暗底(#2a2a28)成立,亮底下压暗读作褪色故障
参考实现
demos/ui-entrance/wall-reveal-moves/ (BentoLightUp.tsx / GridWaveFlip.tsx / WireframeDrawOn.tsx)
实现状态:三式均有参考实现与 Gallery 动态样片。
Reference implementation (Remotion)
- demos/ui-entrance/wall-reveal-moves/BentoLightUp.tsx — https://raw.githubusercontent.com/Vincentwei1021/video-shotcraft/main/demos/ui-entrance/wall-reveal-moves/BentoLightUp.tsx
- demos/ui-entrance/wall-reveal-moves/GridWaveFlip.tsx — https://raw.githubusercontent.com/Vincentwei1021/video-shotcraft/main/demos/ui-entrance/wall-reveal-moves/GridWaveFlip.tsx
- demos/ui-entrance/wall-reveal-moves/WireframeDrawOn.tsx — https://raw.githubusercontent.com/Vincentwei1021/video-shotcraft/main/demos/ui-entrance/wall-reveal-moves/WireframeDrawOn.tsx
The component imports shared fixtures from demos/_fixtures and helpers from assets/lib in the repo; SKILL.md there documents the render workflow.
Everything on this page is also machine-readable. Point your agent at the JSON, or add the gimgs MCP server and ask it to search motion templates.
- Fetch the JSON — it holds the shot recipe (timing, easing, parameter table, pitfalls) and the full TSX source.
- Clone the video-shotcraft repo; the component imports shared fixtures from demos/_fixtures and helpers from assets/lib.
- Register the component as a <Composition> in a Remotion project and render with `npx remotion render`, or re-implement the recipe in your own engine.
curl -s https://gimgs.net/motion/wall-reveal-moves.jsongit clone https://github.com/Vincentwei1021/video-shotcraft
# component: demos/ui-entrance/wall-reveal-moves/BentoLightUp.tsx, demos/ui-entrance/wall-reveal-moves/GridWaveFlip.tsx, demos/ui-entrance/wall-reveal-moves/WireframeDrawOn.tsx
npx remotion render <CompositionId> out.mp4claude mcp add --transport http gimgs https://gimgs.net/mcp
# then: search_motion_templates / get_motion_template("wall-reveal-moves")Prompt
Use the video-shotcraft shot recipe "Wall reveal: three moves" (Remotion composition, Apache-2.0) published on gimgs.net.
Recipe JSON (prompt = timing/easing/parameter table/pitfalls, files = TSX source): https://gimgs.net/motion/wall-reveal-moves.json
Raw TSX: https://gimgs.net/motion/wall-reveal-moves/template.html
Repository: https://github.com/Vincentwei1021/video-shotcraft  (component: demos/ui-entrance/wall-reveal-moves/BentoLightUp.tsx, demos/ui-entrance/wall-reveal-moves/GridWaveFlip.tsx, demos/ui-entrance/wall-reveal-moves/WireframeDrawOn.tsx; imports demos/_fixtures and assets/lib)
Spec: 1920x1080, 30 fps, 5.06s

1. Read the JSON and follow its "prompt" section (when to use, intention, parameter table, known pitfalls).
2. Adapt it for: <describe what you want>.
3. Either clone the repo, register the component as a <Composition> in a Remotion project and run npx remotion render <CompositionId> out.mp4 — or re-implement the recipe in your own engine (HTML/WAAPI works: keep the same timing and easing).
// ===== demos/ui-entrance/wall-reveal-moves/BentoLightUp.tsx =====
import React from 'react';
import { AbsoluteFill, Easing, interpolate, useCurrentFrame } from 'remotion';
import { Card, TitleBlock } from '../../_fixtures/Fixtures';

// bento-light-up:暗场里 3×2 bento 墙压暗待命,随节拍逐格点亮——
// 边框流光先描一圈(琥珀),格内内容随后提亮上浮弹出;六格全亮后整体微推收住。
// 节拍:0–20 建立(hold) → 每格间隔 12f 依次激活(描边 8f + 内容弹出 8f)
//       → ~96f 全亮 → 96–121 scale 1→1.04 缓推 → 121–150 静止收尾。

const BG = '#2a2a28';
const AMBER = '#e8b45e';
const FIRST = 20; // 首格激活帧
const GAP = 12; // 格间节拍
const CELL_W = 480;
const CELL_H = 330;
const GUT = 44;
const LEFT = (1920 - (CELL_W * 3 + GUT * 2)) / 2;
const TOP = (1080 - (CELL_H * 2 + GUT)) / 2 + 30;

const Cell: React.FC<{ i: number; frame: number }> = ({ i, frame }) => {
  const start = FIRST + i * GAP;
  const col = i % 3;
  const row = Math.floor(i / 3);
  const x = LEFT + col * (CELL_W + GUT);
  const y = TOP + row * (CELL_H + GUT);

  // ① 边框流光:pathLength=100 的 dashoffset 描边,8f 走完一圈
  const draw = interpolate(frame, [start, start + 8], [0, 1], {
    extrapolateLeft: 'clamp',
    extrapolateRight: 'clamp',
    easing: Easing.out(Easing.cubic),
  });
  // 描完后流光退火:琥珀亮边 → 弱化成常亮细边
  const strokeFade = interpolate(frame, [start + 12, start + 26], [1, 0.4], {
    extrapolateLeft: 'clamp',
    extrapolateRight: 'clamp',
    easing: Easing.out(Easing.quad),
  });

  // ② 内容提亮 + 上浮弹出:描边过半后接力,8f 弹出(back-out 带一点过冲)
  const lit = interpolate(frame, [start + 6, start + 14], [0, 1], {
    extrapolateLeft: 'clamp',
    extrapolateRight: 'clamp',
    easing: Easing.out(Easing.cubic),
  });
  const rise = interpolate(frame, [start + 6, start + 14], [0, 1], {
    extrapolateLeft: 'clamp',
    extrapolateRight: 'clamp',
    easing: Easing.bezier(0.3, 1.4, 0.5, 1),
  });
  const opacity = 0.18 + 0.82 * lit;
  const ty = 20 * (1 - rise);
  // seed 正弦哈希做每格微差(点亮瞬间的辉光强度略有随机感)
  const jitter = Math.abs(Math.sin(i * 127.3) * 43758.5453 % 1);
  const glow = lit * (1 - lit) * 4 * (14 + jitter * 6); // 点亮中段最亮的辉光脉冲

  return (
    <div style={{ position: 'absolute', left: x, top: y, width: CELL_W, height: CELL_H }}>
      {/* 暗态卡 + 点亮后的内容(同一张卡,靠 opacity/translateY 提亮浮出) */}
      <div
        style={{
          opacity,
          transform: `translateY(${ty}px)`,
          boxShadow: lit > 0.5 ? `0 0 ${glow}px rgba(232,180,94,${0.35 * lit * (1 - lit) * 4})` : 'none',
          borderRadius: 14,
        }}
      >
        <Card w={CELL_W} h={CELL_H} seed={i + 1} />
      </div>
      {/* 边框流光:SVG rect 描边一圈 */}
      {draw > 0 && (
        <svg
          width={CELL_W}
          height={CELL_H}
          viewBox={`0 0 ${CELL_W} ${CELL_H}`}
          style={{ position: 'absolute', left: 0, top: ty, overflow: 'visible' }}
        >
          <rect
            x={2}
            y={2}
            width={CELL_W - 4}
            height={CELL_H - 4}
            rx={14}
            fill="none"
            stroke={AMBER}
            strokeWidth={4}
            pathLength={100}
            strokeDasharray={100}
            strokeDashoffset={100 * (1 - draw)}
            opacity={strokeFade}
            style={{ filter: `drop-shadow(0 0 ${6 + jitter * 4}px ${AMBER})` }}
          />
        </svg>
      )}
    </div>
  );
};

export const BentoLightUp: React.FC = () => {
  const frame = useCurrentFrame();

  // ③ 六格全亮(~96f)后整体缓推 scale 1→1.04,25f 收住,之后真静止
  const push = interpolate(frame, [96, 121], [1, 1.04], {
    extrapolateLeft: 'clamp',
    extrapolateRight: 'clamp',
    easing: Easing.bezier(0.33, 0, 0.2, 1),
  });

  // 标题随首格点亮微微提亮,交代场景
  const titleLit = interpolate(frame, [FIRST, FIRST + 20], [0.25, 0.75], {
    extrapolateLeft: 'clamp',
    extrapolateRight: 'clamp',
    easing: Easing.out(Easing.quad),
  });

  return (
    <AbsoluteFill style={{ background: BG, overflow: 'hidden' }}>
      <div
        style={{
          position: 'absolute',
          inset: 0,
          transform: `scale(${push})`,
          transformOrigin: '960px 540px',
        }}
      >
        <div style={{ position: 'absolute', left: LEFT, top: TOP - 110, opacity: titleLit, filter: 'invert(1)' }}>
          <TitleBlock text="Features" size={64} />
        </div>
        {Array.from({ length: 6 }).map((_, i) => (
          <Cell key={i} i={i} frame={frame} />
        ))}
      </div>
    </AbsoluteFill>
  );
};


// ===== demos/ui-entrance/wall-reveal-moves/GridWaveFlip.tsx =====
import React from 'react';
import { AbsoluteFill, Easing, interpolate, useCurrentFrame } from 'remotion';
import { Card, G } from '../../_fixtures/Fixtures';

// grid-wave-flip〔入场退场〕:3×3 灰背卡片墙沿对角线波前依次 rotateX 翻转 180°,
// 灰背翻成正面内容卡;波浪约一秒扫完全屏,最后一张落定带轻微过冲。
// 结构:hold 20f → delay=(row+col)*6f、每张 14f bezier(0.35,0,0.25,1) → 尾张过冲回弹 → 静止收尾。

const COLS = 3;
const ROWS = 3;
const CELL_W = 520;
const CELL_H = 280;
const GAP = 36;
const HOLD = 20; // 开头建立
const STAGGER = 6; // 对角线波前步进
const FLIP = 14; // 单张翻转时长

const flipEase = Easing.bezier(0.35, 0, 0.25, 1);

// 单张卡的翻转角度:普通卡 0→180;最后一张(波前最末)过冲到 ~190 再回落 180
const angleAt = (frame: number, row: number, col: number): number => {
  const delay = HOLD + (row + col) * STAGGER;
  const isLast = row === ROWS - 1 && col === COLS - 1;
  if (!isLast) {
    return interpolate(frame, [delay, delay + FLIP], [0, 180], {
      extrapolateLeft: 'clamp',
      extrapolateRight: 'clamp',
      easing: flipEase,
    });
  }
  // 过冲:14f 冲到 190°,再 8f 弹回 180°
  const main = interpolate(frame, [delay, delay + FLIP], [0, 190], {
    extrapolateLeft: 'clamp',
    extrapolateRight: 'clamp',
    easing: flipEase,
  });
  const settle = interpolate(frame, [delay + FLIP, delay + FLIP + 8], [0, -10], {
    extrapolateLeft: 'clamp',
    extrapolateRight: 'clamp',
    easing: Easing.out(Easing.cubic),
  });
  return main + settle;
};

export const GridWaveFlip: React.FC = () => {
  const frame = useCurrentFrame();
  const wallW = COLS * CELL_W + (COLS - 1) * GAP;
  const wallH = ROWS * CELL_H + (ROWS - 1) * GAP;

  return (
    <AbsoluteFill
      style={{
        background: G.bg,
        justifyContent: 'center',
        alignItems: 'center',
      }}
    >
      {/* 卡片墙:共享 perspective 1200px 容器,整墙一个消失点 */}
      <div
        style={{
          width: wallW,
          height: wallH,
          perspective: 1200,
          perspectiveOrigin: '50% 50%',
          display: 'grid',
          gridTemplateColumns: `repeat(${COLS}, ${CELL_W}px)`,
          gridTemplateRows: `repeat(${ROWS}, ${CELL_H}px)`,
          gap: GAP,
        }}
      >
        {Array.from({ length: ROWS * COLS }).map((_, i) => {
          const row = Math.floor(i / COLS);
          const col = i % COLS;
          const angle = angleAt(frame, row, col);
          // 高光线:翻到 90°(最薄处)时最亮,位置随角度从上缘扫向下缘
          const glow = Math.max(0, 1 - Math.abs(angle - 90) / 45);
          const glowTop = interpolate(angle, [45, 135], [8, 92], {
            extrapolateLeft: 'clamp',
            extrapolateRight: 'clamp',
          });
          // 翻转中抬起阴影,落定后收回
          const lift = Math.sin(Math.min(Math.max(angle, 0), 180) * (Math.PI / 180));
          return (
            <div key={i} style={{ width: CELL_W, height: CELL_H, position: 'relative' }}>
              <div
                style={{
                  position: 'absolute',
                  inset: 0,
                  transformStyle: 'preserve-3d',
                  transform: `rotateX(${angle}deg)`,
                  boxShadow: `0 ${4 + lift * 22}px ${10 + lift * 40}px rgba(0,0,0,${0.08 + lift * 0.16})`,
                  borderRadius: 14,
                }}
              >
                {/* 灰背面(初始朝外) */}
                <div
                  style={{
                    position: 'absolute',
                    inset: 0,
                    backfaceVisibility: 'hidden',
                    WebkitBackfaceVisibility: 'hidden',
                    background: '#c7c7c5',
                    border: `2px solid ${G.bar}`,
                    borderRadius: 14,
                    boxSizing: 'border-box',
                    display: 'flex',
                    justifyContent: 'center',
                    alignItems: 'center',
                  }}
                >
                  {/* 背面只留一个哑光圆点标记,强调"灰背" */}
                  <div
                    style={{
                      width: 44,
                      height: 44,
                      borderRadius: 22,
                      background: G.mid,
                      opacity: 0.55,
                    }}
                  />
                </div>
                {/* 正面内容卡(预转 180°,翻过来正好朝外) */}
                <div
                  style={{
                    position: 'absolute',
                    inset: 0,
                    backfaceVisibility: 'hidden',
                    WebkitBackfaceVisibility: 'hidden',
                    transform: 'rotateX(180deg)',
                    borderRadius: 14,
                  }}
                >
                  <Card w={CELL_W} h={CELL_H} seed={i + 1} style={{ width: '100%', height: '100%' }} />
                </div>
              </div>
              {/* 最薄处高光线:不随卡旋转,贴在格位上随角度纵向移动 */}
              {glow > 0.01 && (
                <div
                  style={{
                    position: 'absolute',
                    left: '4%',
                    width: '92%',
                    top: `${glowTop}%`,
                    height: 4,
                    borderRadius: 2,
                    background:
                      'linear-gradient(90deg, rgba(255,255,255,0) 0%, rgba(255,255,255,0.95) 50%, rgba(255,255,255,0) 100%)',
                    boxShadow: '0 0 14px rgba(255,255,255,0.8)',
                    opacity: glow,
                    pointerEvents: 'none',
                  }}
                />
              )}
            </div>
          );
        })}
      </div>
    </AbsoluteFill>
  );
};


// ===== demos/ui-entrance/wall-reveal-moves/WireframeDrawOn.tsx =====
import React from 'react';
import { AbsoluteFill, Easing, interpolate, useCurrentFrame } from 'remotion';
import { FakeDashboard, G } from '../../_fixtures/Fixtures';

// wireframe-draw-on〔入场退场〕:界面先以蓝图细线描画成形(stroke-dashoffset
// 分组错峰),随后一条发光竖线从左向右扫过,扫过之处线框实体化为真实灰阶界面。
// 节拍:0–20 hold 空底 → 20–82 分组描线 → 88–118 光线扫描实体化 → 118–150 hold。

// FakeDashboard variant A 的几何(1920×1080):
// 侧栏 220 宽;顶栏 x220–1920 h72;内容区 padding36 gap28,3×2 卡片
// 卡 w524 h454,x = 256/808/1360,y = 108/590。
const CARD_W = 524;
const CARD_H = 454;
const CARD_X = [256, 808, 1360];
const CARD_Y = [108, 590];

const seedFrac = (i: number) => {
  const v = Math.sin(i * 127.3) * 43758.5453;
  return v - Math.floor(v);
};

export const WireframeDrawOn: React.FC = () => {
  const frame = useCurrentFrame();

  // 描线进度:每组 30f 画完,start 错峰
  const draw = (start: number) =>
    interpolate(frame, [start, start + 30], [0, 1], {
      extrapolateLeft: 'clamp',
      extrapolateRight: 'clamp',
      easing: Easing.bezier(0.4, 0, 0.3, 1),
    });

  const tSide = draw(20); // 侧栏
  const tTop = draw(30); // 顶栏
  const tCards = Array.from({ length: 6 }, (_, i) => draw(40 + i * 3)); // 卡片错峰
  const tChart = draw(52); // 折线图

  // 实体化扫描:88–118 从左向右
  const scan = interpolate(frame, [88, 118], [0, 1], {
    extrapolateLeft: 'clamp',
    extrapolateRight: 'clamp',
    easing: Easing.bezier(0.55, 0, 0.25, 1),
  });
  const scanX = scan * 1920;
  const lineOpacity = interpolate(frame, [86, 92, 112, 120], [0, 1, 1, 0], {
    extrapolateLeft: 'clamp',
    extrapolateRight: 'clamp',
  });

  // 描线小工具:pathLength=1 + dashoffset 从 1 → 0
  const stroke = (t: number): React.SVGAttributes<SVGElement> => ({
    fill: 'none',
    stroke: G.mid,
    strokeWidth: 2.5,
    pathLength: 1,
    strokeDasharray: 1,
    strokeDashoffset: 1 - t,
    strokeLinecap: 'round',
    opacity: t > 0 ? 1 : 0,
  });

  // 折线图数据(seed 正弦哈希,落在卡 (1,1) 内部)
  const chartCardX = CARD_X[1];
  const chartCardY = CARD_Y[1];
  const chartPts = Array.from({ length: 8 }, (_, i) => {
    const px = chartCardX + 50 + (i * (CARD_W - 100)) / 7;
    const py = chartCardY + 130 + seedFrac(i + 3) * 230;
    return `${px},${py}`;
  }).join(' ');

  return (
    <AbsoluteFill style={{ background: G.bg, overflow: 'hidden' }}>
      {/* —— 线框层(蓝图描线) —— */}
      <svg
        width={1920}
        height={1080}
        viewBox="0 0 1920 1080"
        style={{ position: 'absolute', inset: 0 }}
      >
        {/* 侧栏 */}
        <rect x={4} y={4} width={216} height={1072} rx={2} {...stroke(tSide)} />
        <rect x={26} y={30} width={40} height={40} rx={10} {...stroke(draw(24))} />
        {Array.from({ length: 7 }).map((_, i) => {
          const w = (216 - 44) * (0.6 + ((i * 29) % 35) / 100);
          return (
            <line
              key={`s${i}`}
              x1={26}
              y1={94 + i * 30}
              x2={26 + w}
              y2={94 + i * 30}
              {...stroke(draw(26 + i * 2))}
            />
          );
        })}

        {/* 顶栏 */}
        <line x1={220} y1={72} x2={1916} y2={72} {...stroke(tTop)} />
        <rect x={252} y={27} width={180} height={18} rx={9} {...stroke(draw(34))} />
        <rect x={1476} y={18} width={320} height={36} rx={18} {...stroke(draw(36))} />
        <circle cx={1834} cy={36} r={18} {...stroke(draw(38))} />

        {/* 3×2 卡片:轮廓 + 内部占位线 */}
        {tCards.map((t, i) => {
          const cx = CARD_X[i % 3];
          const cy = CARD_Y[Math.floor(i / 3)];
          const titleW = (CARD_W - 36) * (0.45 + (((i + 1) * 37) % 40) / 100);
          return (
            <g key={`c${i}`}>
              <rect x={cx} y={cy} width={CARD_W} height={CARD_H} rx={14} {...stroke(t)} />
              <rect x={cx + 18} y={cy + 18} width={titleW} height={16} rx={8} {...stroke(draw(46 + i * 3))} />
              <line x1={cx + 18} y1={cy + 62} x2={cx + 18 + (CARD_W - 36) * 0.82} y2={cy + 62} {...stroke(draw(49 + i * 3))} />
              <line x1={cx + 18} y1={cy + 88} x2={cx + 18 + (CARD_W - 36) * 0.62} y2={cy + 88} {...stroke(draw(51 + i * 3))} />
              <circle cx={cx + 31} cy={cy + CARD_H - 31} r={13} {...stroke(draw(53 + i * 3))} />
            </g>
          );
        })}

        {/* 折线图(画在中列下排卡内) */}
        <polyline points={chartPts} {...stroke(tChart)} strokeWidth={3} />
      </svg>

      {/* —— 实体层:clip-path inset 从左向右展开 —— */}
      <div
        style={{
          position: 'absolute',
          inset: 0,
          clipPath: `inset(0 ${(1 - scan) * 100}% 0 0)`,
        }}
      >
        <FakeDashboard variant="A" />
      </div>

      {/* —— 4px 发光扫描竖线(琥珀微光) —— */}
      <div
        style={{
          position: 'absolute',
          left: scanX - 2,
          top: 0,
          width: 4,
          height: 1080,
          background: '#ffc46b',
          opacity: lineOpacity,
          boxShadow:
            '0 0 18px 6px rgba(232, 163, 61, 0.65), 0 0 60px 18px rgba(232, 163, 61, 0.28)',
        }}
      />
    </AbsoluteFill>
  );
};
- Read the recipePrompt = when to use, intention, parameter table with typical values and how each one feels, known pitfalls. Treat values as calibrated starting points.
- Get the codetool: git
git clone https://github.com/Vincentwei1021/video-shotcraft && cd video-shotcraft && npm install - Register + rendertool: remotion
npx remotion render <CompositionId> out.mp4 # component: demos/ui-entrance/wall-reveal-moves/BentoLightUp.tsx, demos/ui-entrance/wall-reveal-moves/GridWaveFlip.tsx, demos/ui-entrance/wall-reveal-moves/WireframeDrawOn.tsx - Or re-implementPort the timing/easing from the recipe to HTML + WAAPI (gimgs motion contract) or any engine; keep the same segment windows and easing.
| param | type | default | description |
|---|---|---|---|
| — | |||
More in this category
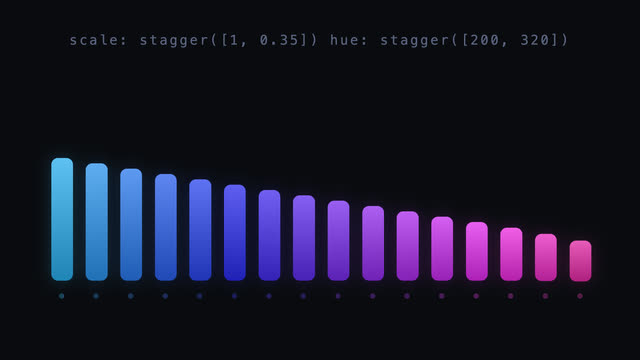
Value-stagger gradient bars
16 bars enter with delay as a time stagger, while height/hue/offset/blur each lay out as a value gradient from first to last; the second beat moves the stagger origin to center and re-lays the pulse peaking there.
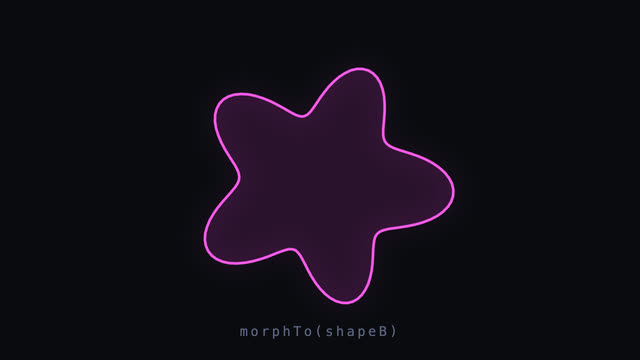
SVG shape morph loop
A 140-point closed outline morphs smoothly into another and back; both shapes are resampled to equal point counts in polar coordinates with per-point radius interpolation and inOutCubic, plus a light scale breathing, slow rotation, and hue drifting 185°→305° mid-morph.
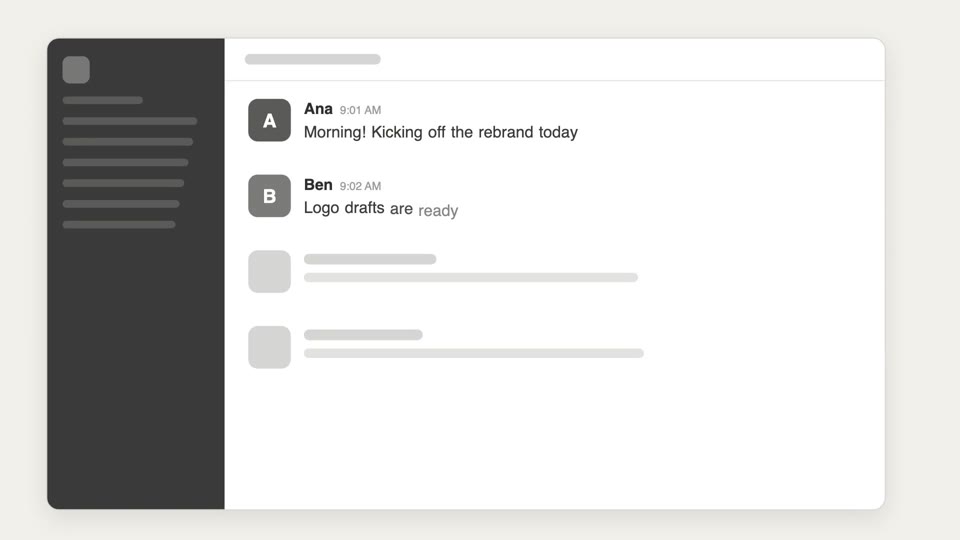
Skeleton reveal
Three-tier reveal from sketch to structure to content — hand-drawn doodles get swapped for skeleton bars, which resolve into real UI.
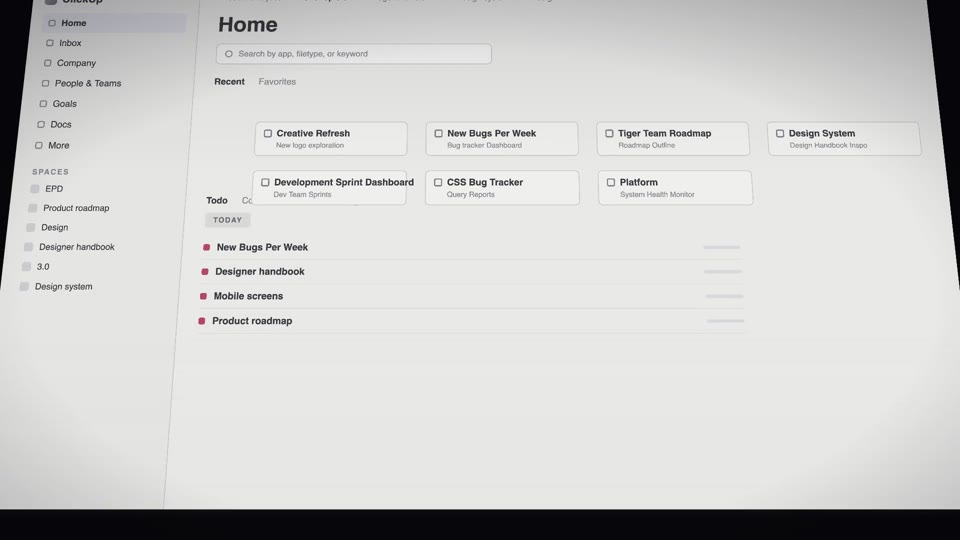
Runway ground skim entrance
From a low ground-skim angle, UI cards rain down fast and land with zero bounce, then the whole page stands up and squares to camera.