Motion · UI xuất hiện
Hiện hình cả bức tường: ba kiểu
Ba kiểu vào hình hàng loạt cả bức tường — bento thắp sáng từng ô, lưới lật sóng, và bản vẽ blueprint hiện nét; tất cả hiện hình tại chỗ không dịch chuyển, bổ trợ cho deck-deal-flyin kiểu bay vào dịch chuyển.
Nguồn: video-shotcraft (Vincent Wei) ↗ · Apache-2.0 · Composition Remotion (React/TSX) — có video preview, không có player trong trình duyệt
Biến thể
Tường bento 3×2 nền tối chờ sẵn trong bóng tối, dòng sáng hổ phách lần lượt viền quanh từng ô một vòng, nội dung liền sáng lên và nổi lên, sáng hết cả tường máy quay đẩy chậm để đứng vững
Đoạn thương hiệu trang trọng/nền tối; tổng quan tính năng nhịp điềm tĩnh
Tường thẻ 3×3 nền xám lật 180° tại chỗ theo làn sóng chéo bằng rotateX, lật ra nội dung mặt trước, thẻ cuối cùng overshoot rồi bật lại
Tường tính năng nhanh gọn; đoạn nhịp nhanh quét hết màn hình trong một giây
Giao diện trước tiên được vẽ theo nhóm bằng blueprint nét SVG mảnh, sau đó một đường dọc phát sáng hổ phách quét từ trái sang phải, quét tới đâu khung dây hóa thực thể thành giao diện thật tới đó
Câu chuyện "từ thiết kế đến sản phẩm thực/từ ý tưởng đến sản phẩm"; lần ra mắt tổng thể đầu tiên của sản phẩm
Khi nào dùng
Ra mắt tổng thể tường tính năng/tường thẻ/toàn bộ giao diện; đoạn nội dung đã ở đúng vị trí cần "hiện hình" chứ không phải "đổ vào"
Ý đồ
"Một bức tường nội dung ra mắt thế nào" trong thư viện trước nay chỉ có một đáp án là deck-deal-flyin — năng lượng cao, kiểu dịch chuyển, "đồ vật đổ vào". Nhưng không phải bức tường nào cũng nên đổ vào: đoạn thương hiệu cần trang trọng, tường tính năng cần nhanh gọn, đoạn "từ thiết kế đến sản phẩm thực" cần kể quy trình. Ba kiểu này có điểm chung là vào hình hàng loạt không dịch chuyển — phần tử hiện hình tại chỗ, bố cục đã đúng ngay từ khung đầu, khán giả xem "làn sóng thay đổi trạng thái quét qua một bức tường" chứ không phải "vật thể đang bay". Chọn kiểu trước tiên hỏi: bức tường này nên "đổ vào" hay "sáng lên"? Vế trước dùng deck-deal-flyin, vế sau dùng thẻ này.
Thời lượng & năng lượng
- Thời lượng: Mỗi kiểu khoảng 4.3–5s (A 150f / B 130f / C 150f @30fps, gồm giữ khung thiết lập và đứng yên khi kết)
- Năng lượng: Trung bình
Công thức cảnh quay (bản gốc tiếng Trung — timing, easing, bảng tham số, lỗi hay gặp)
意图
"一墙内容怎么出场"库内此前只有 deck-deal-flyin 一个答案——高能量、位移型、 "东西涌进来"。但不是每面墙都该涌:品牌段要庄重、功能墙要轻快、 "从设计到实物"要讲工序。这三式共同点是非位移批量入场——元素原地显形, 版式从第一帧就成立,观众看的是"状态变化的波前扫过一面墙"而不是"物体飞行"。 选型先问一句:这面墙该"涌进来"还是"亮起来"?前者去 deck-deal-flyin,后者进本卡。
三式选型
| 式 | 做法 | 适用 | |----|------|------| | A bento-light-up 逐格点亮 | 暗场 3×2 bento 墙压暗待命,强调色流光逐格描边一圈、内容随即提亮上浮,全亮后镜头缓推收住 | 内容庄重/暗场品牌段;节奏沉稳的功能总览 | | B grid-wave-flip 波浪翻面 | 3×3 灰背卡墙沿对角线波前依次 rotateX 原位翻转 180°,翻出正面内容,尾张过冲回弹 | 轻快功能墙;一秒扫完全屏的快节奏段 | | C wireframe-draw-on 蓝图描线成形 | 界面先以 SVG 细线蓝图分组描画,再一条强调色发光竖线左→右扫过,扫过处线框实体化成真实界面 | "从设计到实物/从想法到产品"叙事;产品首次整体亮相 |
参数表
| 参数 | 典型值 | 调节手感 | |------|--------|----------| | A 节拍 | hold 20f → 每格间隔 12f 依次激活(六格 ~96f 全亮)→ scale 1→1.04 缓推 25f(bezier 0.33,0,0.2,1)→ 静止收尾 | 12f 级联是"逐格可辨"与"整墙拖沓"的平衡点;格数增多可压到 8–10f,但间隔均匀本身就是这一式的庄重感来源,别学发牌加速 | | A 单格 | 暗态 opacity 0.18 + translateY 20px;SVG rect pathLength=100 + dashoffset 描边 8f(强调色 #e8b45e 4px + drop-shadow 辉光);描边过半(+6f)内容 back-out(0.3,1.4,0.5,1) 弹出 8f 提亮归位;描完 +12f 流光退火到 0.4 常亮细边 | 描边与内容弹出要接力不同步——同帧起读作整格闪现;点亮中段辉光脉冲用 lit·(1−lit)·4 抛物线,峰值幅度按格 seed 微差(正弦哈希,禁真随机) | | B 波前 | hold 20f → delay=(row+col)*6f 对角线步进,每张 rotateX 0→180° 翻 14f bezier(0.35,0,0.25,1);尾张冲到 190° 再 8f 弹回 180° | (row+col) 是对角波的灵魂,换 row 或 col 单向扫立刻平庸;只给尾张过冲——张张过冲读作整墙果冻 | | B 翻面结构 | 共享 perspective 1200px 容器(整墙一个消失点),每张双面卡 preserve-3d:灰背朝外 + 正面预转 rotateX(180°),两面都 backfaceVisibility hidden | perspective 加在墙容器不是单卡上,否则九个消失点各翻各的;翻到 90° 最薄处叠一道 4px 白色高光线(不随卡旋转、贴格位随角度 45°→135° 从上缘扫到下缘,opacity=1−|angle−90|/45),阴影随 sin(angle) 抬起再收回 | | C 描线 | hold 20f → 分组错峰各 30f 描完:侧栏 20f 起/顶栏 30f 起/6 卡 40+i*3f 起/折线图 52f 起;SVG pathLength=1 + dashoffset 1→0,描边 #8f8f8d 2.5px round | 分组错峰是"手在画"的感觉来源,全部同帧起笔读作打印机;卡内占位线再按 +3f 细错峰,长短用 seed 哈希微差 | | C 实体化 | 88–118f 实体层 clip-path inset(0 right% 0 0) 从左向右展开 30f,bezier(0.55,0,0.25,1);前沿跟 4px 强调色竖线(#ffc46b + 双层辉光 boxShadow),86–92f 淡入、112–120f 淡出 | 竖线位置与 clip 前沿必须同一个 scan 值驱动,异步读作穿帮;描线段与扫描段之间留 ~6f 喘息(82→88f),线框画完立刻扫读作赶工 | | 静止收尾 | 三式动作全部落定后真静止 ≥15f(A 在缓推结束后、B 在尾张回弹后、C 在扫描线淡出后起算) | R1 呼吸判例:静止期一切属性锁死,包括辉光/阴影/高光残留 |
已知坑
- **demo 在灰阶/占位素材上调校通过——参数是调校起点非实战定稿,
首次实战须以真实素材回验**
- A/C 的强调色描边/扫描线属"单点高质量光效"范畴(Q4 三约束内合规),但一支片
整墙点亮 ≤1 次(P4 手法去重)——A 和 C 同片共用即算两次整墙光效,选一
- B 式翻面后的正面实战要接真实截图:backface 侧预留高清纹理(Q2),翻转中
正面会以斜角被看,低倍截图先按审美准则 Q2 的高分辨率栅格化技法处理再上
- C 式线框几何必须与实体层布局逐像素对位(demo 里按 FakeDashboard A 手排),
换素材要重排线框——对不齐则扫描线扫过瞬间元素跳位,一眼穿帮
- 三式都是"原位显形",别混入位移入场(如 B 翻面时再加 translateY 飞入)——
位移需求去 deck-deal-flyin,杂交会两头不像
- A 式暗态 opacity 0.18 依赖暗底(#2a2a28)成立,亮底下压暗读作褪色故障
参考实现
demos/ui-entrance/wall-reveal-moves/ (BentoLightUp.tsx / GridWaveFlip.tsx / WireframeDrawOn.tsx)
实现状态:三式均有参考实现与 Gallery 动态样片。
Mã nguồn tham chiếu (Remotion)
- demos/ui-entrance/wall-reveal-moves/BentoLightUp.tsx — https://raw.githubusercontent.com/Vincentwei1021/video-shotcraft/main/demos/ui-entrance/wall-reveal-moves/BentoLightUp.tsx
- demos/ui-entrance/wall-reveal-moves/GridWaveFlip.tsx — https://raw.githubusercontent.com/Vincentwei1021/video-shotcraft/main/demos/ui-entrance/wall-reveal-moves/GridWaveFlip.tsx
- demos/ui-entrance/wall-reveal-moves/WireframeDrawOn.tsx — https://raw.githubusercontent.com/Vincentwei1021/video-shotcraft/main/demos/ui-entrance/wall-reveal-moves/WireframeDrawOn.tsx
Component import fixture chung từ demos/_fixtures và helper từ assets/lib của repo; xem SKILL.md trong repo để biết quy trình render.
Mọi thứ trên trang này đều có bản máy đọc. Đưa agent link JSON, hoặc thêm MCP server gimgs rồi bảo nó tìm motion template.
- Tải JSON — trong đó có công thức cảnh quay (timing, easing, bảng tham số, lỗi hay gặp) và toàn bộ source TSX.
- Clone repo video-shotcraft; component import fixture chung từ demos/_fixtures và helper từ assets/lib.
- Đăng ký component thành <Composition> trong project Remotion rồi render bằng `npx remotion render`, hoặc dựng lại công thức bằng engine của bạn.
curl -s https://gimgs.net/motion/wall-reveal-moves.jsongit clone https://github.com/Vincentwei1021/video-shotcraft
# component: demos/ui-entrance/wall-reveal-moves/BentoLightUp.tsx, demos/ui-entrance/wall-reveal-moves/GridWaveFlip.tsx, demos/ui-entrance/wall-reveal-moves/WireframeDrawOn.tsx
npx remotion render <CompositionId> out.mp4claude mcp add --transport http gimgs https://gimgs.net/mcp
# then: search_motion_templates / get_motion_template("wall-reveal-moves")Prompt
Use the video-shotcraft shot recipe "Hiện hình cả bức tường: ba kiểu" (Remotion composition, Apache-2.0) published on gimgs.net.
Recipe JSON (prompt = timing/easing/parameter table/pitfalls, files = TSX source): https://gimgs.net/motion/wall-reveal-moves.json
Raw TSX: https://gimgs.net/motion/wall-reveal-moves/template.html
Repository: https://github.com/Vincentwei1021/video-shotcraft  (component: demos/ui-entrance/wall-reveal-moves/BentoLightUp.tsx, demos/ui-entrance/wall-reveal-moves/GridWaveFlip.tsx, demos/ui-entrance/wall-reveal-moves/WireframeDrawOn.tsx; imports demos/_fixtures and assets/lib)
Spec: 1920x1080, 30 fps, 5.06s

1. Read the JSON and follow its "prompt" section (when to use, intention, parameter table, known pitfalls).
2. Adapt it for: <describe what you want>.
3. Either clone the repo, register the component as a <Composition> in a Remotion project and run npx remotion render <CompositionId> out.mp4 — or re-implement the recipe in your own engine (HTML/WAAPI works: keep the same timing and easing).
// ===== demos/ui-entrance/wall-reveal-moves/BentoLightUp.tsx =====
import React from 'react';
import { AbsoluteFill, Easing, interpolate, useCurrentFrame } from 'remotion';
import { Card, TitleBlock } from '../../_fixtures/Fixtures';

// bento-light-up:暗场里 3×2 bento 墙压暗待命,随节拍逐格点亮——
// 边框流光先描一圈(琥珀),格内内容随后提亮上浮弹出;六格全亮后整体微推收住。
// 节拍:0–20 建立(hold) → 每格间隔 12f 依次激活(描边 8f + 内容弹出 8f)
//       → ~96f 全亮 → 96–121 scale 1→1.04 缓推 → 121–150 静止收尾。

const BG = '#2a2a28';
const AMBER = '#e8b45e';
const FIRST = 20; // 首格激活帧
const GAP = 12; // 格间节拍
const CELL_W = 480;
const CELL_H = 330;
const GUT = 44;
const LEFT = (1920 - (CELL_W * 3 + GUT * 2)) / 2;
const TOP = (1080 - (CELL_H * 2 + GUT)) / 2 + 30;

const Cell: React.FC<{ i: number; frame: number }> = ({ i, frame }) => {
  const start = FIRST + i * GAP;
  const col = i % 3;
  const row = Math.floor(i / 3);
  const x = LEFT + col * (CELL_W + GUT);
  const y = TOP + row * (CELL_H + GUT);

  // ① 边框流光:pathLength=100 的 dashoffset 描边,8f 走完一圈
  const draw = interpolate(frame, [start, start + 8], [0, 1], {
    extrapolateLeft: 'clamp',
    extrapolateRight: 'clamp',
    easing: Easing.out(Easing.cubic),
  });
  // 描完后流光退火:琥珀亮边 → 弱化成常亮细边
  const strokeFade = interpolate(frame, [start + 12, start + 26], [1, 0.4], {
    extrapolateLeft: 'clamp',
    extrapolateRight: 'clamp',
    easing: Easing.out(Easing.quad),
  });

  // ② 内容提亮 + 上浮弹出:描边过半后接力,8f 弹出(back-out 带一点过冲)
  const lit = interpolate(frame, [start + 6, start + 14], [0, 1], {
    extrapolateLeft: 'clamp',
    extrapolateRight: 'clamp',
    easing: Easing.out(Easing.cubic),
  });
  const rise = interpolate(frame, [start + 6, start + 14], [0, 1], {
    extrapolateLeft: 'clamp',
    extrapolateRight: 'clamp',
    easing: Easing.bezier(0.3, 1.4, 0.5, 1),
  });
  const opacity = 0.18 + 0.82 * lit;
  const ty = 20 * (1 - rise);
  // seed 正弦哈希做每格微差(点亮瞬间的辉光强度略有随机感)
  const jitter = Math.abs(Math.sin(i * 127.3) * 43758.5453 % 1);
  const glow = lit * (1 - lit) * 4 * (14 + jitter * 6); // 点亮中段最亮的辉光脉冲

  return (
    <div style={{ position: 'absolute', left: x, top: y, width: CELL_W, height: CELL_H }}>
      {/* 暗态卡 + 点亮后的内容(同一张卡,靠 opacity/translateY 提亮浮出) */}
      <div
        style={{
          opacity,
          transform: `translateY(${ty}px)`,
          boxShadow: lit > 0.5 ? `0 0 ${glow}px rgba(232,180,94,${0.35 * lit * (1 - lit) * 4})` : 'none',
          borderRadius: 14,
        }}
      >
        <Card w={CELL_W} h={CELL_H} seed={i + 1} />
      </div>
      {/* 边框流光:SVG rect 描边一圈 */}
      {draw > 0 && (
        <svg
          width={CELL_W}
          height={CELL_H}
          viewBox={`0 0 ${CELL_W} ${CELL_H}`}
          style={{ position: 'absolute', left: 0, top: ty, overflow: 'visible' }}
        >
          <rect
            x={2}
            y={2}
            width={CELL_W - 4}
            height={CELL_H - 4}
            rx={14}
            fill="none"
            stroke={AMBER}
            strokeWidth={4}
            pathLength={100}
            strokeDasharray={100}
            strokeDashoffset={100 * (1 - draw)}
            opacity={strokeFade}
            style={{ filter: `drop-shadow(0 0 ${6 + jitter * 4}px ${AMBER})` }}
          />
        </svg>
      )}
    </div>
  );
};

export const BentoLightUp: React.FC = () => {
  const frame = useCurrentFrame();

  // ③ 六格全亮(~96f)后整体缓推 scale 1→1.04,25f 收住,之后真静止
  const push = interpolate(frame, [96, 121], [1, 1.04], {
    extrapolateLeft: 'clamp',
    extrapolateRight: 'clamp',
    easing: Easing.bezier(0.33, 0, 0.2, 1),
  });

  // 标题随首格点亮微微提亮,交代场景
  const titleLit = interpolate(frame, [FIRST, FIRST + 20], [0.25, 0.75], {
    extrapolateLeft: 'clamp',
    extrapolateRight: 'clamp',
    easing: Easing.out(Easing.quad),
  });

  return (
    <AbsoluteFill style={{ background: BG, overflow: 'hidden' }}>
      <div
        style={{
          position: 'absolute',
          inset: 0,
          transform: `scale(${push})`,
          transformOrigin: '960px 540px',
        }}
      >
        <div style={{ position: 'absolute', left: LEFT, top: TOP - 110, opacity: titleLit, filter: 'invert(1)' }}>
          <TitleBlock text="Features" size={64} />
        </div>
        {Array.from({ length: 6 }).map((_, i) => (
          <Cell key={i} i={i} frame={frame} />
        ))}
      </div>
    </AbsoluteFill>
  );
};


// ===== demos/ui-entrance/wall-reveal-moves/GridWaveFlip.tsx =====
import React from 'react';
import { AbsoluteFill, Easing, interpolate, useCurrentFrame } from 'remotion';
import { Card, G } from '../../_fixtures/Fixtures';

// grid-wave-flip〔入场退场〕:3×3 灰背卡片墙沿对角线波前依次 rotateX 翻转 180°,
// 灰背翻成正面内容卡;波浪约一秒扫完全屏,最后一张落定带轻微过冲。
// 结构:hold 20f → delay=(row+col)*6f、每张 14f bezier(0.35,0,0.25,1) → 尾张过冲回弹 → 静止收尾。

const COLS = 3;
const ROWS = 3;
const CELL_W = 520;
const CELL_H = 280;
const GAP = 36;
const HOLD = 20; // 开头建立
const STAGGER = 6; // 对角线波前步进
const FLIP = 14; // 单张翻转时长

const flipEase = Easing.bezier(0.35, 0, 0.25, 1);

// 单张卡的翻转角度:普通卡 0→180;最后一张(波前最末)过冲到 ~190 再回落 180
const angleAt = (frame: number, row: number, col: number): number => {
  const delay = HOLD + (row + col) * STAGGER;
  const isLast = row === ROWS - 1 && col === COLS - 1;
  if (!isLast) {
    return interpolate(frame, [delay, delay + FLIP], [0, 180], {
      extrapolateLeft: 'clamp',
      extrapolateRight: 'clamp',
      easing: flipEase,
    });
  }
  // 过冲:14f 冲到 190°,再 8f 弹回 180°
  const main = interpolate(frame, [delay, delay + FLIP], [0, 190], {
    extrapolateLeft: 'clamp',
    extrapolateRight: 'clamp',
    easing: flipEase,
  });
  const settle = interpolate(frame, [delay + FLIP, delay + FLIP + 8], [0, -10], {
    extrapolateLeft: 'clamp',
    extrapolateRight: 'clamp',
    easing: Easing.out(Easing.cubic),
  });
  return main + settle;
};

export const GridWaveFlip: React.FC = () => {
  const frame = useCurrentFrame();
  const wallW = COLS * CELL_W + (COLS - 1) * GAP;
  const wallH = ROWS * CELL_H + (ROWS - 1) * GAP;

  return (
    <AbsoluteFill
      style={{
        background: G.bg,
        justifyContent: 'center',
        alignItems: 'center',
      }}
    >
      {/* 卡片墙:共享 perspective 1200px 容器,整墙一个消失点 */}
      <div
        style={{
          width: wallW,
          height: wallH,
          perspective: 1200,
          perspectiveOrigin: '50% 50%',
          display: 'grid',
          gridTemplateColumns: `repeat(${COLS}, ${CELL_W}px)`,
          gridTemplateRows: `repeat(${ROWS}, ${CELL_H}px)`,
          gap: GAP,
        }}
      >
        {Array.from({ length: ROWS * COLS }).map((_, i) => {
          const row = Math.floor(i / COLS);
          const col = i % COLS;
          const angle = angleAt(frame, row, col);
          // 高光线:翻到 90°(最薄处)时最亮,位置随角度从上缘扫向下缘
          const glow = Math.max(0, 1 - Math.abs(angle - 90) / 45);
          const glowTop = interpolate(angle, [45, 135], [8, 92], {
            extrapolateLeft: 'clamp',
            extrapolateRight: 'clamp',
          });
          // 翻转中抬起阴影,落定后收回
          const lift = Math.sin(Math.min(Math.max(angle, 0), 180) * (Math.PI / 180));
          return (
            <div key={i} style={{ width: CELL_W, height: CELL_H, position: 'relative' }}>
              <div
                style={{
                  position: 'absolute',
                  inset: 0,
                  transformStyle: 'preserve-3d',
                  transform: `rotateX(${angle}deg)`,
                  boxShadow: `0 ${4 + lift * 22}px ${10 + lift * 40}px rgba(0,0,0,${0.08 + lift * 0.16})`,
                  borderRadius: 14,
                }}
              >
                {/* 灰背面(初始朝外) */}
                <div
                  style={{
                    position: 'absolute',
                    inset: 0,
                    backfaceVisibility: 'hidden',
                    WebkitBackfaceVisibility: 'hidden',
                    background: '#c7c7c5',
                    border: `2px solid ${G.bar}`,
                    borderRadius: 14,
                    boxSizing: 'border-box',
                    display: 'flex',
                    justifyContent: 'center',
                    alignItems: 'center',
                  }}
                >
                  {/* 背面只留一个哑光圆点标记,强调"灰背" */}
                  <div
                    style={{
                      width: 44,
                      height: 44,
                      borderRadius: 22,
                      background: G.mid,
                      opacity: 0.55,
                    }}
                  />
                </div>
                {/* 正面内容卡(预转 180°,翻过来正好朝外) */}
                <div
                  style={{
                    position: 'absolute',
                    inset: 0,
                    backfaceVisibility: 'hidden',
                    WebkitBackfaceVisibility: 'hidden',
                    transform: 'rotateX(180deg)',
                    borderRadius: 14,
                  }}
                >
                  <Card w={CELL_W} h={CELL_H} seed={i + 1} style={{ width: '100%', height: '100%' }} />
                </div>
              </div>
              {/* 最薄处高光线:不随卡旋转,贴在格位上随角度纵向移动 */}
              {glow > 0.01 && (
                <div
                  style={{
                    position: 'absolute',
                    left: '4%',
                    width: '92%',
                    top: `${glowTop}%`,
                    height: 4,
                    borderRadius: 2,
                    background:
                      'linear-gradient(90deg, rgba(255,255,255,0) 0%, rgba(255,255,255,0.95) 50%, rgba(255,255,255,0) 100%)',
                    boxShadow: '0 0 14px rgba(255,255,255,0.8)',
                    opacity: glow,
                    pointerEvents: 'none',
                  }}
                />
              )}
            </div>
          );
        })}
      </div>
    </AbsoluteFill>
  );
};


// ===== demos/ui-entrance/wall-reveal-moves/WireframeDrawOn.tsx =====
import React from 'react';
import { AbsoluteFill, Easing, interpolate, useCurrentFrame } from 'remotion';
import { FakeDashboard, G } from '../../_fixtures/Fixtures';

// wireframe-draw-on〔入场退场〕:界面先以蓝图细线描画成形(stroke-dashoffset
// 分组错峰),随后一条发光竖线从左向右扫过,扫过之处线框实体化为真实灰阶界面。
// 节拍:0–20 hold 空底 → 20–82 分组描线 → 88–118 光线扫描实体化 → 118–150 hold。

// FakeDashboard variant A 的几何(1920×1080):
// 侧栏 220 宽;顶栏 x220–1920 h72;内容区 padding36 gap28,3×2 卡片
// 卡 w524 h454,x = 256/808/1360,y = 108/590。
const CARD_W = 524;
const CARD_H = 454;
const CARD_X = [256, 808, 1360];
const CARD_Y = [108, 590];

const seedFrac = (i: number) => {
  const v = Math.sin(i * 127.3) * 43758.5453;
  return v - Math.floor(v);
};

export const WireframeDrawOn: React.FC = () => {
  const frame = useCurrentFrame();

  // 描线进度:每组 30f 画完,start 错峰
  const draw = (start: number) =>
    interpolate(frame, [start, start + 30], [0, 1], {
      extrapolateLeft: 'clamp',
      extrapolateRight: 'clamp',
      easing: Easing.bezier(0.4, 0, 0.3, 1),
    });

  const tSide = draw(20); // 侧栏
  const tTop = draw(30); // 顶栏
  const tCards = Array.from({ length: 6 }, (_, i) => draw(40 + i * 3)); // 卡片错峰
  const tChart = draw(52); // 折线图

  // 实体化扫描:88–118 从左向右
  const scan = interpolate(frame, [88, 118], [0, 1], {
    extrapolateLeft: 'clamp',
    extrapolateRight: 'clamp',
    easing: Easing.bezier(0.55, 0, 0.25, 1),
  });
  const scanX = scan * 1920;
  const lineOpacity = interpolate(frame, [86, 92, 112, 120], [0, 1, 1, 0], {
    extrapolateLeft: 'clamp',
    extrapolateRight: 'clamp',
  });

  // 描线小工具:pathLength=1 + dashoffset 从 1 → 0
  const stroke = (t: number): React.SVGAttributes<SVGElement> => ({
    fill: 'none',
    stroke: G.mid,
    strokeWidth: 2.5,
    pathLength: 1,
    strokeDasharray: 1,
    strokeDashoffset: 1 - t,
    strokeLinecap: 'round',
    opacity: t > 0 ? 1 : 0,
  });

  // 折线图数据(seed 正弦哈希,落在卡 (1,1) 内部)
  const chartCardX = CARD_X[1];
  const chartCardY = CARD_Y[1];
  const chartPts = Array.from({ length: 8 }, (_, i) => {
    const px = chartCardX + 50 + (i * (CARD_W - 100)) / 7;
    const py = chartCardY + 130 + seedFrac(i + 3) * 230;
    return `${px},${py}`;
  }).join(' ');

  return (
    <AbsoluteFill style={{ background: G.bg, overflow: 'hidden' }}>
      {/* —— 线框层(蓝图描线) —— */}
      <svg
        width={1920}
        height={1080}
        viewBox="0 0 1920 1080"
        style={{ position: 'absolute', inset: 0 }}
      >
        {/* 侧栏 */}
        <rect x={4} y={4} width={216} height={1072} rx={2} {...stroke(tSide)} />
        <rect x={26} y={30} width={40} height={40} rx={10} {...stroke(draw(24))} />
        {Array.from({ length: 7 }).map((_, i) => {
          const w = (216 - 44) * (0.6 + ((i * 29) % 35) / 100);
          return (
            <line
              key={`s${i}`}
              x1={26}
              y1={94 + i * 30}
              x2={26 + w}
              y2={94 + i * 30}
              {...stroke(draw(26 + i * 2))}
            />
          );
        })}

        {/* 顶栏 */}
        <line x1={220} y1={72} x2={1916} y2={72} {...stroke(tTop)} />
        <rect x={252} y={27} width={180} height={18} rx={9} {...stroke(draw(34))} />
        <rect x={1476} y={18} width={320} height={36} rx={18} {...stroke(draw(36))} />
        <circle cx={1834} cy={36} r={18} {...stroke(draw(38))} />

        {/* 3×2 卡片:轮廓 + 内部占位线 */}
        {tCards.map((t, i) => {
          const cx = CARD_X[i % 3];
          const cy = CARD_Y[Math.floor(i / 3)];
          const titleW = (CARD_W - 36) * (0.45 + (((i + 1) * 37) % 40) / 100);
          return (
            <g key={`c${i}`}>
              <rect x={cx} y={cy} width={CARD_W} height={CARD_H} rx={14} {...stroke(t)} />
              <rect x={cx + 18} y={cy + 18} width={titleW} height={16} rx={8} {...stroke(draw(46 + i * 3))} />
              <line x1={cx + 18} y1={cy + 62} x2={cx + 18 + (CARD_W - 36) * 0.82} y2={cy + 62} {...stroke(draw(49 + i * 3))} />
              <line x1={cx + 18} y1={cy + 88} x2={cx + 18 + (CARD_W - 36) * 0.62} y2={cy + 88} {...stroke(draw(51 + i * 3))} />
              <circle cx={cx + 31} cy={cy + CARD_H - 31} r={13} {...stroke(draw(53 + i * 3))} />
            </g>
          );
        })}

        {/* 折线图(画在中列下排卡内) */}
        <polyline points={chartPts} {...stroke(tChart)} strokeWidth={3} />
      </svg>

      {/* —— 实体层:clip-path inset 从左向右展开 —— */}
      <div
        style={{
          position: 'absolute',
          inset: 0,
          clipPath: `inset(0 ${(1 - scan) * 100}% 0 0)`,
        }}
      >
        <FakeDashboard variant="A" />
      </div>

      {/* —— 4px 发光扫描竖线(琥珀微光) —— */}
      <div
        style={{
          position: 'absolute',
          left: scanX - 2,
          top: 0,
          width: 4,
          height: 1080,
          background: '#ffc46b',
          opacity: lineOpacity,
          boxShadow:
            '0 0 18px 6px rgba(232, 163, 61, 0.65), 0 0 60px 18px rgba(232, 163, 61, 0.28)',
        }}
      />
    </AbsoluteFill>
  );
};
- Read the recipePrompt = when to use, intention, parameter table with typical values and how each one feels, known pitfalls. Treat values as calibrated starting points.
- Get the codetool: git
git clone https://github.com/Vincentwei1021/video-shotcraft && cd video-shotcraft && npm install - Register + rendertool: remotion
npx remotion render <CompositionId> out.mp4 # component: demos/ui-entrance/wall-reveal-moves/BentoLightUp.tsx, demos/ui-entrance/wall-reveal-moves/GridWaveFlip.tsx, demos/ui-entrance/wall-reveal-moves/WireframeDrawOn.tsx - Or re-implementPort the timing/easing from the recipe to HTML + WAAPI (gimgs motion contract) or any engine; keep the same segment windows and easing.
| param | type | default | description |
|---|---|---|---|
| — | |||
Cùng danh mục
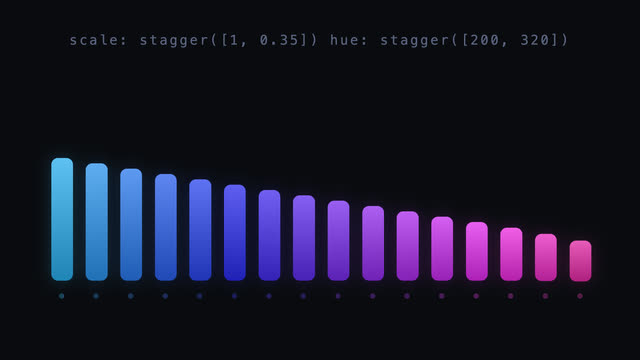
Cột nhập theo bậc thang giá trị
16 cột vào hình với delay là bậc thang thời gian, đồng thời chiều cao/sắc màu/dịch chuyển/độ mờ mỗi thuộc tính tự trải thành bậc thang giá trị từ đầu đến cuối; nhịp hai đổi gốc lệch nhịp về tâm, biên độ xung lấy tâm làm đỉnh trải lại.
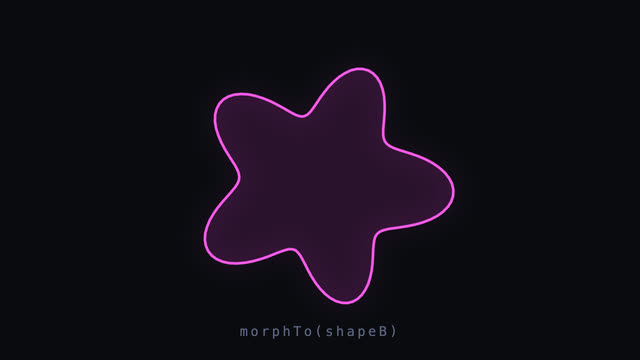
Biến hình SVG lặp vòng
Một viền khép kín 140 điểm biến hình mượt sang viền khác rồi biến lại, hai hình trước hết được lấy mẫu lại cùng số điểm trong tọa độ cực, nội suy bán kính từng điểm + inOutCubic, giữa chừng chèn hơi thở scale nhẹ, tự xoay chậm và sắc màu trôi 185°→305°.
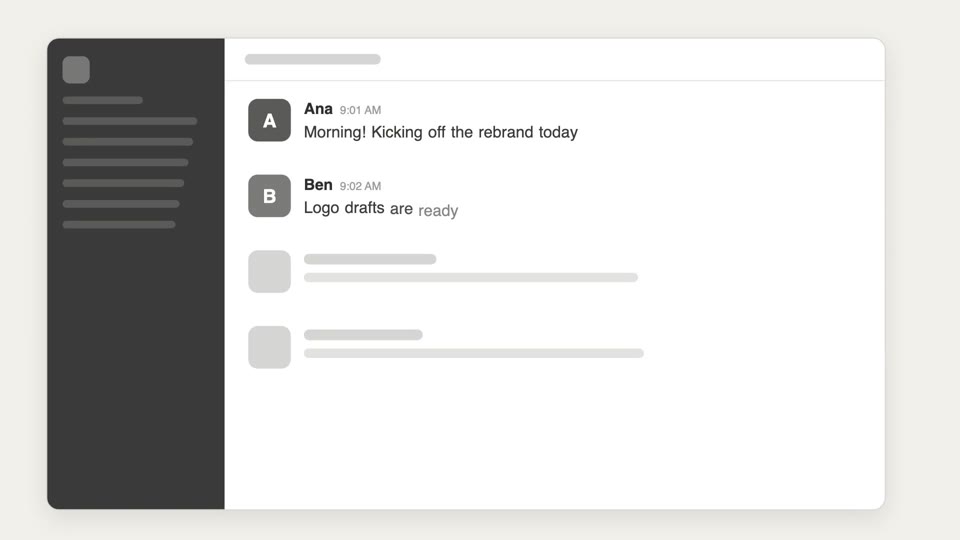
Hiện hình từ khung xương
Hiện hình ba tầng từ phác thảo đến khung xương đến nội dung — nét vẽ tay được thay bằng thanh xám khung xương rồi rõ nét thành UI thật.
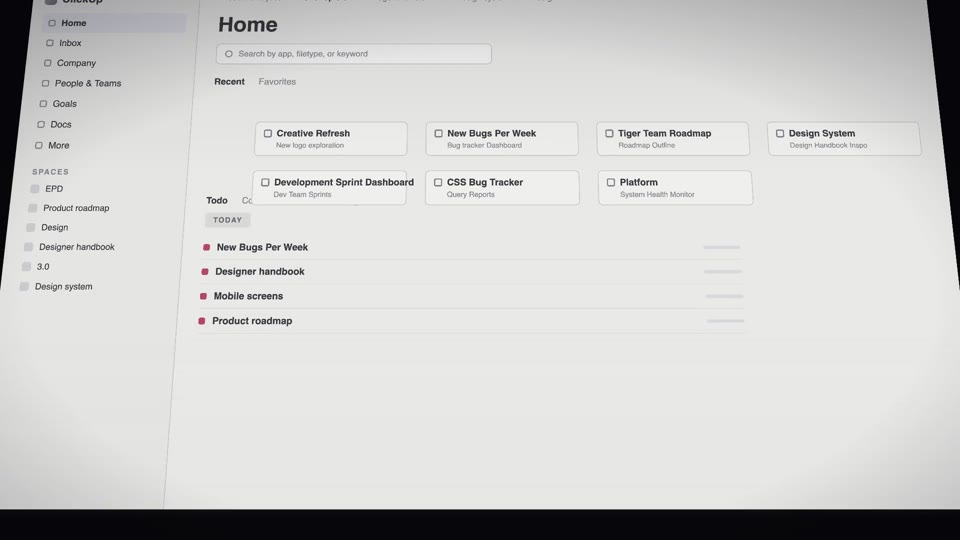
Thẻ UI đổ mưa lướt sát mặt đất
Từ góc máy thấp lướt sát mặt đất, thẻ UI đổ như mưa rào rồi dừng cứng không nảy, sau đó cả trang dựng lên và quay thẳng vào camera.