Motion · Entrada de UI
Element body moves
Two element-body-feel styles: axial-stretch taffy-pull stretching, and contact-shadow-lift lifting off the surface with a contact shadow.
Fonte: video-shotcraft (Vincent Wei) ↗ · Apache-2.0 · Composição Remotion (React/TSX) — vídeo de prévia, sem player no navegador
Variantes
速度差分驱动轴向拉伸——飞得越快拉得越长(满拉伸 scaleX 2.2/scaleY 0.72),落点 8f 压扁回弹
p(f)−p(f−1)\
抬起 10f out-cubic:卡 translateY(−28px)+scale(1.08),独立椭圆阴影 scale 1→1.72 / opacity 0.55→0.18 同进度反向;落回 8f in-cubic + 2f 微压卡壳
逐张点名强调;2.5D 段落的离面铺垫
When to use
Adds "the body is changing" on top of "the position is changing": high-speed fly-ins get a physical body of speed (A), card call-outs get proof of hovering (B); pair A with a lateral-rush entrance, pair B with 2.5D camera moves and one-by-one call-outs.
Intention
The library's motion cards all manage "the position is changing" — flying in, sliding, bouncing, while the element itself stays a rigid body. These two styles manage the body changing: A gives speed a visible body — the faster it flies, the longer it stretches along its motion axis, like taffy, squashing and rebounding straight at landing, a UI translation of squash & stretch; B gives hovering credible proof — as a card lifts, the shadow directly beneath it scales up and fades in sync, paper leaving the table, a physical line of dialogue that sets up a 2.5D camera move via the staging principle. Difference from smear-multiples: that's countable afterimages (discrete ghosting), A is continuous stretching (taffy that keeps stringing); difference from CameraMotionBlur: shutter drag is the camera's business, stretching is the body's — don't stack both on the same element.
Duration & energy
- Duration: A ~4.7s / B ~5.3s
- Energy: A: Medium-high / B: Low-medium
Shot recipe (original Chinese — timing, easing, parameter table, known pitfalls)
意图
库内运动卡全在管"位置在变"——飞入、滑动、弹跳,元素本身始终是刚体。 这两式管身体在变:A 给速度一个可见的肉身——飞得越快沿运动轴拉得 越长,一块糖稀,落点压扁回弹收正,squash & stretch 的 UI 翻译;B 给 悬浮一个可信的证据——卡抬起时正下方阴影同步放大变淡,纸片离桌, staging 法则给 2.5D 运镜垫的物理台词。与 smear-multiples 的区别:那是 可数残像(离散鬼影),A 是连续拉伸(糖稀不断丝);与 CameraMotionBlur 的区别:快门拖影是相机的事,拉伸是身体的事,同一元素别叠加。
两式选型
| 式 | 做法 | 适用 | |----|------|------| | A axial-stretch | 速度差分驱动轴向 scale:v=\|p(f)−p(f−1)\|,v<2px/f 不拉伸、≥140px/f 满拉伸(scaleX 2.2 / scaleY 0.72);落点 8f 压扁回弹 | 高速飞入/横冲入场;多卡错峰填坑 | | B contact-shadow-lift | 抬起 10f out-cubic:卡 translateY(−28px)+scale(1.08),独立椭圆阴影 scale 1→1.72 / opacity 0.55→0.18 同进度反向;落回 8f in-cubic + 2f 微压卡壳 | 逐张点名强调;2.5D 段落的离面铺垫 |
参数表
| 参数 | 典型值 | 调节手感 | |------|--------|----------| | A 拉伸映射 | v∈[2,140]px/f → 拉伸 0→满(scaleX 2.2/scaleY 0.72) | 峰值 <1.6 不可感;>2.6 读作故障拉丝 | | A origin/顺序 | transformOrigin 设运动后缘(右飞 100% 50%);translate 再 scale | origin 居中读作缩放不是拉伸;顺序反了位移跟着放大 | | A 落点回弹 | 8f out-cubic:scaleX 过冲 0.85、scaleY 1.1 再回 1 | 无回弹的拉伸像刹不住车 | | A 错峰 | 三卡起飞间隔 12f,飞行 36f | 同帧齐飞读不出各自的拉丝 | | B 抬升幅度 | −28px + scale 1.08 | 判例锁死:<12px 禁用(见已知坑) | | B 阴影 | 独立 radial-gradient 椭圆 div;卡本体 boxShadow: none | box-shadow 跟卡走,给不出"影子留在桌上" | | B 落地 | scale 0.99 卡壳 2f 再 5f 回弹到 1 | 无微压读作飘落,没有重量 | | 收尾 | A 末卡回弹后 62f / B 全落回后 35f 真静止 | 收尾帧须与 rest 态逐像素一致 |
已知坑
- demo 在灰阶/占位素材上调校通过——参数是调校起点非实战定稿,
首次实战须以真实素材回验
- B 微幅加码判例:原案 8px 抬升不可感,加码到 28px 才过——实战禁回调到 12px 以下,宁可不用不可用弱
- A 速度必须位置差分实算,不许拿 easing 进度近似——差分才保证
"低于阈值不拉伸",起步与将落时自动收正
- A 竖向运动轴要换:竖飞拉 scaleY 压 scaleX,origin 设上/下缘,
照抄横版参数会拉错轴(原案就把轴写反过)
- B 一次只抬一张——两张同时离桌,观众找不到被点名的是谁(P4)
- 声音:A 落点一声闷撞、B 抬起轻吸/落回轻放(sound-design §4.5)
参考实现
demos/ui-entrance/element-body-moves/ (AxialStretch.tsx / ContactShadowLift.tsx)
Reference implementation (Remotion)
- demos/ui-entrance/element-body-moves/AxialStretch.tsx — https://raw.githubusercontent.com/Vincentwei1021/video-shotcraft/main/demos/ui-entrance/element-body-moves/AxialStretch.tsx
- demos/ui-entrance/element-body-moves/ContactShadowLift.tsx — https://raw.githubusercontent.com/Vincentwei1021/video-shotcraft/main/demos/ui-entrance/element-body-moves/ContactShadowLift.tsx
The component imports shared fixtures from demos/_fixtures and helpers from assets/lib in the repo; SKILL.md there documents the render workflow.
Tudo nesta página também é legível por máquina. Aponte seu agente para o JSON ou adicione o servidor MCP do gimgs e peça para buscar templates de motion.
- Baixe o JSON — contém a receita do plano (timing, easing, tabela de parâmetros, armadilhas) e o código TSX completo.
- Clone o repositório video-shotcraft; o componente importa fixtures de demos/_fixtures e helpers de assets/lib.
- Registre o componente como <Composition> em um projeto Remotion e renderize com `npx remotion render`, ou reimplemente a receita no seu próprio engine.
curl -s https://gimgs.net/motion/element-body-moves.jsongit clone https://github.com/Vincentwei1021/video-shotcraft
# component: demos/ui-entrance/element-body-moves/AxialStretch.tsx, demos/ui-entrance/element-body-moves/ContactShadowLift.tsx
npx remotion render <CompositionId> out.mp4claude mcp add --transport http gimgs https://gimgs.net/mcp
# then: search_motion_templates / get_motion_template("element-body-moves")Prompt
Use the video-shotcraft shot recipe "Element body moves" (Remotion composition, Apache-2.0) published on gimgs.net.
Recipe JSON (prompt = timing/easing/parameter table/pitfalls, files = TSX source): https://gimgs.net/motion/element-body-moves.json
Raw TSX: https://gimgs.net/motion/element-body-moves/template.html
Repository: https://github.com/Vincentwei1021/video-shotcraft  (component: demos/ui-entrance/element-body-moves/AxialStretch.tsx, demos/ui-entrance/element-body-moves/ContactShadowLift.tsx; imports demos/_fixtures and assets/lib)
Spec: 1920x1080, 30 fps, 4.72s

1. Read the JSON and follow its "prompt" section (when to use, intention, parameter table, known pitfalls).
2. Adapt it for: <describe what you want>.
3. Either clone the repo, register the component as a <Composition> in a Remotion project and run npx remotion render <CompositionId> out.mp4 — or re-implement the recipe in your own engine (HTML/WAAPI works: keep the same timing and easing).
// ===== demos/ui-entrance/element-body-moves/AxialStretch.tsx =====
// axial-stretch —— 轴向拉伸速度感
// 三张 Card 从右外依次横向飞入落位,飞行途中沿运动轴速度驱动拉伸
// (scaleX 峰值 ≈2.2 / scaleY ≈0.72,糖稀拉丝感),落点 Back.out 式回弹。
// 速度用位置差分 p(f)-p(f-1) 驱动,低于阈值不拉伸。收尾真静止 ≥35f。
import React from 'react';
import { useCurrentFrame, interpolate, Easing } from 'remotion';
import { G, Card, TitleBlock } from '../../_fixtures/Fixtures';

const W = 1920;
const CARD_W = 380;
const CARD_H = 230;
const GAP = 60;
const ROW_W = 3 * CARD_W + 2 * GAP; // 1260
const ROW_X0 = (W - ROW_W) / 2; // 330
const ROW_Y = (1080 - CARD_H) / 2; // 425

const START_X = 1980; // 完全在画面右外
const FLIGHT = 36; // 飞行帧数
const STAGGER = 12; // 错峰
const FIRST = 10; // 首卡起飞帧
const SQUASH = 8; // 落点回弹帧数

const VEL_MIN = 2; // px/frame,低于此不拉伸
const VEL_REF = 140; // px/frame,达到此速度即满拉伸
const STRETCH_X = 1.2; // scaleX 峰值 1 + 1.2 = 2.2
const SQUISH_Y = 0.28; // scaleY 谷值 1 - 0.28 = 0.72

// poly(4) in-out:中段速度峰值 ≈ 4× 平均速度,够冲
const flightEase = Easing.inOut(Easing.poly(4));

const posAt = (f: number, start: number, targetX: number): number =>
  interpolate(f, [start, start + FLIGHT], [START_X, targetX], {
    easing: flightEase,
    extrapolateLeft: 'clamp',
    extrapolateRight: 'clamp',
  });

const FlyCard: React.FC<{ i: number; frame: number }> = ({ i, frame }) => {
  const start = FIRST + i * STAGGER;
  const targetX = ROW_X0 + i * (CARD_W + GAP);
  const land = start + FLIGHT;

  const x = posAt(frame, start, targetX);
  // 速度 = 位置差分(帧时间解耦,纯由位置函数决定)
  const v = Math.abs(posAt(frame, start, targetX) - posAt(frame - 1, start, targetX));
  const s = Math.min(Math.max((v - VEL_MIN) / (VEL_REF - VEL_MIN), 0), 1);

  const stretchX = 1 + STRETCH_X * s;
  const stretchY = 1 - SQUISH_Y * s;

  // 落点回弹:scaleX 过冲到 0.85 再回 1(横向被"撞停"压扁),8f
  const sqX = interpolate(frame, [land, land + SQUASH / 2, land + SQUASH], [1, 0.85, 1], {
    easing: Easing.out(Easing.cubic),
    extrapolateLeft: 'clamp',
    extrapolateRight: 'clamp',
  });
  const sqY = interpolate(frame, [land, land + SQUASH / 2, land + SQUASH], [1, 1.1, 1], {
    easing: Easing.out(Easing.cubic),
    extrapolateLeft: 'clamp',
    extrapolateRight: 'clamp',
  });

  return (
    <div
      style={{
        position: 'absolute',
        left: 0,
        top: ROW_Y,
        // 顺序:先 translate 再 scale;transformOrigin 设运动后缘(向左飞 → 右缘)
        transform: `translateX(${x}px) scaleX(${stretchX * sqX}) scaleY(${stretchY * sqY})`,
        transformOrigin: '100% 50%',
      }}
    >
      <Card w={CARD_W} h={CARD_H} seed={i + 1} />
    </div>
  );
};

export const AxialStretch: React.FC = () => {
  const frame = useCurrentFrame();
  const titleOp = interpolate(frame, [0, 10], [0, 1], {
    extrapolateLeft: 'clamp',
    extrapolateRight: 'clamp',
  });

  return (
    <div style={{ width: 1920, height: 1080, background: G.bg, position: 'relative', overflow: 'hidden' }}>
      <div style={{ position: 'absolute', top: 120, width: '100%', textAlign: 'center', opacity: titleOp }}>
        <TitleBlock text="AXIAL STRETCH" size={72} />
      </div>
      {/* 落位虚线槽,标出目标位置 */}
      {[0, 1, 2].map((i) => (
        <div
          key={`slot-${i}`}
          style={{
            position: 'absolute',
            left: ROW_X0 + i * (CARD_W + GAP),
            top: ROW_Y,
            width: CARD_W,
            height: CARD_H,
            border: `2px dashed ${G.bar}`,
            borderRadius: 14,
            boxSizing: 'border-box',
          }}
        />
      ))}
      {[0, 1, 2].map((i) => (
        <FlyCard key={i} i={i} frame={frame} />
      ))}
    </div>
  );
};


// ===== demos/ui-entrance/element-body-moves/ContactShadowLift.tsx =====
// contact-shadow-lift|接触阴影离面抬升
// 浅底上一排 3 张卡,逐张被"点名"抬起:卡 translateY(-28px)+scale(1.08),
// 其正下方独立椭圆阴影同步放大变淡——纸片离桌感;落回时阴影收紧变实,
// 落地 2f 卡壳 scale 0.99 微压。三张依次各来一遍。收尾真静止 ≥35f。
import React from 'react';
import { useCurrentFrame, interpolate, Easing } from 'remotion';
import { G, Card } from '../../_fixtures/Fixtures';

const outCubic = Easing.out(Easing.cubic);
const inCubic = Easing.in(Easing.cubic);

// 每张卡的局部时间轴(局部帧 t):
// [0,10)   抬起  out-cubic
// [10,28)  悬停 18f
// [28,36)  落回  in-cubic
// [36,38)  落地卡壳 scale 0.99
// [38,43)  回弹 0.99→1.0 out-cubic
// t<0 或 t>=43 完全静止(rest 态)
const LIFT_Y = -28; // 原案 -8 → 加码 -20 → QA 保险再到 -28
const LIFT_S = 1.08;

const cardMotion = (t: number) => {
  const y = interpolate(t, [0, 10], [0, LIFT_Y], {
    easing: outCubic, extrapolateLeft: 'clamp', extrapolateRight: 'clamp',
  }) + interpolate(t, [28, 36], [0, -LIFT_Y], {
    easing: inCubic, extrapolateLeft: 'clamp', extrapolateRight: 'clamp',
  });

  let s: number;
  if (t < 28) {
    s = interpolate(t, [0, 10], [1, LIFT_S], {
      easing: outCubic, extrapolateLeft: 'clamp', extrapolateRight: 'clamp',
    });
  } else if (t < 38) {
    s = interpolate(t, [28, 36], [LIFT_S, 0.99], {
      easing: inCubic, extrapolateLeft: 'clamp', extrapolateRight: 'clamp',
    });
  } else {
    s = interpolate(t, [38, 43], [0.99, 1], {
      easing: outCubic, extrapolateLeft: 'clamp', extrapolateRight: 'clamp',
    });
  }

  // 抬升进度 0(贴桌)→1(悬空),驱动阴影
  const lift = interpolate(t, [0, 10], [0, 1], {
    easing: outCubic, extrapolateLeft: 'clamp', extrapolateRight: 'clamp',
  }) - interpolate(t, [28, 36], [0, 1], {
    easing: inCubic, extrapolateLeft: 'clamp', extrapolateRight: 'clamp',
  });

  return { y, s, lift };
};

const CARD_W = 360;
const CARD_H = 220;
const GAP = 120;
const STARTS = [2, 42, 82]; // 三张卡依次点名,间隔 40f;末次动画止于 f125,留 35f 真静止

export const ContactShadowLift: React.FC = () => {
  const frame = useCurrentFrame();
  const rowW = CARD_W * 3 + GAP * 2;
  const left0 = (1920 - rowW) / 2;
  const top = (1080 - CARD_H) / 2 - 20;

  return (
    <div style={{ width: 1920, height: 1080, background: G.bg, position: 'relative', overflow: 'hidden' }}>
      {/* 假 dashboard 式顶栏,给浅底一点场景感 */}
      <div style={{ position: 'absolute', top: 0, left: 0, right: 0, height: 84, background: G.panel, borderBottom: `2px solid ${G.line}`, display: 'flex', alignItems: 'center', padding: '0 48px', gap: 24, boxSizing: 'border-box' }}>
        <div style={{ width: 40, height: 40, borderRadius: 10, background: G.side }} />
        <div style={{ height: 18, width: 220, background: G.bar, borderRadius: 9 }} />
        <div style={{ marginLeft: 'auto', width: 36, height: 36, borderRadius: 18, background: G.mid }} />
      </div>

      {[0, 1, 2].map((i) => {
        const t = frame - STARTS[i];
        const { y, s, lift } = cardMotion(t);
        const x = left0 + i * (CARD_W + GAP);

        // 独立接触阴影(不是 box-shadow):卡正下方椭圆径向渐变
        const shScale = 1 + 0.72 * lift;     // 1.0 → 1.72(对比再拉大)
        const shOpacity = 0.55 - 0.37 * lift; // 0.55 → 0.18
        const shW = CARD_W * 0.88;
        const shH = 44;

        return (
          <React.Fragment key={i}>
            <div
              style={{
                position: 'absolute',
                left: x + (CARD_W - shW) / 2,
                top: top + CARD_H - shH / 2 - 4,
                width: shW,
                height: shH,
                borderRadius: '50%',
                background: 'radial-gradient(ellipse at center, rgba(0,0,0,0.9) 0%, rgba(0,0,0,0.45) 42%, rgba(0,0,0,0) 72%)',
                transform: `scale(${shScale})`,
                opacity: shOpacity,
              }}
            />
            <Card
              w={CARD_W}
              h={CARD_H}
              seed={i + 2}
              style={{
                position: 'absolute',
                left: x,
                top,
                boxShadow: 'none',
                transform: `translateY(${y}px) scale(${s})`,
              }}
            />
          </React.Fragment>
        );
      })}
    </div>
  );
};
- Read the recipePrompt = when to use, intention, parameter table with typical values and how each one feels, known pitfalls. Treat values as calibrated starting points.
- Get the codetool: git
git clone https://github.com/Vincentwei1021/video-shotcraft && cd video-shotcraft && npm install - Register + rendertool: remotion
npx remotion render <CompositionId> out.mp4 # component: demos/ui-entrance/element-body-moves/AxialStretch.tsx, demos/ui-entrance/element-body-moves/ContactShadowLift.tsx - Or re-implementPort the timing/easing from the recipe to HTML + WAAPI (gimgs motion contract) or any engine; keep the same segment windows and easing.
| param | type | default | description |
|---|---|---|---|
| — | |||
Mais nesta categoria
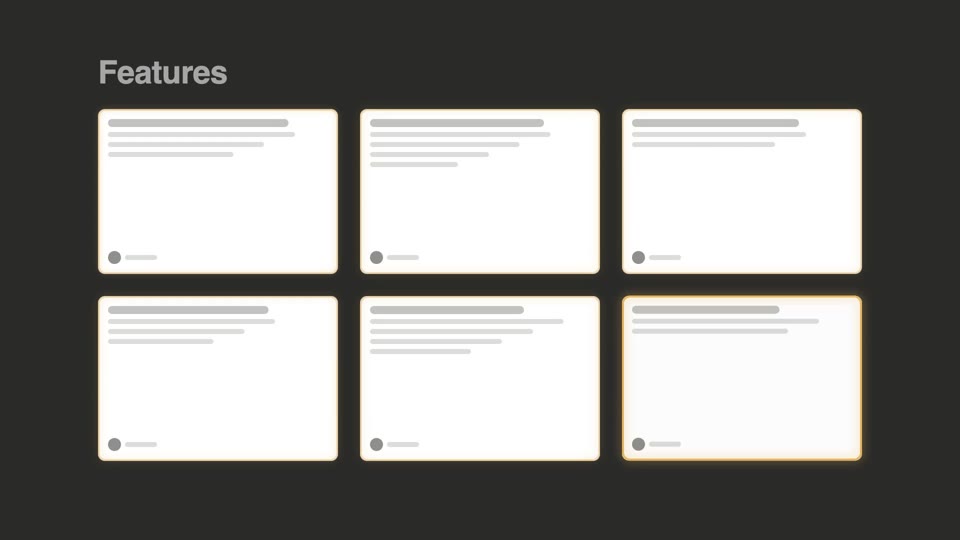
Wall reveal: three moves
Three whole-wall batch entrances — bento cell-by-cell light-up, grid wave flip, and blueprint draw-on; all reveal in place with no displacement, complementing the fly-in, displacement-type deck-deal-flyin.
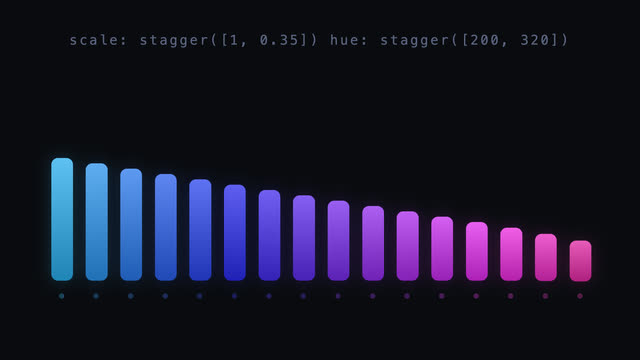
Value-stagger gradient bars
16 bars enter with delay as a time stagger, while height/hue/offset/blur each lay out as a value gradient from first to last; the second beat moves the stagger origin to center and re-lays the pulse peaking there.
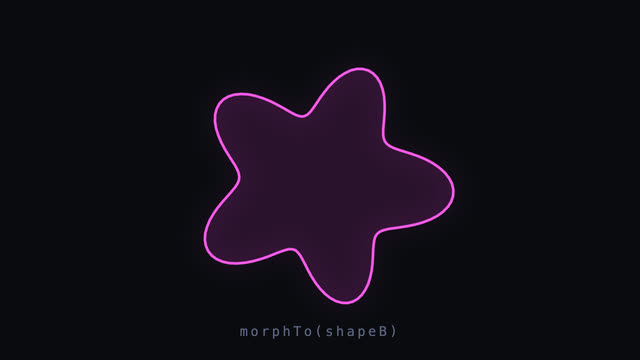
SVG shape morph loop
A 140-point closed outline morphs smoothly into another and back; both shapes are resampled to equal point counts in polar coordinates with per-point radius interpolation and inOutCubic, plus a light scale breathing, slow rotation, and hue drifting 185°→305° mid-morph.
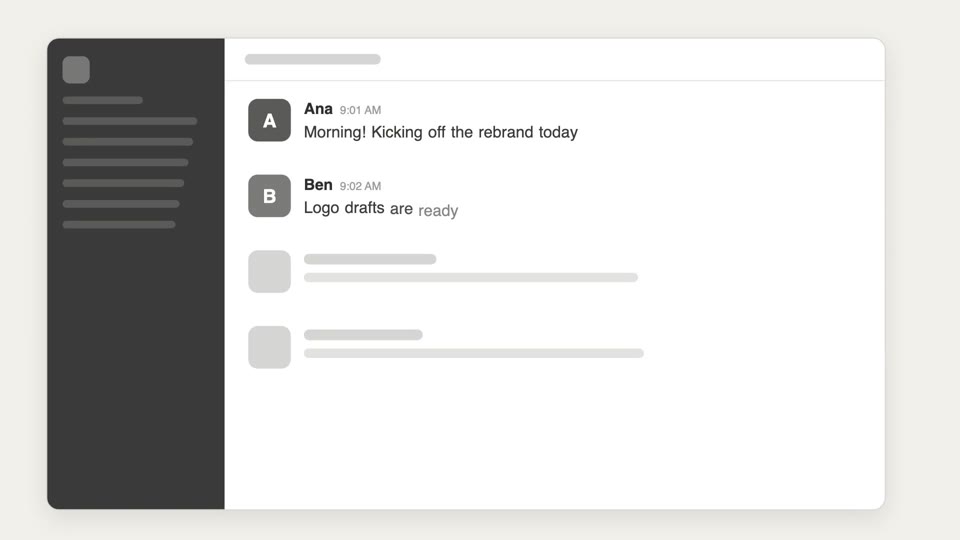
Skeleton reveal
Three-tier reveal from sketch to structure to content — hand-drawn doodles get swapped for skeleton bars, which resolve into real UI.