Motion · Luz & ênfase
Scanline annotate focus
A bright scan line sweeps down the page, framing each element it passes and labeling it with monospace annotations.
Fonte: video-shotcraft (Vincent Wei) ↗ · Apache-2.0 · Composição Remotion (React/TSX) — vídeo de prévia, sem player no navegador
When to use
An analysis shot for "AI is reading your page/brand"; a breakdown intro for design systems/brand guidelines; a self-explanatory capability section for a product
Intention
Make the abstract act of "analysis" into a visible causal chain: wherever the scan line reaches, that area gets framed and named. The viewer is reading "the machine's gaze," so the scan line must move at constant speed and each annotation must strictly lag behind the scan line's passage — scan first, then pop the frame — if the order ever gets scrambled it reads as a pre-choreographed animation instead.
Duration & energy
- Duration: About 4.6s (138f@30fps)
- Energy: Medium (mechanically calm, the rhythm driven by the scan line's constant speed, the annotations are the beats)
Shot recipe (original Chinese — timing, easing, parameter table, known pitfalls)
意图
把"分析"这件抽象事做成可见的因果链:扫描线走到哪,那块就被框住、被 命名。观众读的是"机器的视线",所以扫描线必须匀速、标注必须严格滞后于 扫描线过境——先扫到再弹框,顺序一旦错乱就变成了预先编排的动画。
动效核心
- 扫描线
t 0.06→0.66匀速(无缓动)从 y=−30 走到 300,
0.04→0.09 淡入、0.66→0.71 淡出
- 触发时刻由目标 bbox 反算:
ft = 0.06 + ((y+h+30)/330)*0.60,即扫描线
越过 bbox 下缘的那一刻;再按 y 排序钳制最小间隔 0.05 (ft = max(rawT, prev+0.05))避免两框同时弹
- 取景框由 4 个 9px L 角组成,
outBack驱动scale 1.75→1(0.13 内
走完,过冲后回稳),opacity 走 min(1, a*1.6) 抢先满亮
- 框内白色
fill层闪一下:0.07 峰值,ft+0.04→+0.09起、
+0.09→+0.22 落——像相机对焦成功的确认闪
- 标注
ft+0.05→+0.16 outCubic淡入 +translateY 4→0,
6.5px MONO、letter-spacing:1.5px、#b8bdc7
- 状态行实时数已触发的框(
fired)显示SCAN · 0n/06,
0.74→0.80 后切 ANALYSIS · COMPLETE 并转强调色
参数表
| 参数 | 典型值 | 调节手感 | |------|--------|----------| | 扫描线 | t 0.06→0.66 匀速,y −30→300 | 零缓动:加 ease 就读作"有人在拖进度条" | | 触发换算 | ft = 0.06 + ((y+h+30)/330)·0.60 | 分母 330 = 扫描行程;改扫描窗口必须同改,否则框在扫描线到达前就弹 | | 最小间隔 | prev + 0.05(≈1.5f) | 两个 y 接近的目标会同时弹;钳制后才逐个读得清 | | 取景框收拢 | scale 1.75→1,outBack,0.13 | 1.75 倍是"从外面收进来"的下限;1.2 倍看不出对准动作 | | 角标 | 臂长 9px、描边 1.5px | 臂长超过目标短边 1/3 就变成完整边框,丢掉"取景"语义 | | 对焦闪 | fill opacity 峰值 0.07 | 超过 0.15 就盖住内容,读作"选中高亮"而非对焦确认 | | 标注 | ft+0.05 起、0.11 走完、translateY 4→0 | 滞后 0.05 是"框稳了才命名"的因果;同时出现就乱 | | 计数行 | 按 fired 实时统计,7px MONO,2px 字距 | 写死时间轴的计数一改 bbox 就对不上;必须实时数 |
已知坑
- 扫描线触发时刻与目标 bbox 强绑定:换页面内容后 targets 的
x/y/w/h 与标注锚点 lx/ly 都要重测,否则框和内容错位
- bbox 是手动微调留边的(不是自动量元素),改页面模板不会自动跟随
- 标注用
white-space:nowrap+ 手写lx/ly,词变长会顶出画外;
右侧目标的标注要主动改成左置
- 与
scanline-assemble-flyin分工:那张是"扫到即装配"(页面从空到有),
本卡是"扫到即标注"(页面已存在,只做分析)
- ACCENT(
#9fb6e8)与A_RGB是同一个色的两种写法,换肤要同改两处
参考实现
demos/effects/scanline-annotate-focus/ (ScanlineAnnotateFocus.tsx)
Reference implementation (Remotion)
- demos/effects/scanline-annotate-focus/ScanlineAnnotateFocus.tsx — https://raw.githubusercontent.com/Vincentwei1021/video-shotcraft/main/demos/effects/scanline-annotate-focus/ScanlineAnnotateFocus.tsx
The component imports shared fixtures from demos/_fixtures and helpers from assets/lib in the repo; SKILL.md there documents the render workflow.
Tudo nesta página também é legível por máquina. Aponte seu agente para o JSON ou adicione o servidor MCP do gimgs e peça para buscar templates de motion.
- Baixe o JSON — contém a receita do plano (timing, easing, tabela de parâmetros, armadilhas) e o código TSX completo.
- Clone o repositório video-shotcraft; o componente importa fixtures de demos/_fixtures e helpers de assets/lib.
- Registre o componente como <Composition> em um projeto Remotion e renderize com `npx remotion render`, ou reimplemente a receita no seu próprio engine.
curl -s https://gimgs.net/motion/scanline-annotate-focus.jsongit clone https://github.com/Vincentwei1021/video-shotcraft
# component: demos/effects/scanline-annotate-focus/ScanlineAnnotateFocus.tsx
npx remotion render <CompositionId> out.mp4claude mcp add --transport http gimgs https://gimgs.net/mcp
# then: search_motion_templates / get_motion_template("scanline-annotate-focus")Prompt
Use the video-shotcraft shot recipe "Scanline annotate focus" (Remotion composition, Apache-2.0) published on gimgs.net.
Recipe JSON (prompt = timing/easing/parameter table/pitfalls, files = TSX source): https://gimgs.net/motion/scanline-annotate-focus.json
Raw TSX: https://gimgs.net/motion/scanline-annotate-focus/template.html
Repository: https://github.com/Vincentwei1021/video-shotcraft  (component: demos/effects/scanline-annotate-focus/ScanlineAnnotateFocus.tsx; imports demos/_fixtures and assets/lib)
Spec: 1920x1080, 30 fps, 5.1s

1. Read the JSON and follow its "prompt" section (when to use, intention, parameter table, known pitfalls).
2. Adapt it for: <describe what you want>.
3. Either clone the repo, register the component as a <Composition> in a Remotion project and run npx remotion render <CompositionId> out.mp4 — or re-implement the recipe in your own engine (HTML/WAAPI works: keep the same timing and easing).
// ===== demos/effects/scanline-annotate-focus/ScanlineAnnotateFocus.tsx =====
// scanline-annotate-focus — Scanline Annotate 扫描分析取景标注(motion-lab 定稿转原生 Remotion)
// 一条亮扫描线自上而下掠过页面,扫过之处按先后顺序弹出相机取景框:四角括号从约 1.75 倍
// 大小快速收拢对准目标区块(对准瞬间轻微过冲再回稳),随后旁侧打出等宽小字标注。
// 顶部状态行同步计数 00/06→06/06,扫完切换 ANALYSIS · COMPLETE。
// 页面内容为中性占位模板,标注词与强调色均可按项目替换。设计坐标 480×270(DesignStage 等比放大)。
import React from 'react';
import { DesignStage, E, lerp, seg, useT } from '../../_fixtures/Motion';

export const SCANLINE_ANNOTATE_FOCUS_DURATION = 138; // 4600ms @30fps

const MONO = "'SF Mono',Menlo,Consolas,monospace";
const SERIF = "Georgia,'Times New Roman',serif";
const ACCENT = '#9fb6e8'; // 模板强调色,可按项目替换
const A_RGB = '159,182,232';

/* ---- 分析目标(bbox 手动微调留边):ft=取景框触发时刻,按扫描顺序推导 ---- */
type Target = { x: number; y: number; w: number; h: number; label: string; lx: number; ly: number; ft: number };
const TARGETS: Target[] = (() => {
  const ts: Target[] = [
    { x: 18, y: 30, w: 108, h: 22, label: 'LOGO · MARK + WORDMARK', lx: 132, ly: 38, ft: 0 },
    { x: 292, y: 48, w: 170, h: 158, label: 'MODULE · KINETIC TYPE', lx: 292, ly: 36, ft: 0 },
    { x: 18, y: 58, w: 242, h: 78, label: 'H1 · SERIF DISPLAY', lx: 266, ly: 92, ft: 0 },
    { x: 18, y: 160, w: 136, h: 32, label: 'CTA · PRIMARY + GHOST', lx: 160, ly: 172, ft: 0 },
    { x: 14, y: 240, w: 224, h: 18, label: 'FOOTER · LEGAL', lx: 242, ly: 246, ft: 0 },
    { x: 348, y: 235, w: 116, h: 23, label: 'SOCIAL · BRAND VOICE', lx: 348, ly: 224, ft: 0 },
  ];
  // 触发时刻:扫描线(0.06→0.66 纵扫 -30→300)越过 bbox 下缘
  const rawT = (tg: Target) => 0.06 + ((tg.y + tg.h + 30) / 330) * 0.6;
  let prev = -1;
  for (const tg of [...ts].sort((a, b) => a.y + a.h - (b.y + b.h))) {
    tg.ft = Math.max(rawT(tg), prev + 0.05); // 依序钳制最小间隔
    prev = tg.ft;
  }
  return ts;
})();

// 取景框四角括号:每角朝外的两条边框
// 注意 boxSizing content-box:原采集页 9×9 内容 + 1.5px 外扩边框(外框 10.5),
// Remotion 模板全局 border-box 会把边框内收导致括号臂变短、右/下角内移。
const C_BORDER = '1.5px solid #f2f3f5';
const CORNERS: React.CSSProperties[] = [
  { left: 0, top: 0, borderTop: C_BORDER, borderLeft: C_BORDER },
  { right: 0, top: 0, borderTop: C_BORDER, borderRight: C_BORDER },
  { left: 0, bottom: 0, borderBottom: C_BORDER, borderLeft: C_BORDER },
  { right: 0, bottom: 0, borderBottom: C_BORDER, borderRight: C_BORDER },
];

export const ScanlineAnnotateFocus: React.FC = () => {
  const t = useT();

  // 扫描线纵扫 + 首尾淡入淡出
  const ly = lerp(seg(t, 0.06, 0.66), -30, 300);
  const lineOpacity = seg(t, 0.04, 0.09) * (1 - seg(t, 0.66, 0.71));

  // 已触发的取景框计数(a>0 即已弹出)
  const fired = TARGETS.reduce((acc, tg) => acc + (seg(t, tg.ft, tg.ft + 0.11, E.outCubic) > 0 ? 1 : 0), 0);
  const done = seg(t, 0.74, 0.8);

  return (
    <DesignStage bg="#0a0b0e">
      {/* ---- 中性占位页面(静态底) ---- */}
      <div style={{ position: 'absolute', inset: 0, background: 'linear-gradient(180deg,#101116,#0c0d11)' }}>
        {/* 顶栏(url pill + 状态)——对照原样片实测整体高 0.5px(亚像素基线取整差),
            分数 top 会被取整吞掉,改用 translateY 补偿(transform 不参与像素取整) */}
        <div style={{ position: 'absolute', left: 0, top: 0, width: 480, height: 30, transform: 'translateY(0.5px)' }}>
          <div style={{ position: 'absolute', left: 18, top: 11, padding: '3px 10px', border: '1px solid #2a2c33', borderRadius: 9, font: `500 7px ${MONO}`, color: '#8d93a0', letterSpacing: 1 }}>app.example.com</div>
          <div style={{ position: 'absolute', right: 18, top: 14, font: `500 7px ${MONO}`, color: '#565b66', letterSpacing: 1.5 }}>200 OK · TLS</div>
        </div>
        {/* logo:点阵 mark + 衬线字标 */}
        <div style={{ position: 'absolute', left: 24, top: 35, width: 100, height: 18 }}>
          {[0, 1, 2, 3].map((i) => (
            <div key={i} style={{ position: 'absolute', width: 4, height: 4, borderRadius: '50%', background: '#e8e9ee', left: (i % 2) * 6, top: 2 + (i >> 1) * 6 }} />
          ))}
          <div style={{ position: 'absolute', left: 17, top: 0, font: `400 13px ${SERIF}`, color: '#eceef2' }}>
            Acme <i>Studio</i>
          </div>
        </div>
        {/* H1 两行 + 注脚 */}
        <div style={{ position: 'absolute', left: 22, top: 64, width: 242, height: 84 }}>
          {/* 两行 29px 衬线对照原样片实测低 0.5px(行盒取整差),translateY 补偿(分数 top 会被取整吞掉) */}
          <div style={{ position: 'absolute', left: 0, top: 0, font: `400 29px ${SERIF}`, color: '#f2f3f6', letterSpacing: 0.3, transform: 'translateY(-0.5px)' }}>The headline for</div>
          <div style={{ position: 'absolute', left: 0, top: 36, font: `italic 400 29px ${SERIF}`, color: '#f2f3f6', letterSpacing: 0.3, transform: 'translateY(-0.5px)' }}>your product here</div>
          <div style={{ position: 'absolute', left: 1, top: 79, font: `500 6.5px ${MONO}`, color: '#565b66', letterSpacing: 1.5 }}>H1 · UI-SERIF / GEORGIA</div>
        </div>
        {/* CTA 行 */}
        <div style={{ position: 'absolute', left: 22, top: 166, width: 136, height: 26 }}>
          <div style={{ position: 'absolute', left: 0, top: 0, padding: '6px 13px', border: '1px solid #3a3d46', borderRadius: 12, font: `600 7.5px ${MONO}`, color: '#e8e9ee', letterSpacing: 1.5 }}>GET STARTED</div>
          <div style={{ position: 'absolute', left: 100, top: 7, font: `500 7.5px ${MONO}`, color: '#6a707c', letterSpacing: 1.5 }}>DOCS</div>
        </div>
        {/* 右侧模块卡(boxSizing content-box:原采集页边框外扩,内容盒保持 162×150) */}
        <div style={{ position: 'absolute', left: 296, top: 52, width: 162, height: 150, boxSizing: 'content-box', background: '#121319', border: '1px solid #23252d', borderRadius: 5 }}>
          <div style={{ position: 'absolute', left: 10, top: 9, font: `500 6.5px ${MONO}`, color: '#7c828e', letterSpacing: 1.5 }}>WORK</div>
          <div style={{ position: 'absolute', right: 10, top: 9, font: `500 6.5px ${MONO}`, color: '#565b66', letterSpacing: 1.5 }}>04 / 08</div>
          <div style={{ position: 'absolute', left: 0, top: 24, width: '100%', height: 1, background: '#1e2028' }} />
          <div style={{ position: 'absolute', left: 0, top: 44, width: '100%', textAlign: 'center', font: `italic 400 36px ${SERIF}`, color: '#f4f5f8' }}>sample</div>
          <div style={{ position: 'absolute', left: 0, top: 104, width: '100%', height: 1, background: '#1e2028' }} />
          <div style={{ position: 'absolute', left: 10, top: 112, font: `500 6px ${MONO}`, color: '#6a707c', letterSpacing: 1.5 }}>KINETIC TYPE · 04</div>
          {[0, 1, 2, 3].map((i) => (
            <div key={i} style={{ position: 'absolute', left: 10 + i * 30, top: 124, width: 24, height: 16, background: '#1a1c23', borderRadius: 2 }} />
          ))}
          <div style={{ position: 'absolute', right: 8, top: 129, font: `500 6px ${MONO}`, color: '#565b66' }}>00:30</div>
        </div>
        {/* 页脚 + 社交 chip */}
        <div style={{ position: 'absolute', left: 18, top: 243, width: 220, height: 14 }}>
          <div style={{ position: 'absolute', left: 0, top: 3, font: `500 6.5px ${MONO}`, color: '#4c515c', letterSpacing: 1.5 }}>A PRODUCT OF ACME · ACME LABS, INC.</div>
        </div>
        <div style={{ position: 'absolute', left: 352, top: 239, width: 108, height: 16 }}>
          {/* boxSizing content-box:原采集页 11×11 内容 + 1px 外扩边框 */}
          <div style={{ position: 'absolute', left: 0, top: 2, width: 11, height: 11, boxSizing: 'content-box', border: '1px solid #3a3d46', borderRadius: 2, font: `600 7px ${MONO}`, color: '#c9cdd6', textAlign: 'center', lineHeight: '11px' }}>x</div>
          <div style={{ position: 'absolute', left: 17, top: 3, font: `600 7.5px ${MONO}`, color: '#c9cdd6', letterSpacing: 1.5 }}>@USERNAME</div>
        </div>
      </div>

      {/* ---- 取景框 + 标注(按扫描顺序触发) ---- */}
      {TARGETS.map((tg, i) => {
        const a = seg(t, tg.ft, tg.ft + 0.11, E.outCubic); // 弹出进度
        const s = lerp(E.outBack(seg(t, tg.ft, tg.ft + 0.13)), 1.75, 1); // 1.75 倍收拢 + 过冲回稳
        const fillO = 0.07 * seg(t, tg.ft + 0.04, tg.ft + 0.09) * (1 - seg(t, tg.ft + 0.09, tg.ft + 0.22)); // 对准瞬间白色微闪
        const la = seg(t, tg.ft + 0.05, tg.ft + 0.16, E.outCubic); // 标注淡入上移
        return (
          <React.Fragment key={i}>
            <div
              style={{
                position: 'absolute',
                left: tg.x,
                top: tg.y,
                width: tg.w,
                height: tg.h,
                opacity: Math.min(1, a * 1.6),
                transform: `scale(${a > 0 ? s : 1.75})`,
              }}
            >
              {CORNERS.map((c, k) => (
                <div key={k} style={{ position: 'absolute', width: 9, height: 9, boxSizing: 'content-box', ...c }} />
              ))}
              <div style={{ position: 'absolute', inset: 1, background: '#fff', opacity: fillO }} />
            </div>
            <div
              style={{
                position: 'absolute',
                left: tg.lx,
                top: tg.ly,
                font: `500 6.5px ${MONO}`,
                color: '#b8bdc7',
                letterSpacing: 1.5,
                whiteSpace: 'nowrap',
                opacity: la,
                transform: `translateY(${lerp(la, 4, 0)}px)`,
              }}
            >
              {tg.label}
            </div>
          </React.Fragment>
        );
      })}

      {/* ---- 扫描线(渐变拖尾 + 亮芯) ---- */}
      <div
        style={{
          position: 'absolute',
          left: 0,
          top: 0,
          width: '100%',
          height: 40,
          background: `linear-gradient(180deg,transparent,rgba(${A_RGB},.07) 55%,rgba(${A_RGB},.02) 96%,transparent)`,
          transform: `translateY(${ly - 40}px)`,
          opacity: lineOpacity,
        }}
      >
        <div
          style={{
            position: 'absolute',
            bottom: 0,
            left: 0,
            width: '100%',
            height: 1.5,
            background: 'rgba(238,244,255,.9)',
            boxShadow: `0 0 7px ${ACCENT},0 0 18px rgba(${A_RGB},.35)`,
          }}
        />
      </div>

      {/* ---- 顶部状态行:SCAN 计数 → ANALYSIS · COMPLETE ---- */}
      <div
        style={{
          position: 'absolute',
          left: '50%',
          top: 14,
          transform: 'translateX(-50%)',
          font: `600 7px ${MONO}`,
          letterSpacing: 2,
          color: done >= 1 ? ACCENT : '#8d93a0',
          opacity: seg(t, 0.03, 0.08),
        }}
      >
        {done >= 1 ? 'ANALYSIS · COMPLETE' : `SCAN · 0${fired}/0${TARGETS.length}`}
      </div>
    </DesignStage>
  );
};
- Read the recipePrompt = when to use, intention, parameter table with typical values and how each one feels, known pitfalls. Treat values as calibrated starting points.
- Get the codetool: git
git clone https://github.com/Vincentwei1021/video-shotcraft && cd video-shotcraft && npm install - Register + rendertool: remotion
npx remotion render <CompositionId> out.mp4 # component: demos/effects/scanline-annotate-focus/ScanlineAnnotateFocus.tsx - Or re-implementPort the timing/easing from the recipe to HTML + WAAPI (gimgs motion contract) or any engine; keep the same segment windows and easing.
| param | type | default | description |
|---|---|---|---|
| — | |||
Mais nesta categoria
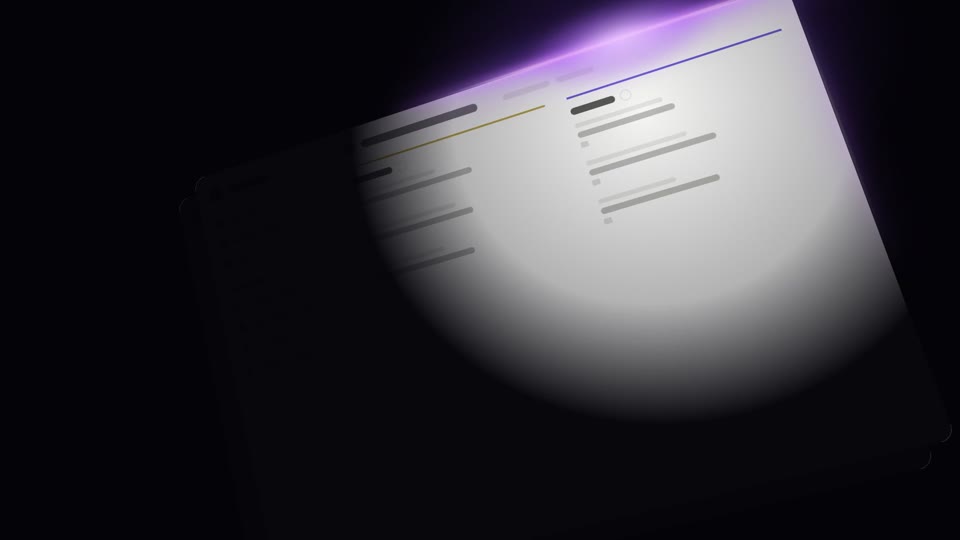
Dark-stage spotlight reveals
Three dark-stage spotlight reveals — A wake-sleep sweep (light in = bright, light out = dark), B edge-hugging glow pan (violet light seeps along UI edges + steady rightward sweep), C corner reveal (radial light expands steadily from a corner to light the whole screen); light itself narrates in the dark.
Slam entrance moves
Three high-energy slam entrances: a whip-in perspective stop, a heavy KPI drop, and a shockwave that hits neighboring cards.
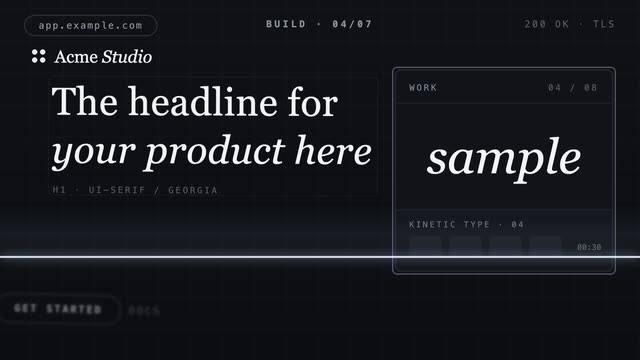
Scanline assemble fly-in
A scan line sweeps down an empty grid, flying each region's component in from off-screen — finishing as the scan ends.
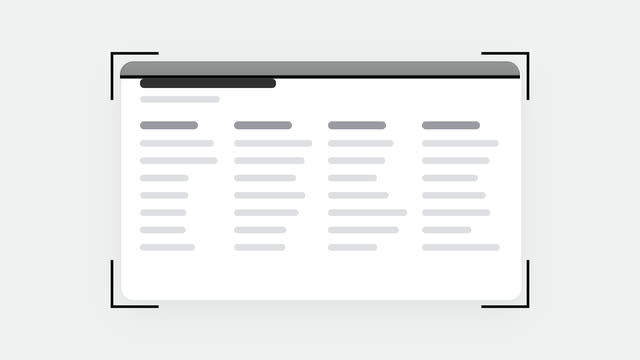
Scan bracket sweep
A skeleton document pops in, viewfinder brackets frame it, and a scan line sweeps it 5 times while it stays completely still.